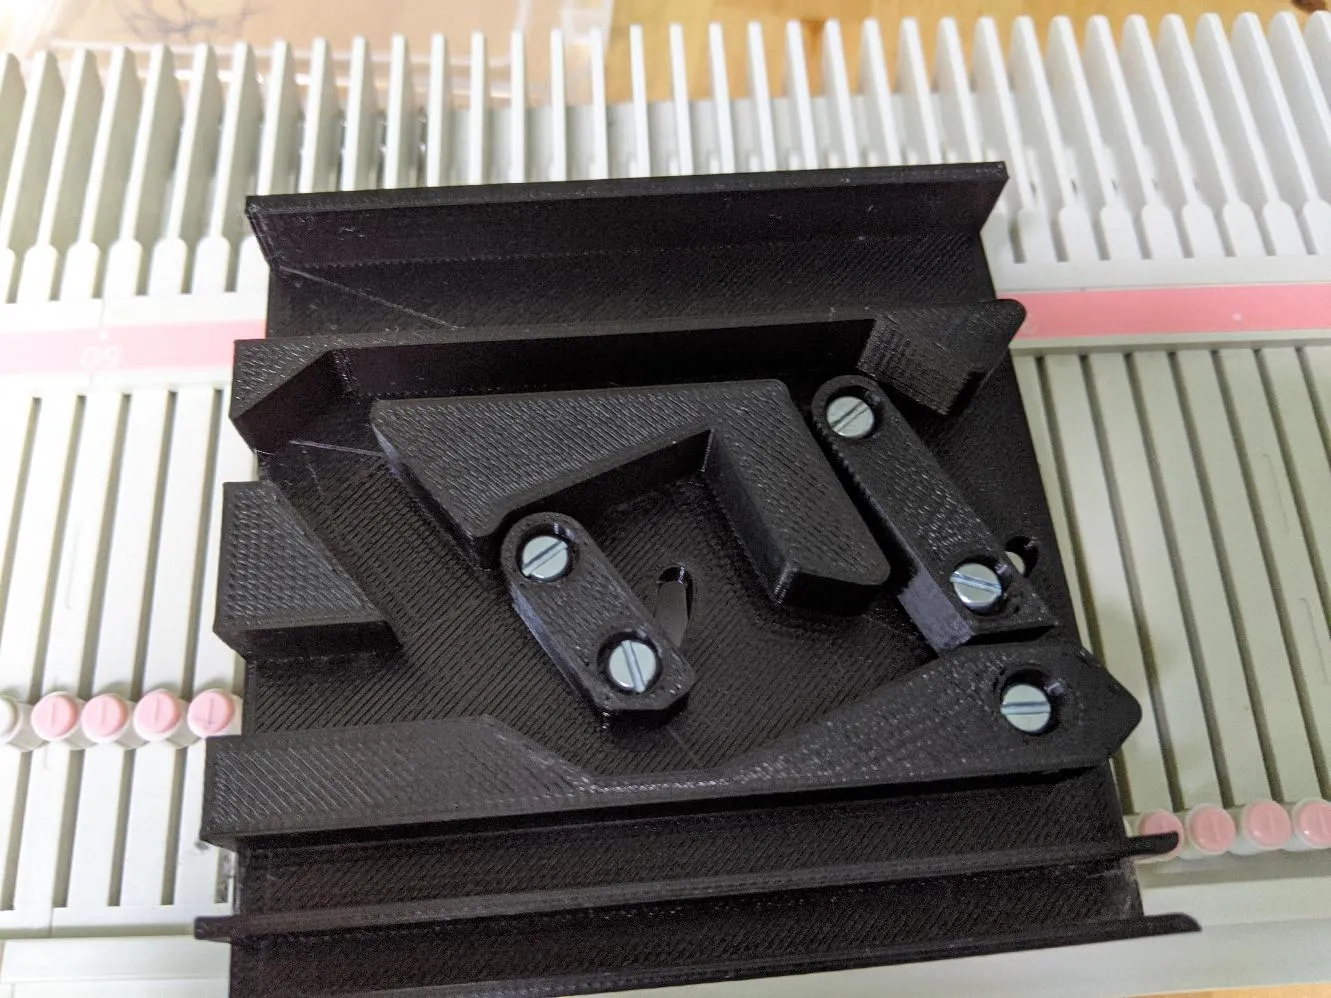
I decided it was time to try out the prototype design! I printed half of the needle movement model to save on time and materials. As a result you need to move the carriage in both directions to see the full needle movement.
I also adjusted the design slightly, adding in some fillets to round off all the pointy edges so things move more easily. I also removed some of the fine points since that sort of thing doesn’t do so well when 3d printed/hit with a zillion knitting needles: keep things (slightly) chunky!
Assembling it and testing it show it’s not quite right: very close though!

Specifically, the “flapper” doesn’t always return to position properly, and the thing jams a bit when routing the needles during the return pass.
If we have a look at the model, we can see why this is the case:
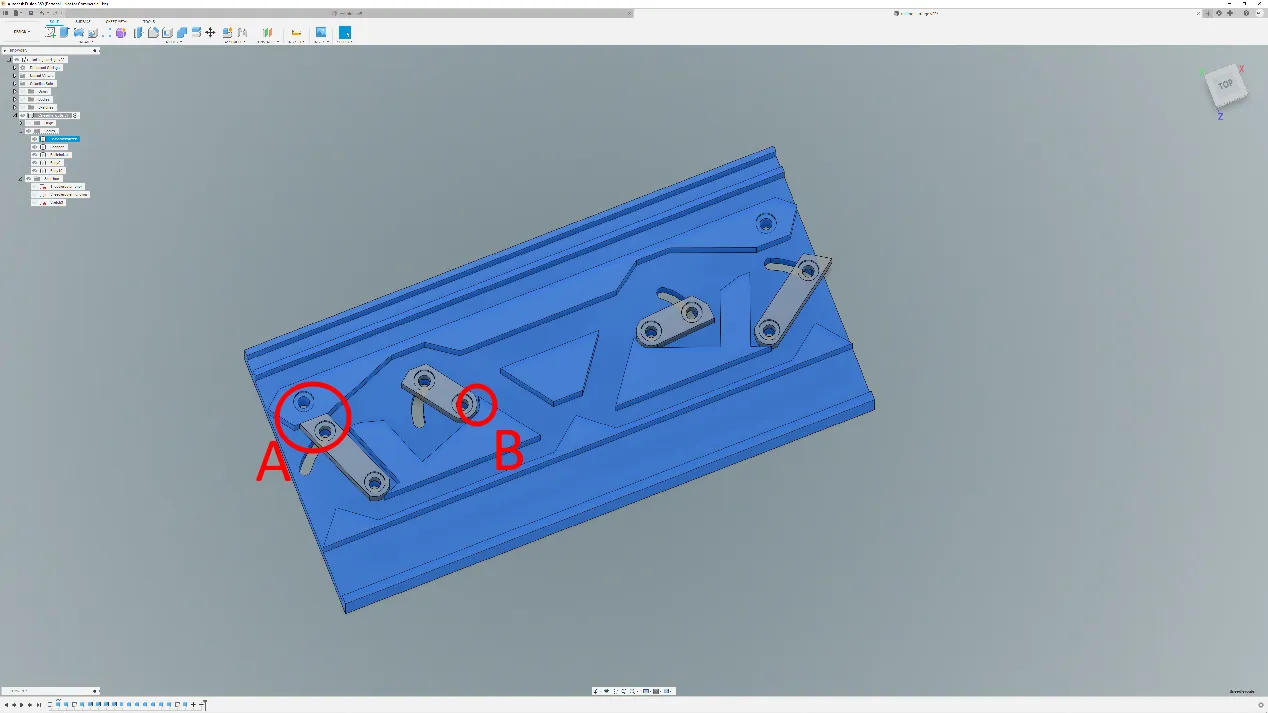
- A. The flapper is meant to be pulled back into the position above by a spring between two bolts through the circled holes. However, I’ve put it in a really silly position: it should be in line with the “slot” it slides along. As a result, its a bit wobbly and jams sometimes. Solution: move it to a better position (I’ll also try and make it a bit more stable).
- B. I’ve left a small indent in the path the needles take, and they tend to get stuck in there. This is the reason the “return pass” in my video jams. Solution: reposition things to eliminate this indent. (I’ve already tested this hypothesis with a piece of sticky tape over the gap, and its a lot better).
So, all in all, this is pretty good actually! The main needle routing worked, and bits that didn’t are in the fiddly moving parts which I expected to be fiddly.
Leave a comment
Comments are moderated, so yours won't appear immediately. Your email is never published.