If I’m going to do woodwork, it made sense to install a woodworking vice. I did some research, and found you could buy relatively cheap vices of modern manufacture, which, or you could try and buy an older vice from ebay, which are apparently “better”.
I tried bidding on a few, but I was frankly outbid every time, even on really rusty pieces needing a lot of restoration.
Meh: I want to make things, not faff around with expensive antique vices. Enough indecision: I ordered one of these:

Cheap, relatively easy to install, and not too many parts to go wrong.
Phase 1: Install the vice body
First things first though, the - ah - “turny bit” at the front was secured to the threaded rod by an expanding pin. I knocked that out so I could take the vice completely to bits during installation.
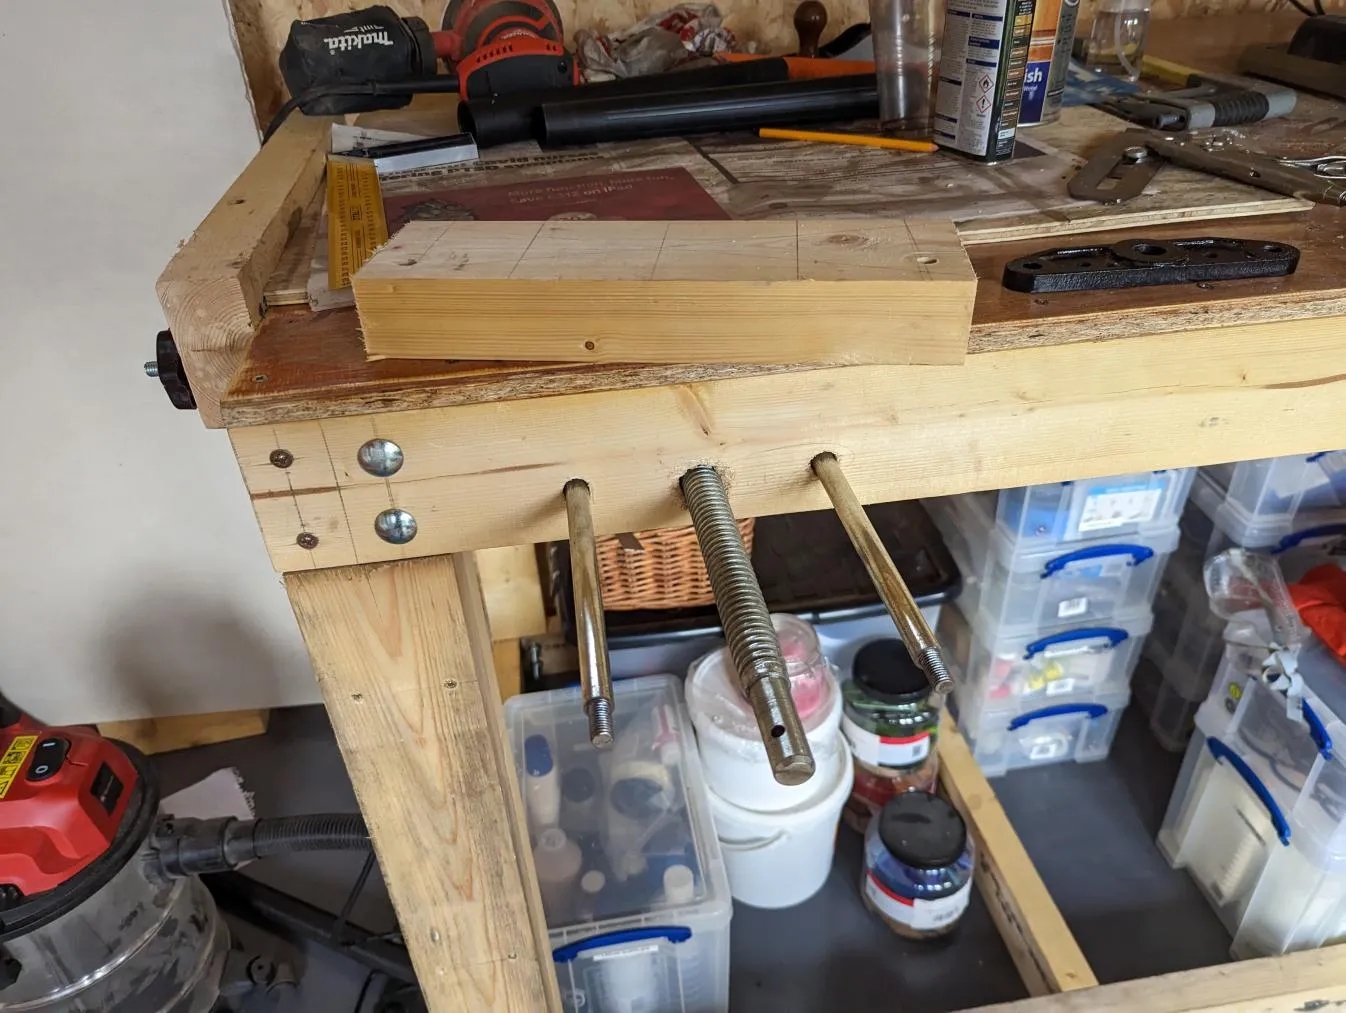
There’s a threaded rod and two “guide bars” needing brought through the bench.
I decided:
-
I’d install a new plank into my workbench to hold the vice
-
I’d drill holes through the front of the bench to route the various rods through.
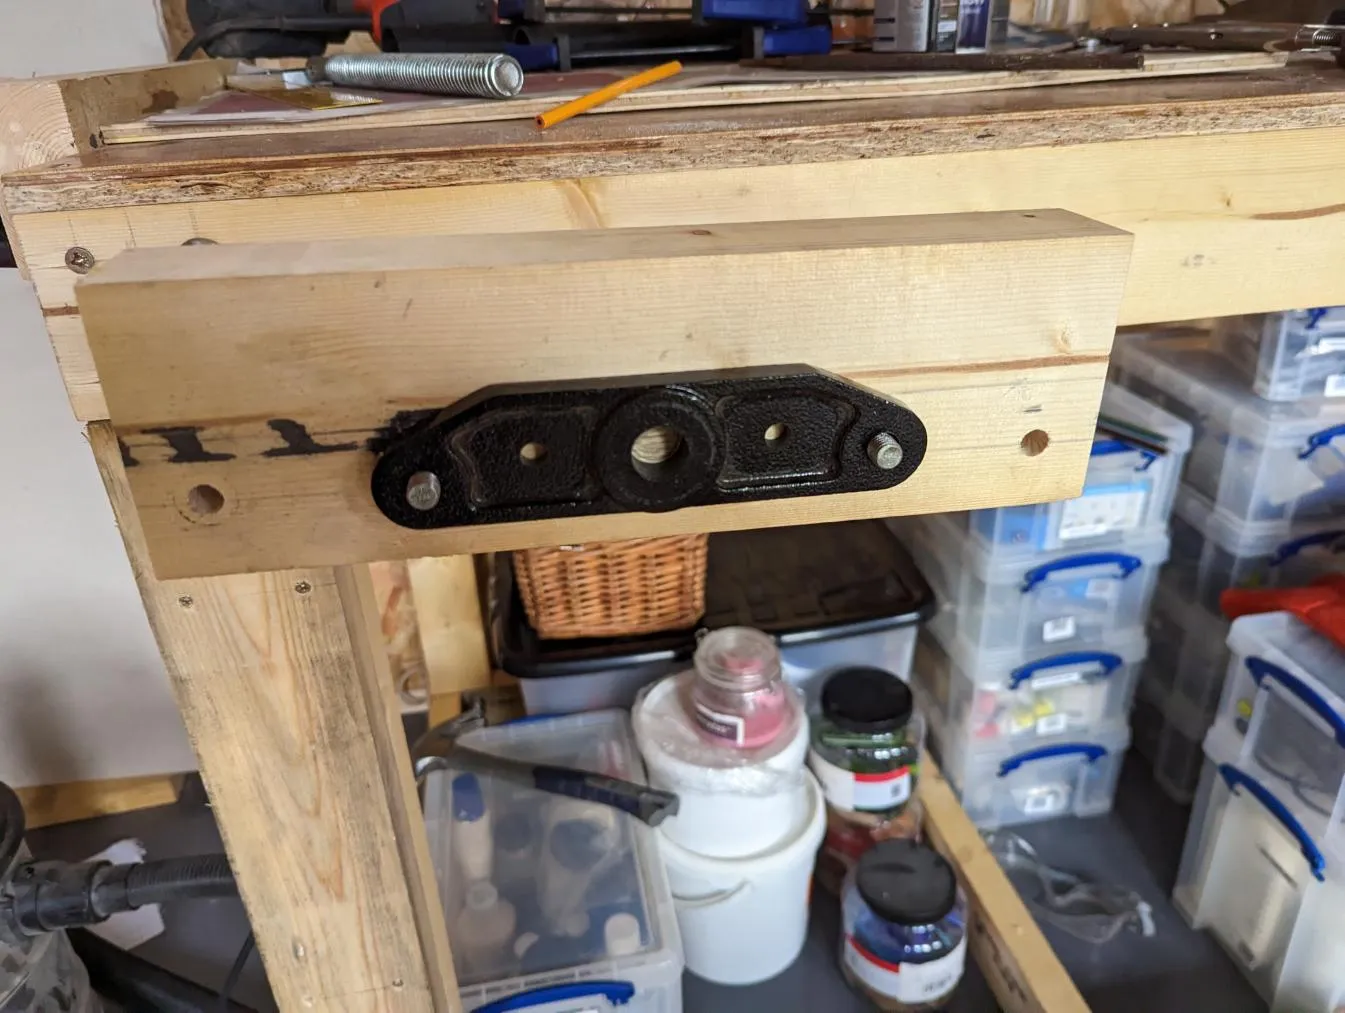
So, preparing the plank: I measured and cut it to size and drilled holes to bolt the vice body to it:

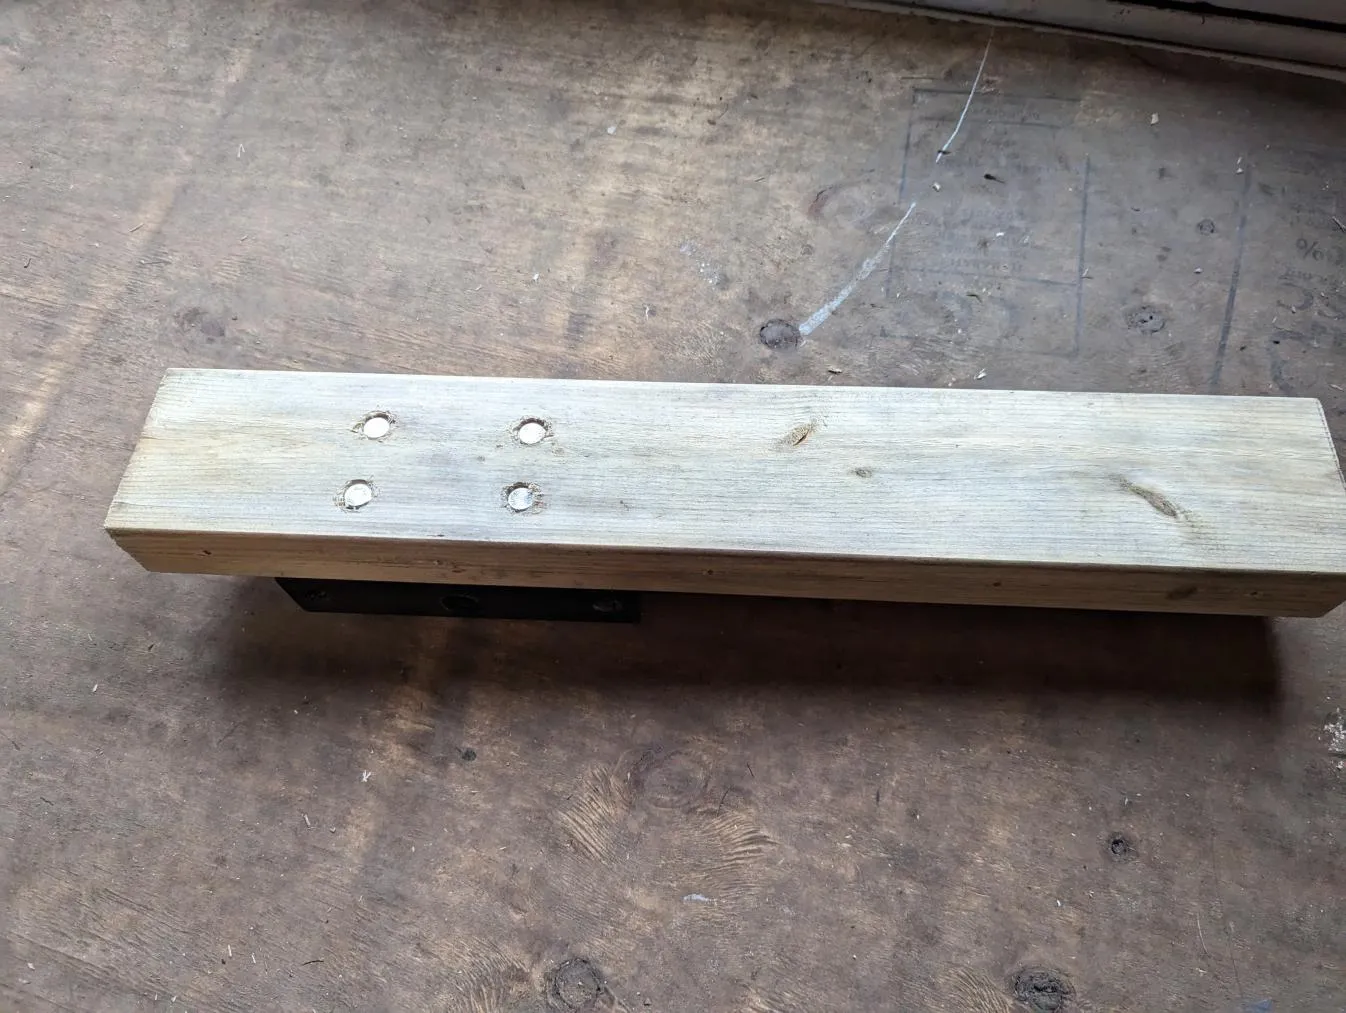
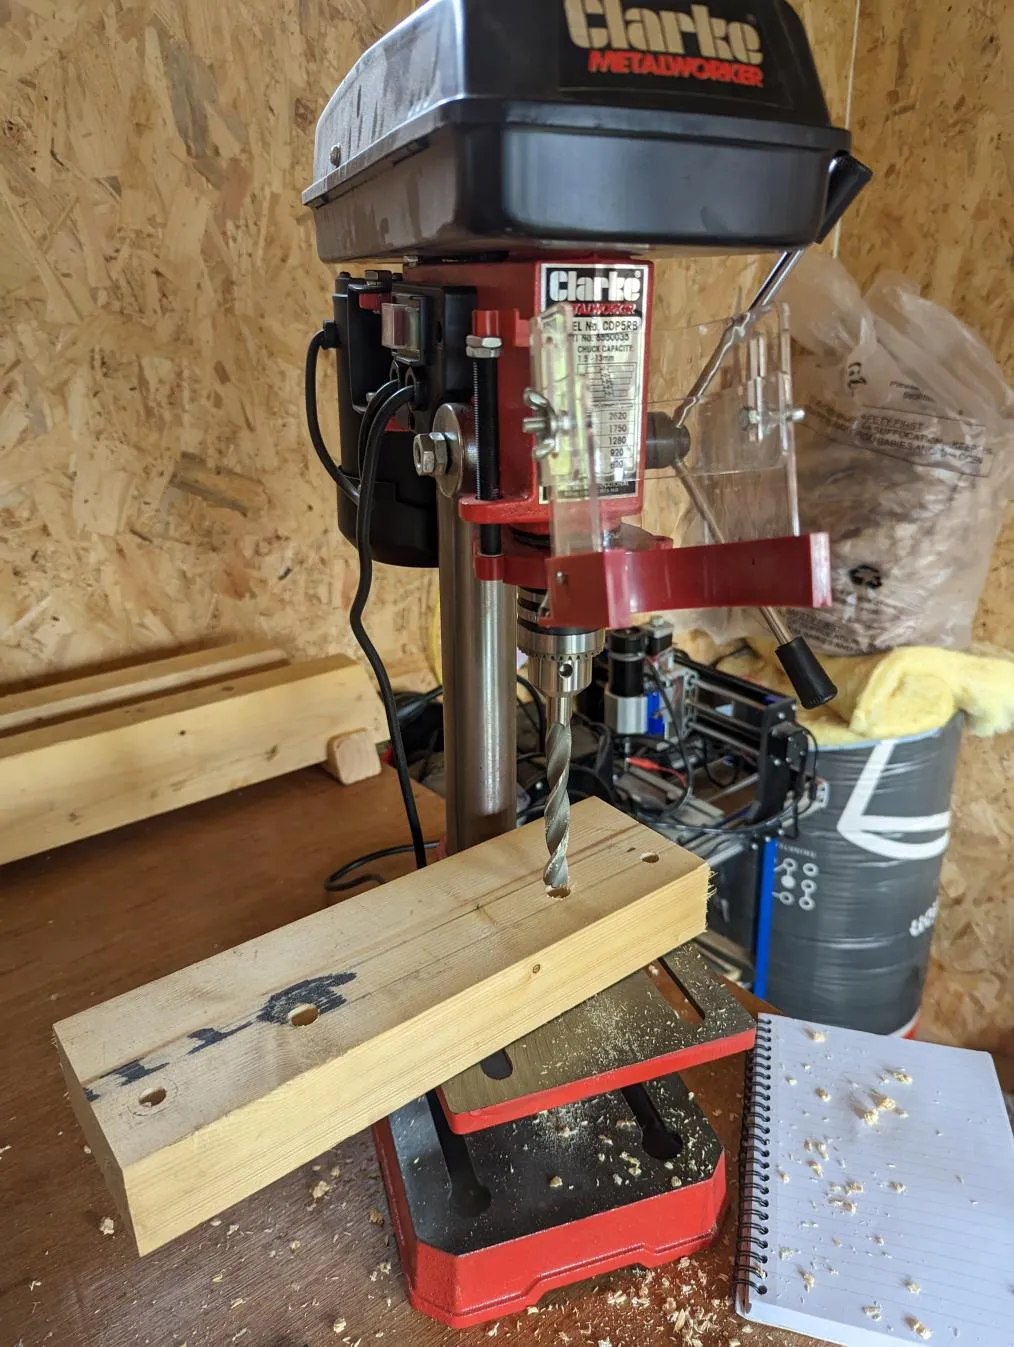
I didn’t have any screws long enough to go through my new plank AND into the bench, so I drilled five deep vertical countersunk holes through the body of the new plank with my drill press (you can just see them on the left picture above). Then I drilled smaller holes from the other side for the screw shaft: rather shockingly, they met up ok!
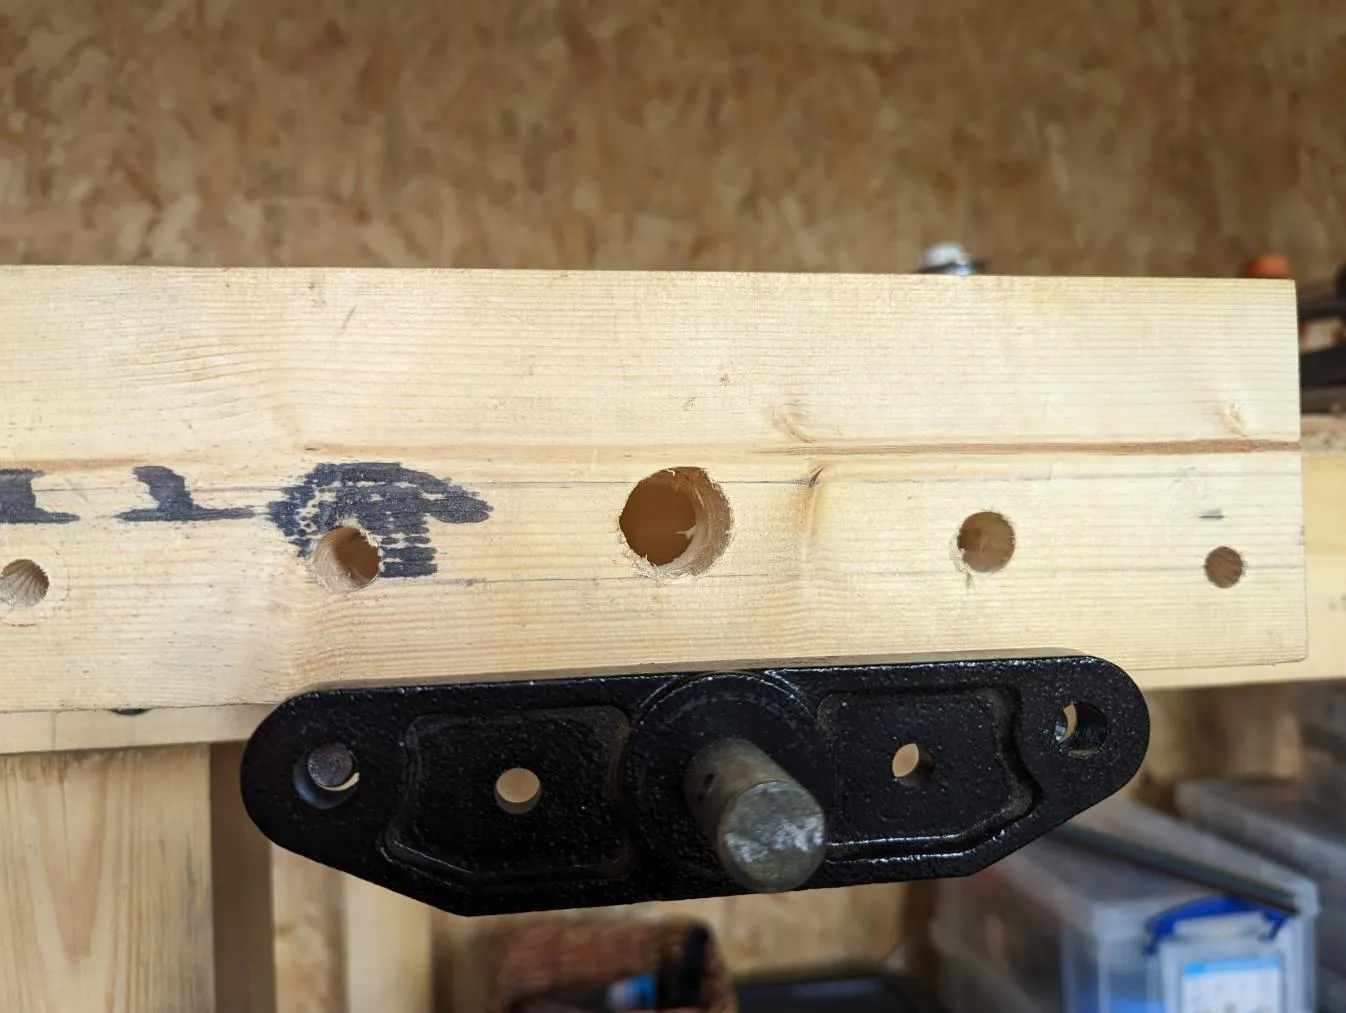
Then I crawled under the desk, clamped it in position, and used a drill + tapping it with a hammer to mark the places for the two support rods:
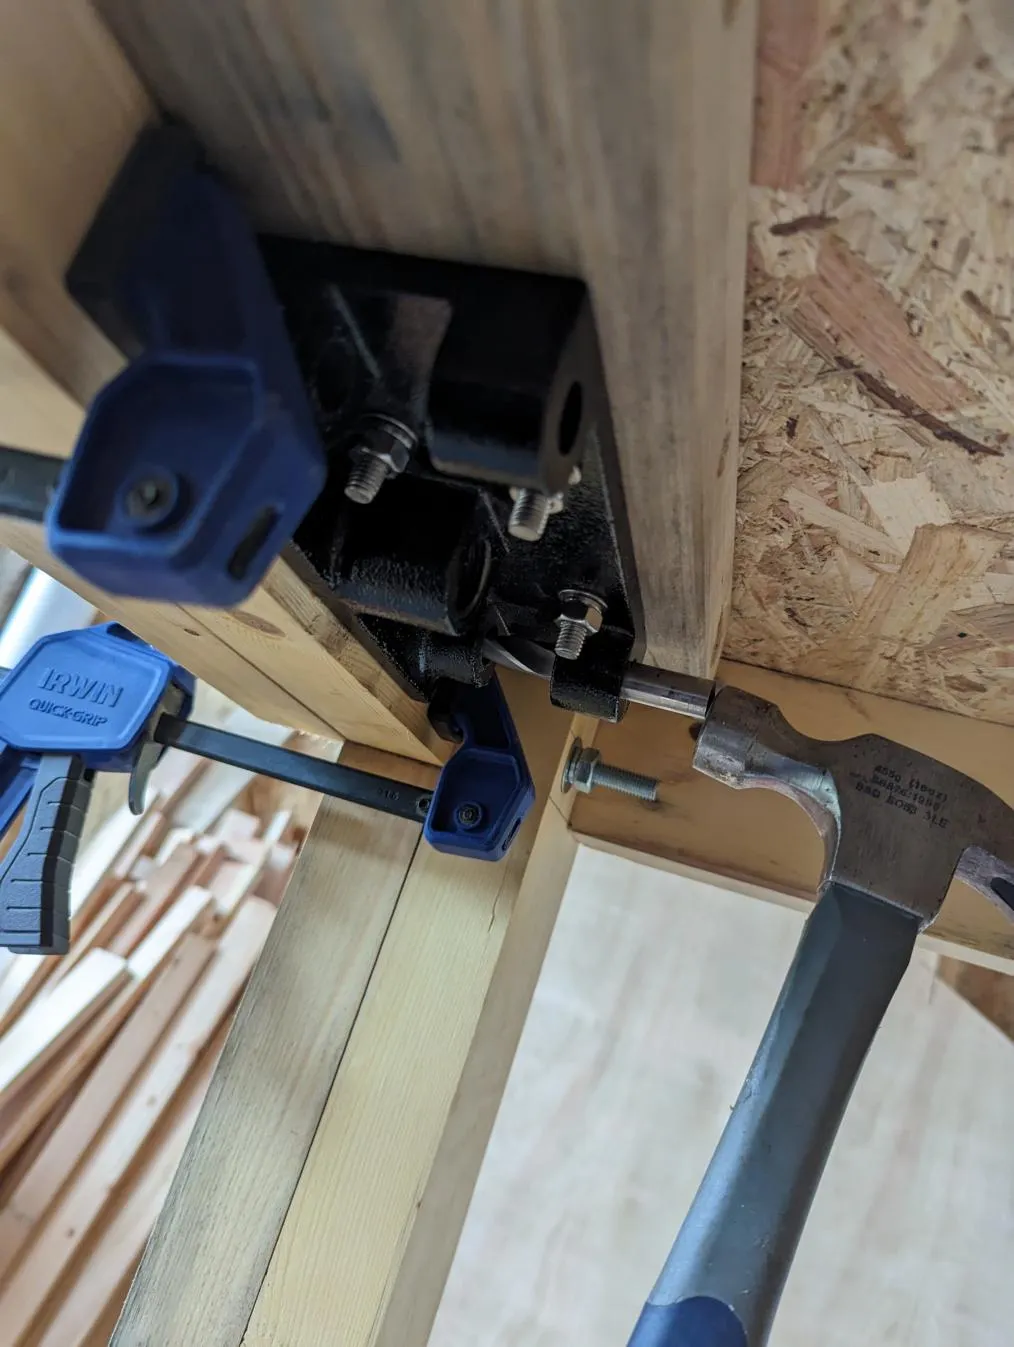
With some trepidation I drilled the holes through the bench. The larger hole for the screw thread was a bit more fiddly/ragged, but I still managed it in the end.
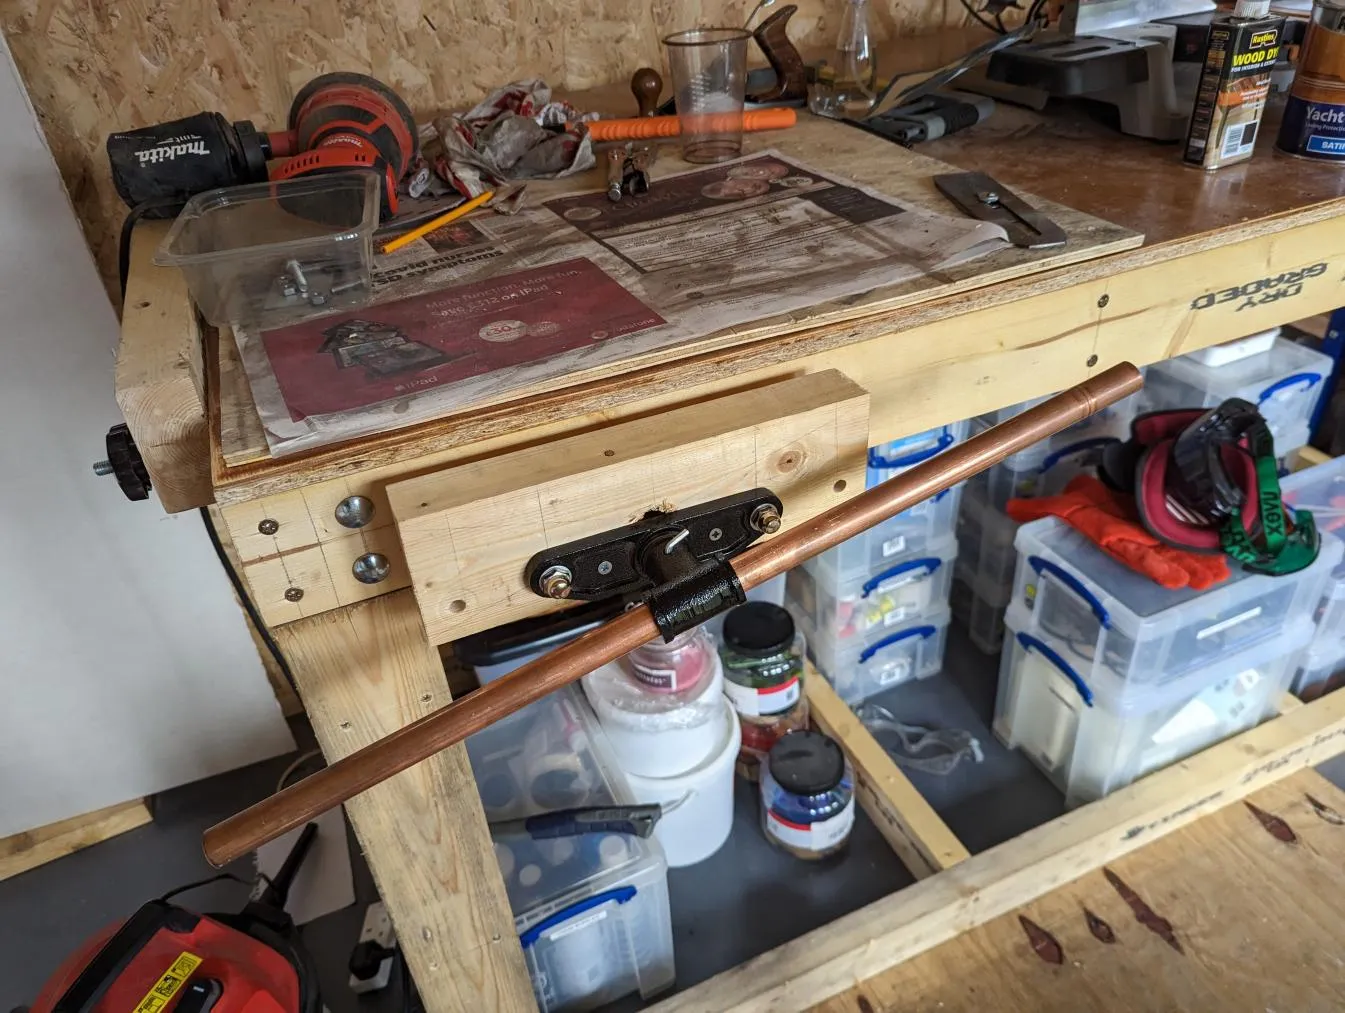
Once that was done, I screwed the new plank in position and tested it:
Kinda surprisingly (to me anyway), it fitted really well!
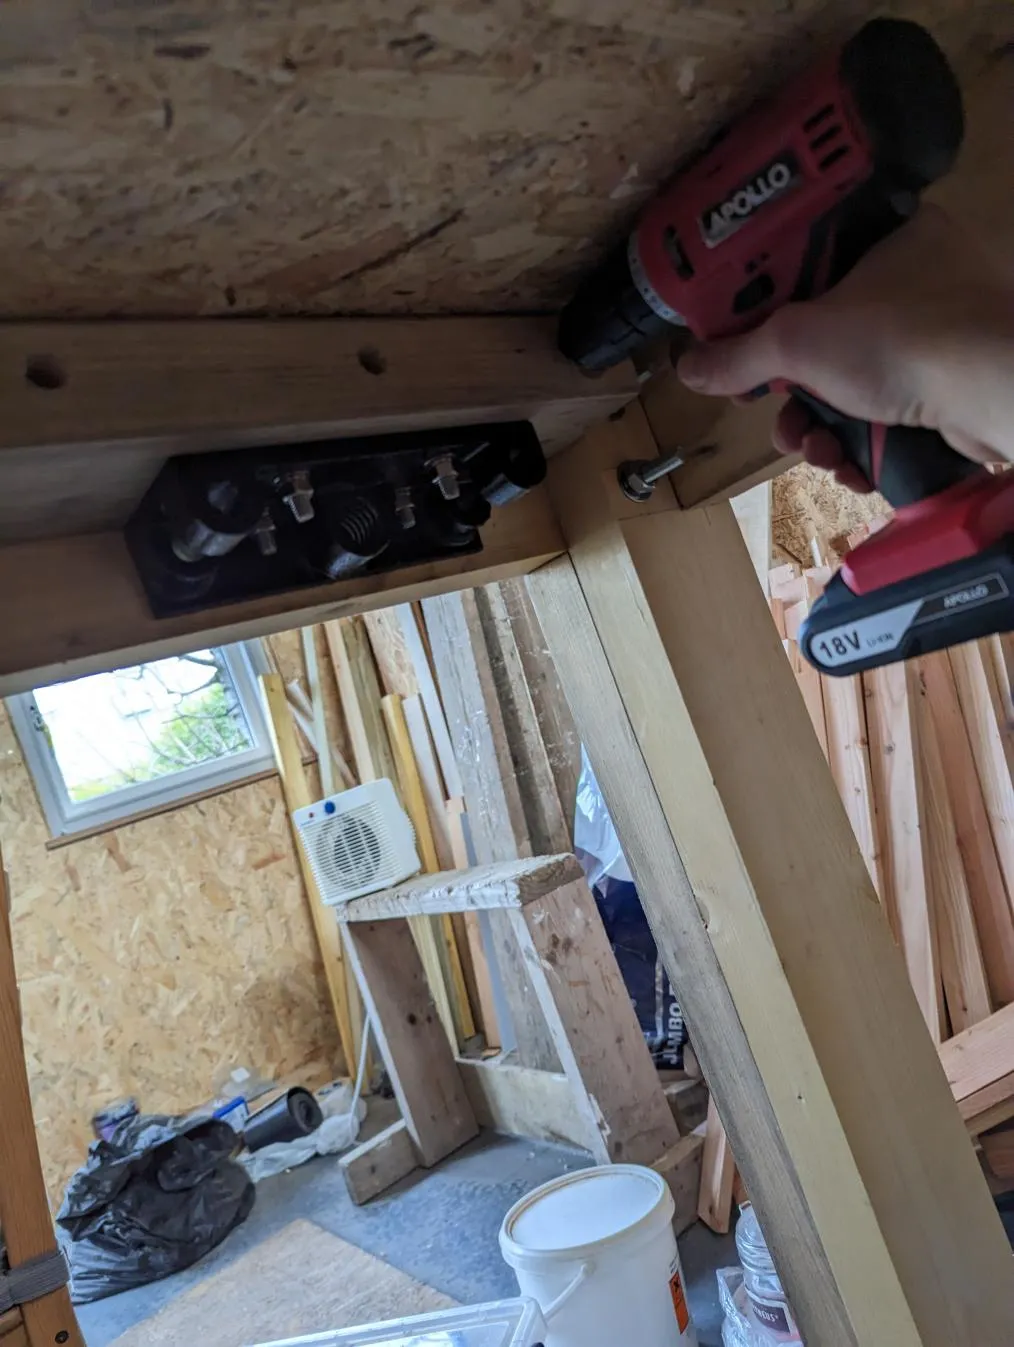
I was so tired by now so I just attached the faceplate to test and left it to continue on the next day:
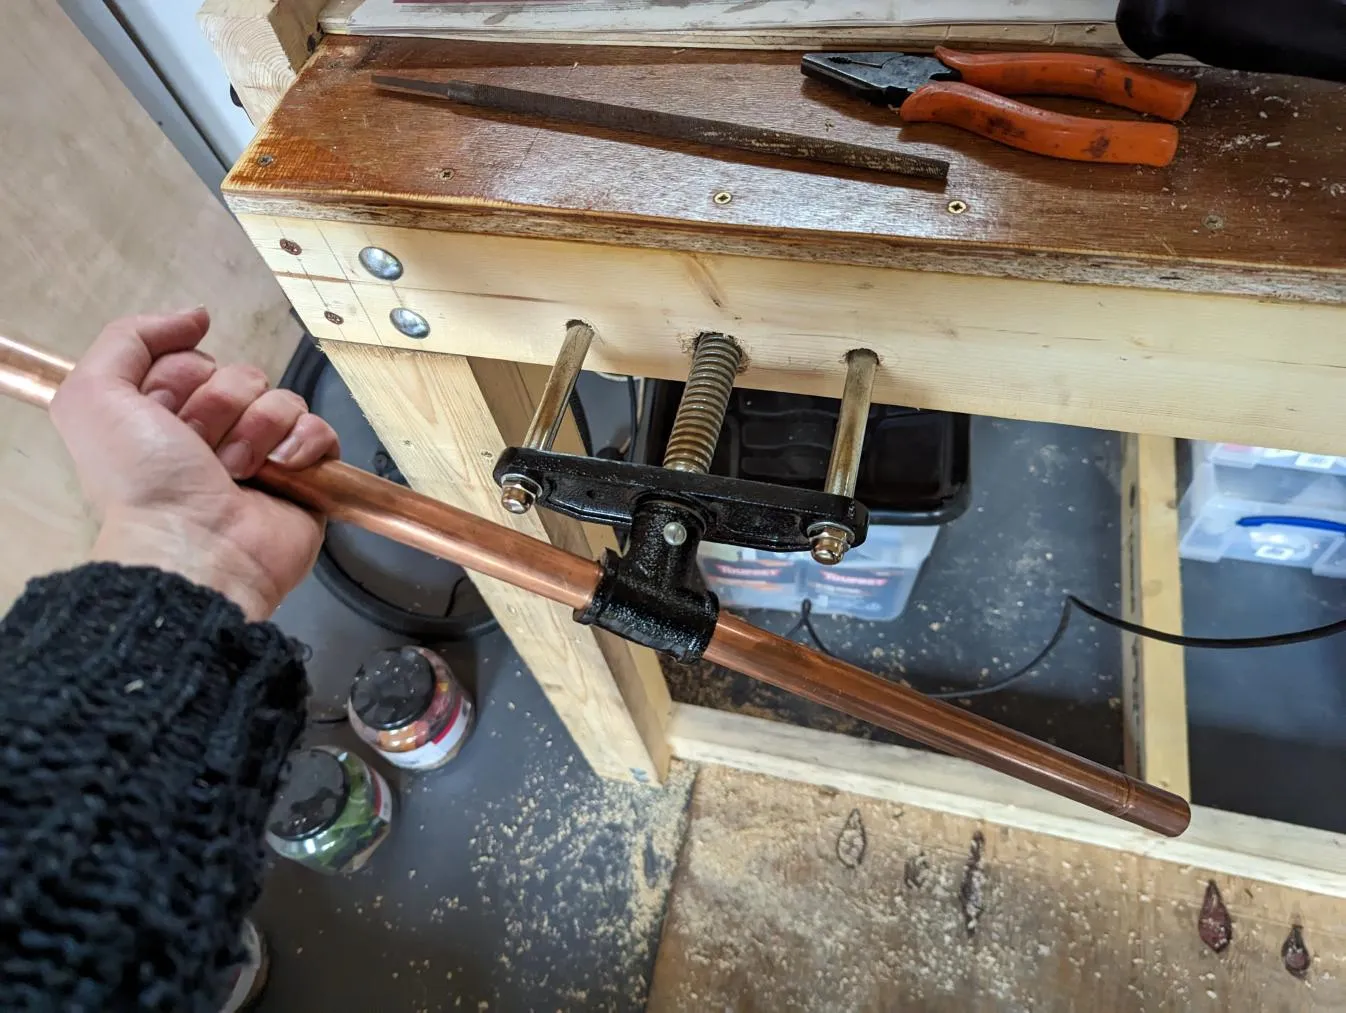
Also, the copper tube I’ve had lying around for years fitted it perfectly! Not sure if I’ll keep using that, but it’ll do for now.
Phase 2: Jaw 2
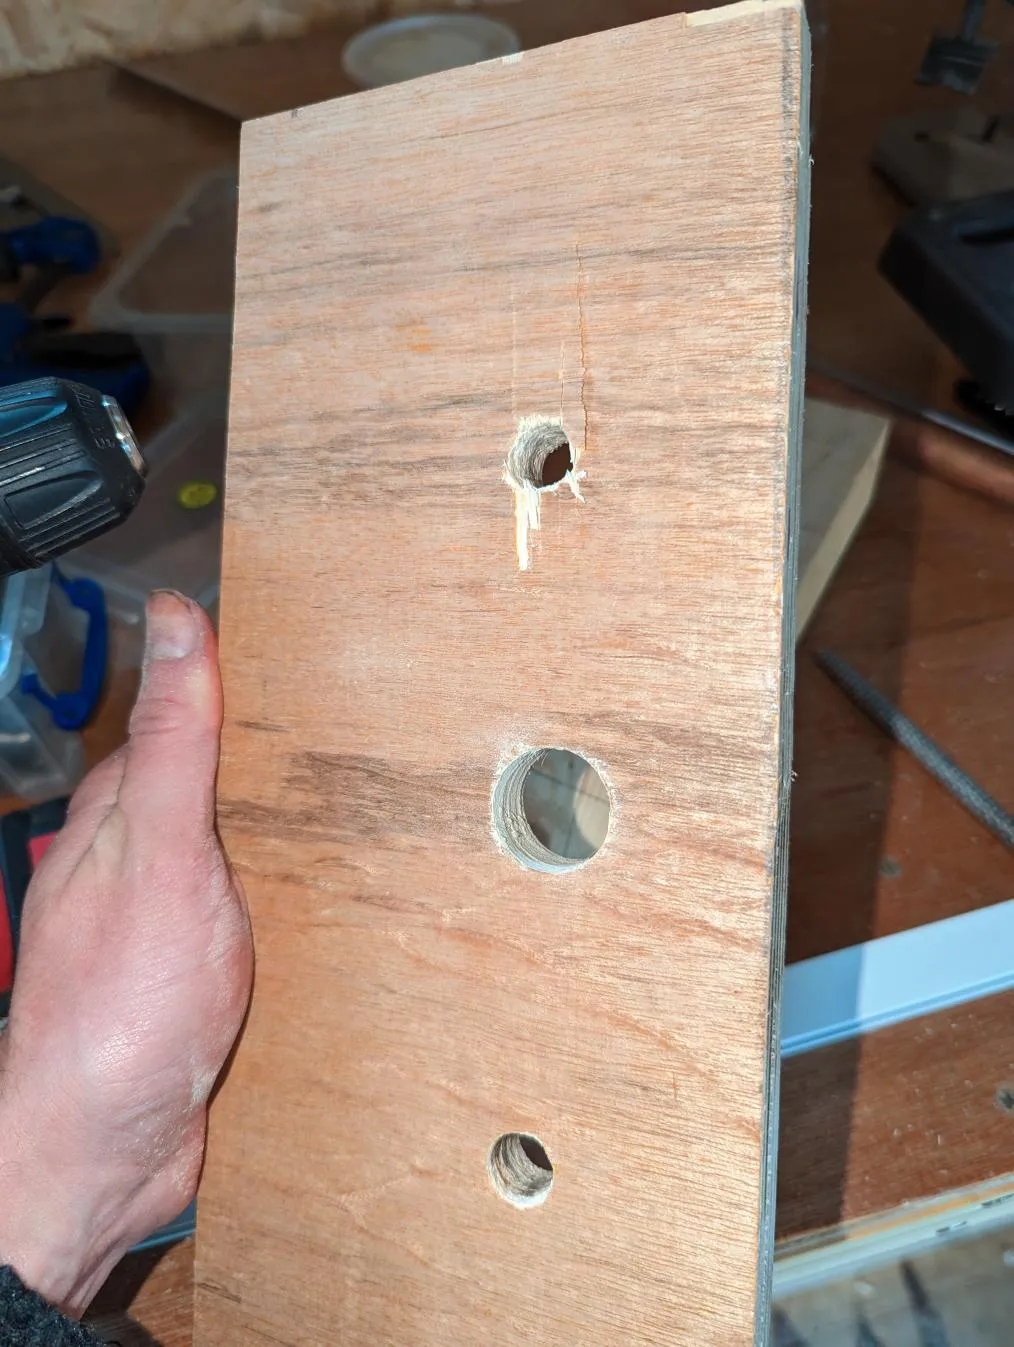
I wanted to use yet another stray block of wood as the missing jaw. I was able to clamp the new block to the workbench and use the “tap a drill bit with a hammer” method again to locate the holes for the two guide bars. I then drilled them with the drill press.
That worked pretty well! So I was able to mount the jaw, put the faceplate on, and mark the hole for the threaded rod and drill it! Or was I? Foreshadowing…
Dammit!
So I then had to drill the hole with the thing the right way round in a plank which already had a hole drilled in it. That is really not very fun as the drill bit naturally deflects into the easiest (ie pre-drilled by a numpty) path.
Much cursing later, I eventually got it done. The faceplate covers most of the mess, but you can see top of the nice neat hole drilled in the wrong place in the following picture. I also screwed the faceplate into the wooden jaws (making sure the screws were short enough not to poke out through the other side though!)

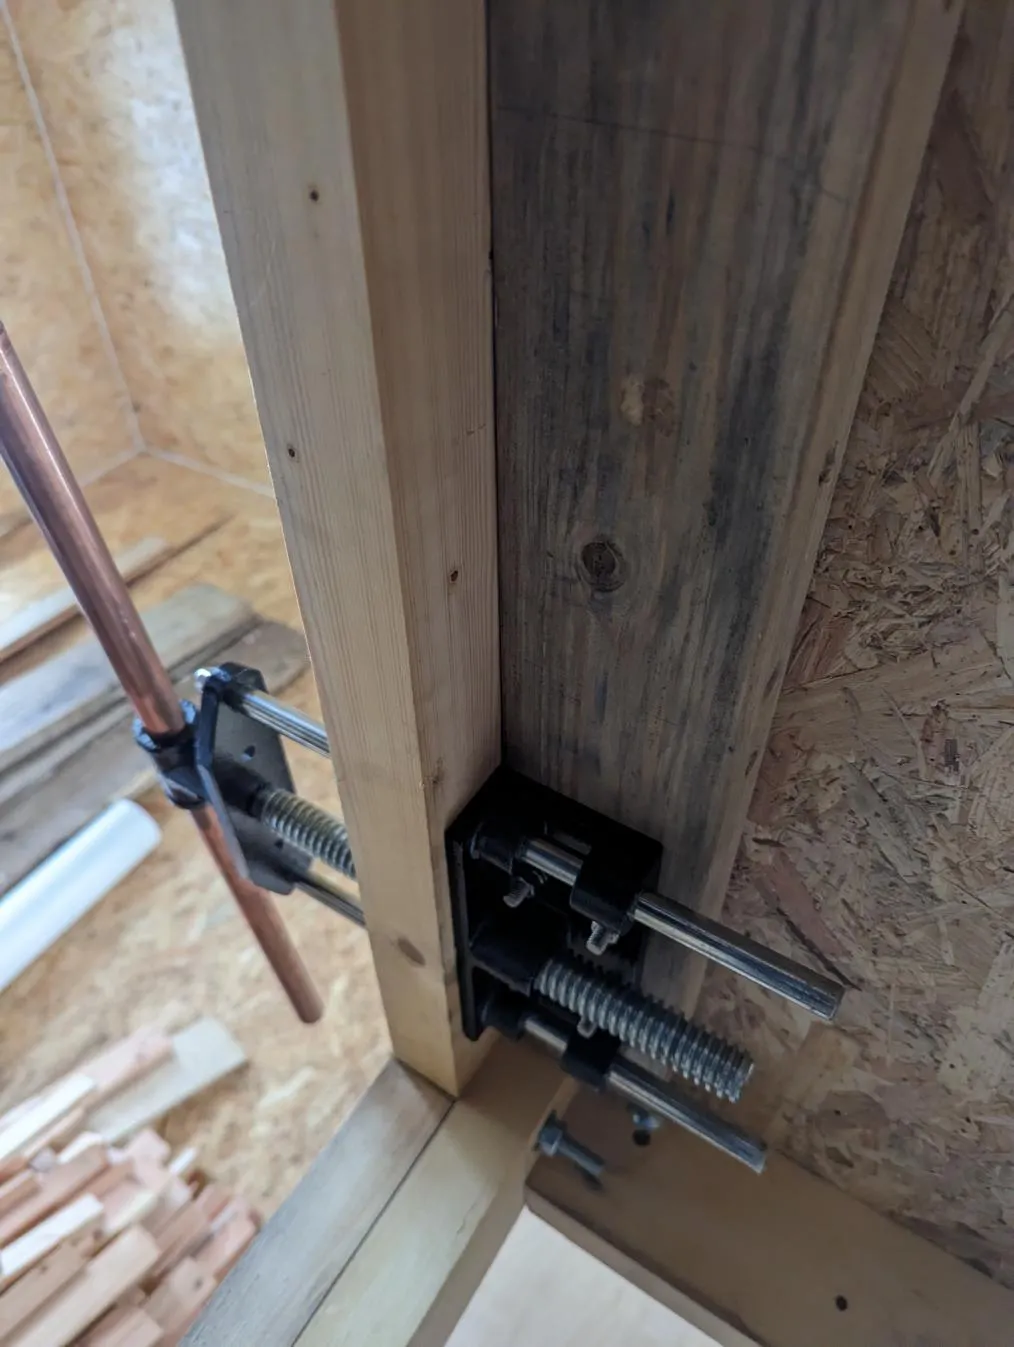
By this time, I had a functional vice!
The only problem is its a wee bit (15mm) below the top of the workbench. Again, I was kinda knackered, so I left it for the day.
Phase 3: Jaw… Liners?
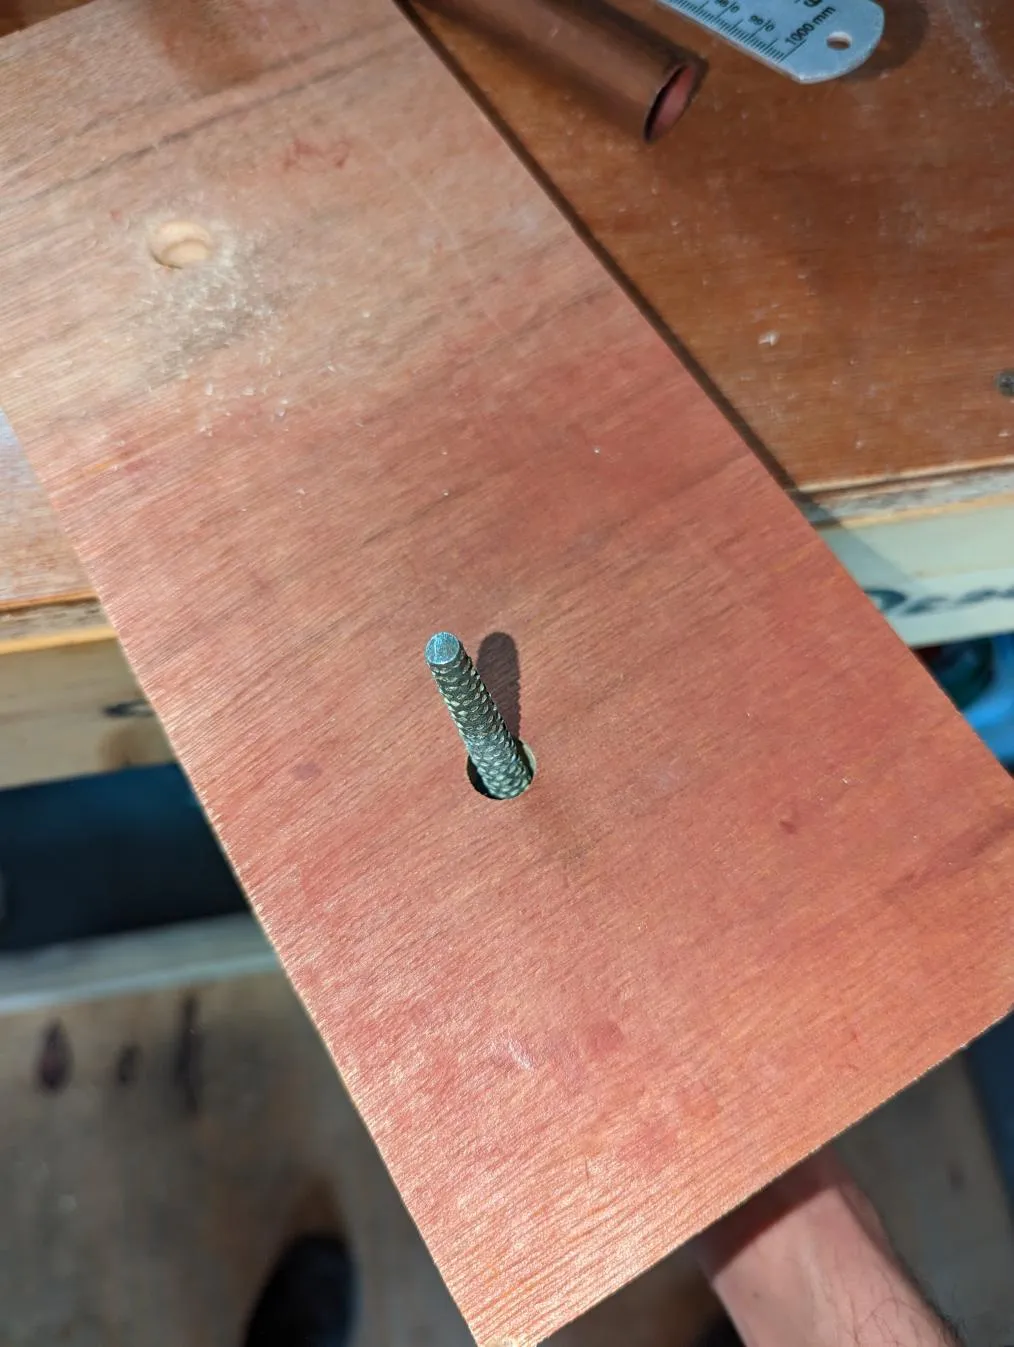
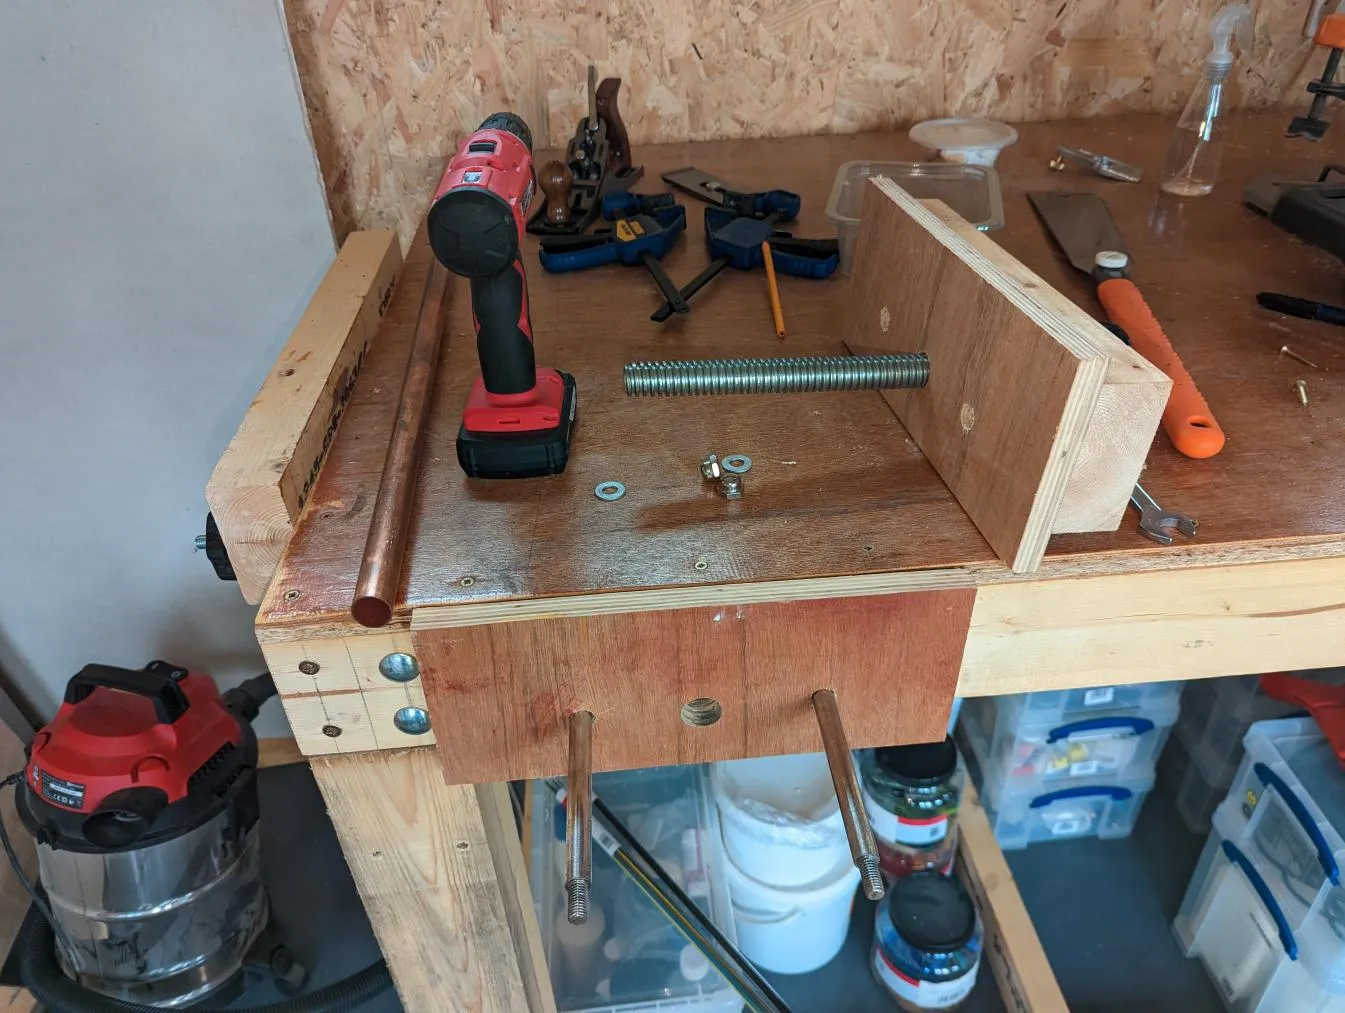
I wanted to bring the edge of the vice up to the same height as the workbench. I’ve had some nice thick plywood lying around for years, so I decided to use that:
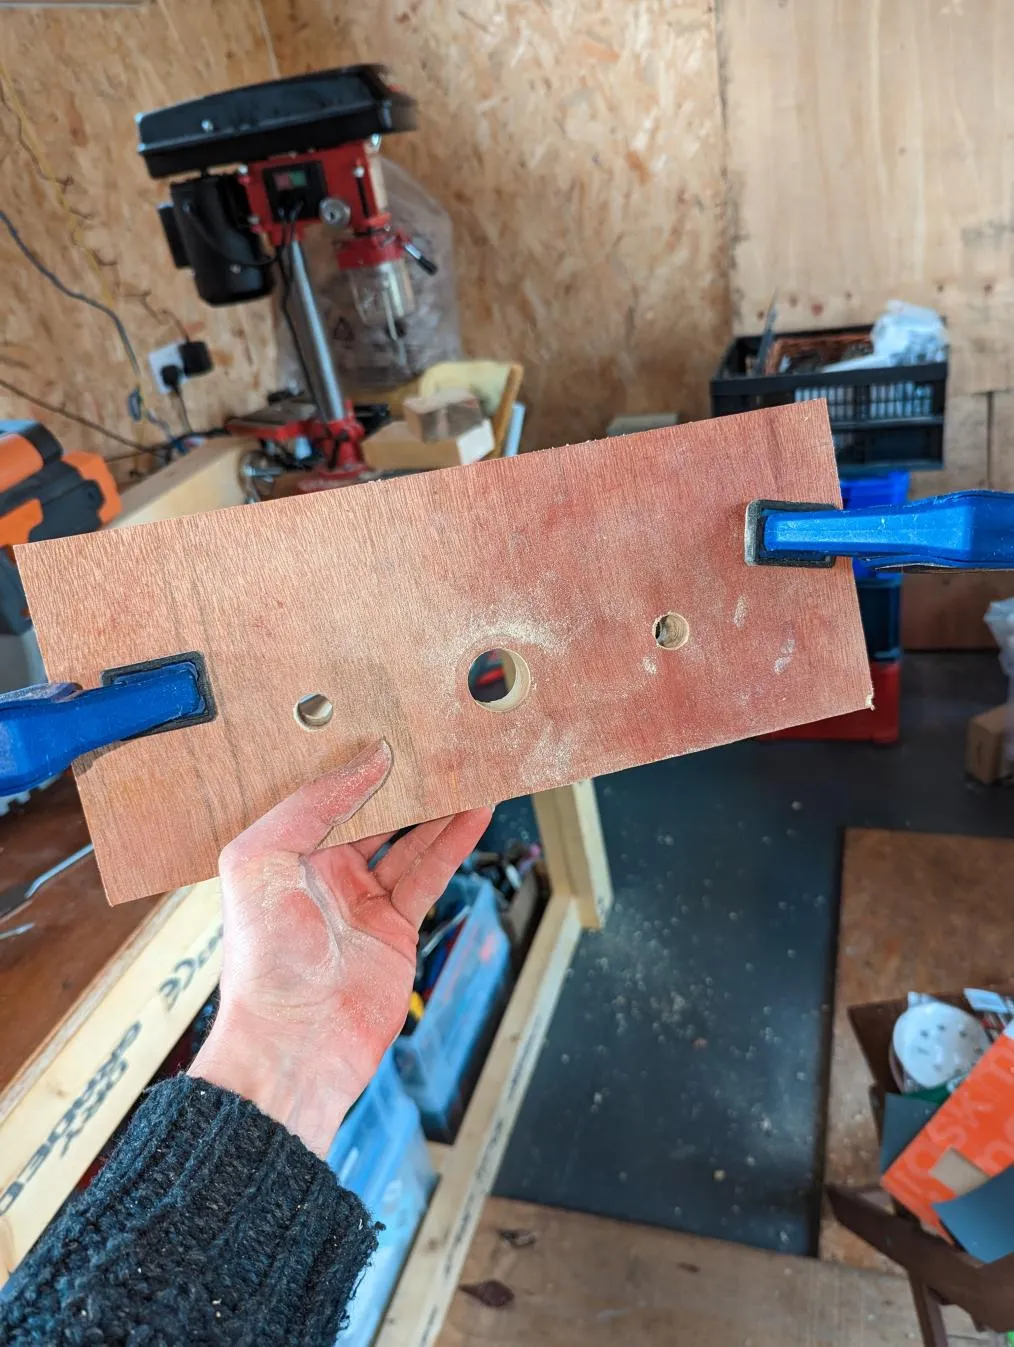
I took the vice to bits again, cut two pieces of plywood to size, clamped them to the wooden jaw I made in phase 2, and marked the position of the two guide bars again. Then I drilled them with the drill press.
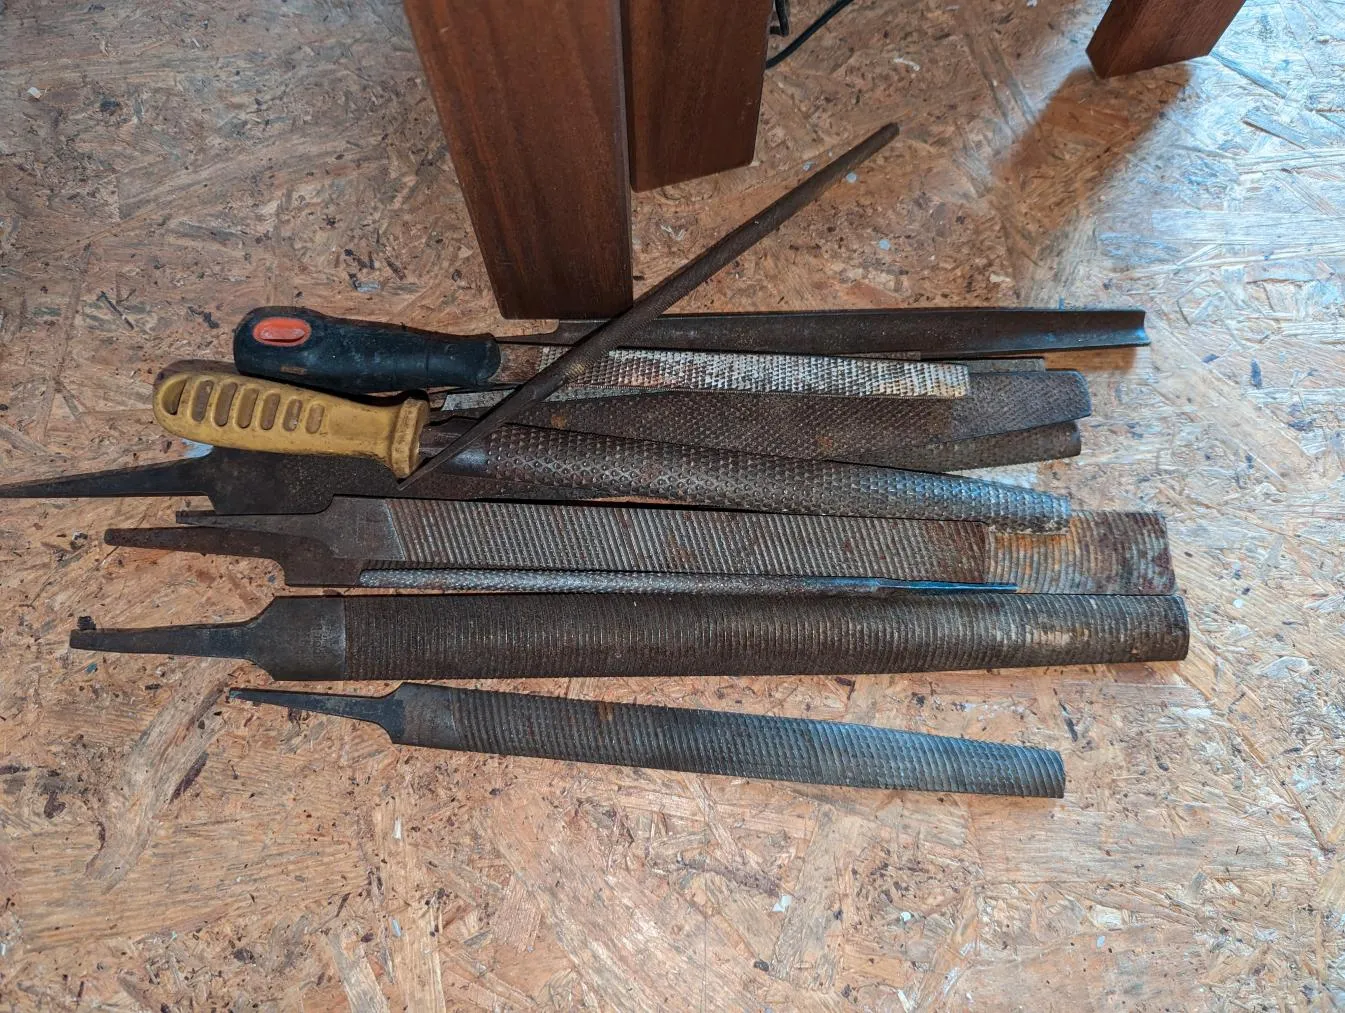
Then I tried to push them onto the guide bars, but they were too tight a fit. Luckily I’d recently bought a slightly excessive number of second hand wood files from Ebay, so I was able to widen the holes slightly and get them to fit.
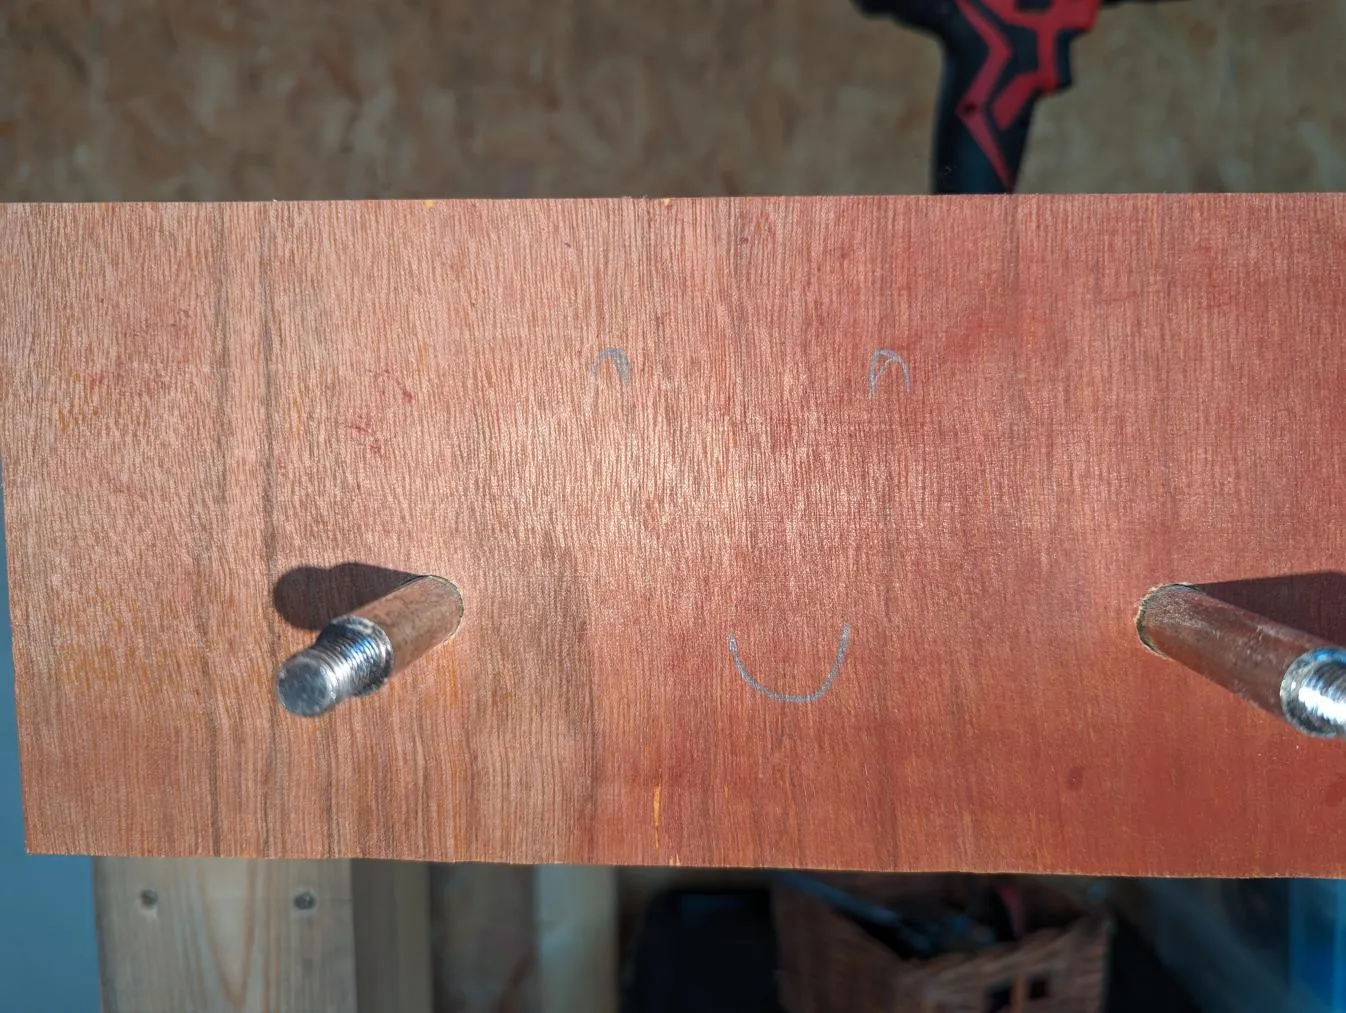
With that, I could push the outer jaw on and mark where the threaded rod needed to go, getting it in the right place this time!
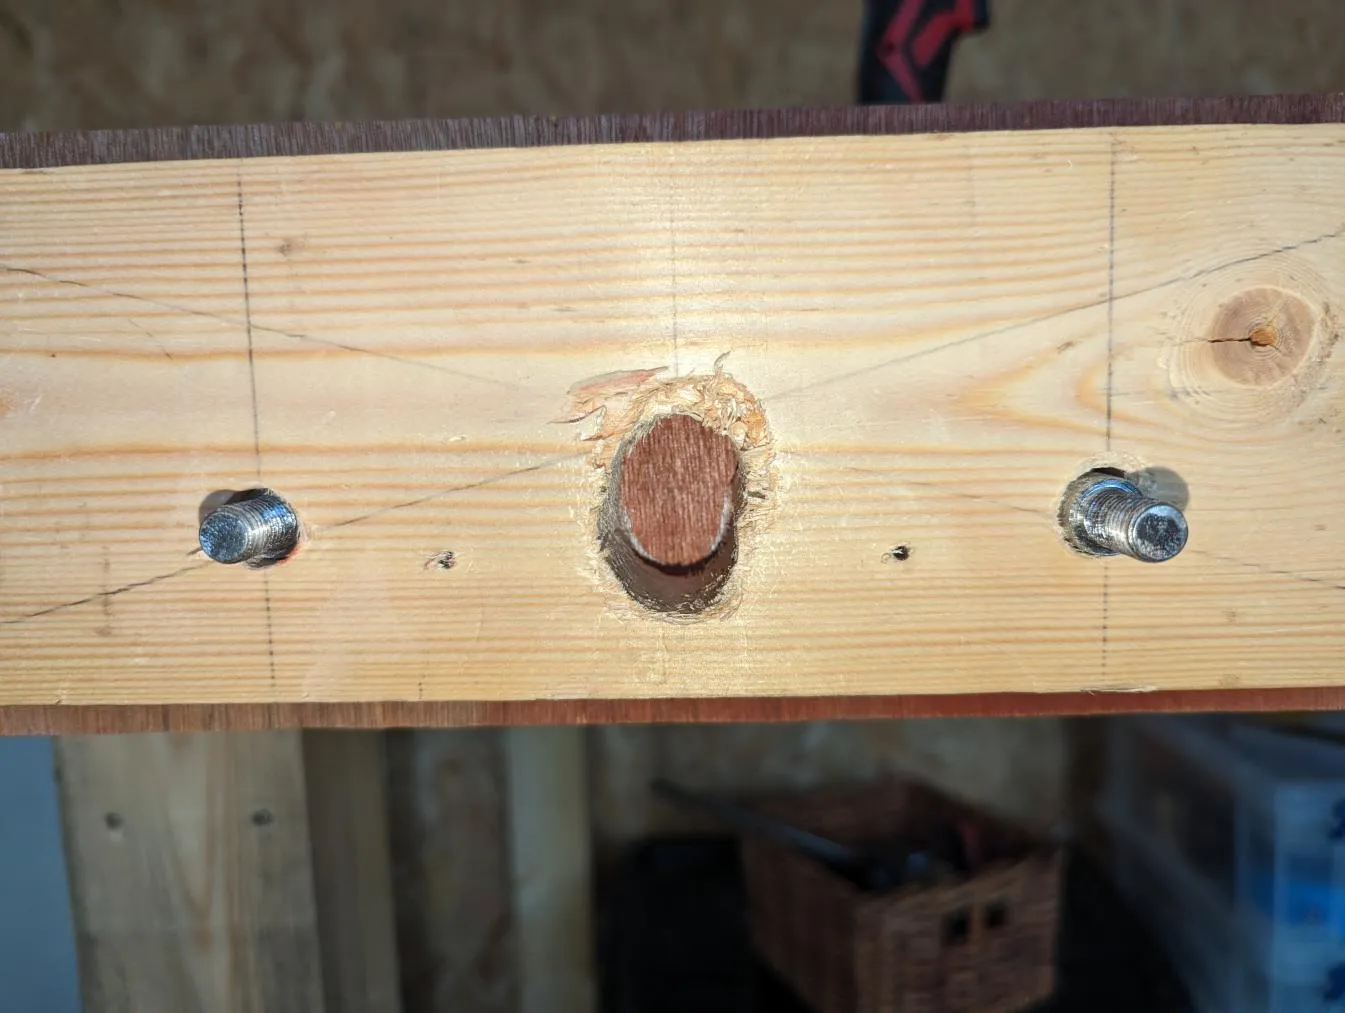
Then I drilled it, and whaddya know, I had to file it a bit more to get it all to fit:
Still its pretty satisfying having such nice accurate holes. Hmm, well except for this one, that I stupidly didn’t support properly:
Anyway, I’ve put that side towards the bench so no one will know my secret shame, unless they read this of course!
I was about ready to put it all together (kinda cool you can dismantle it so easy for repair /adjustment though).
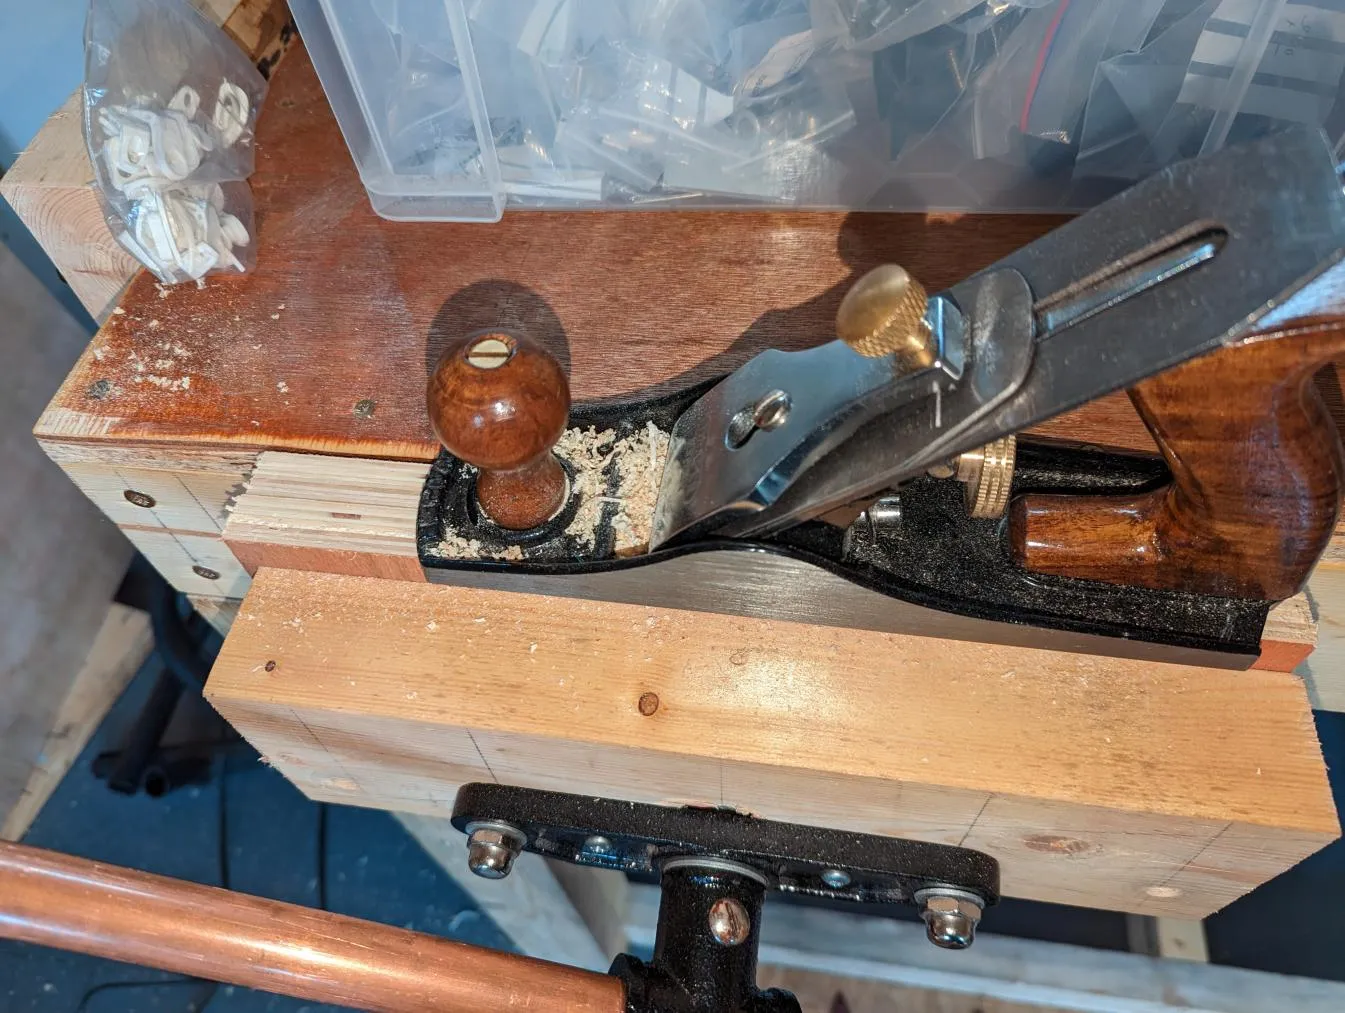
Hmmm, the new jaws were at a slight angle to the workbench top though: I planed them flat:
Complete!
This is it done, it seems to work fine!
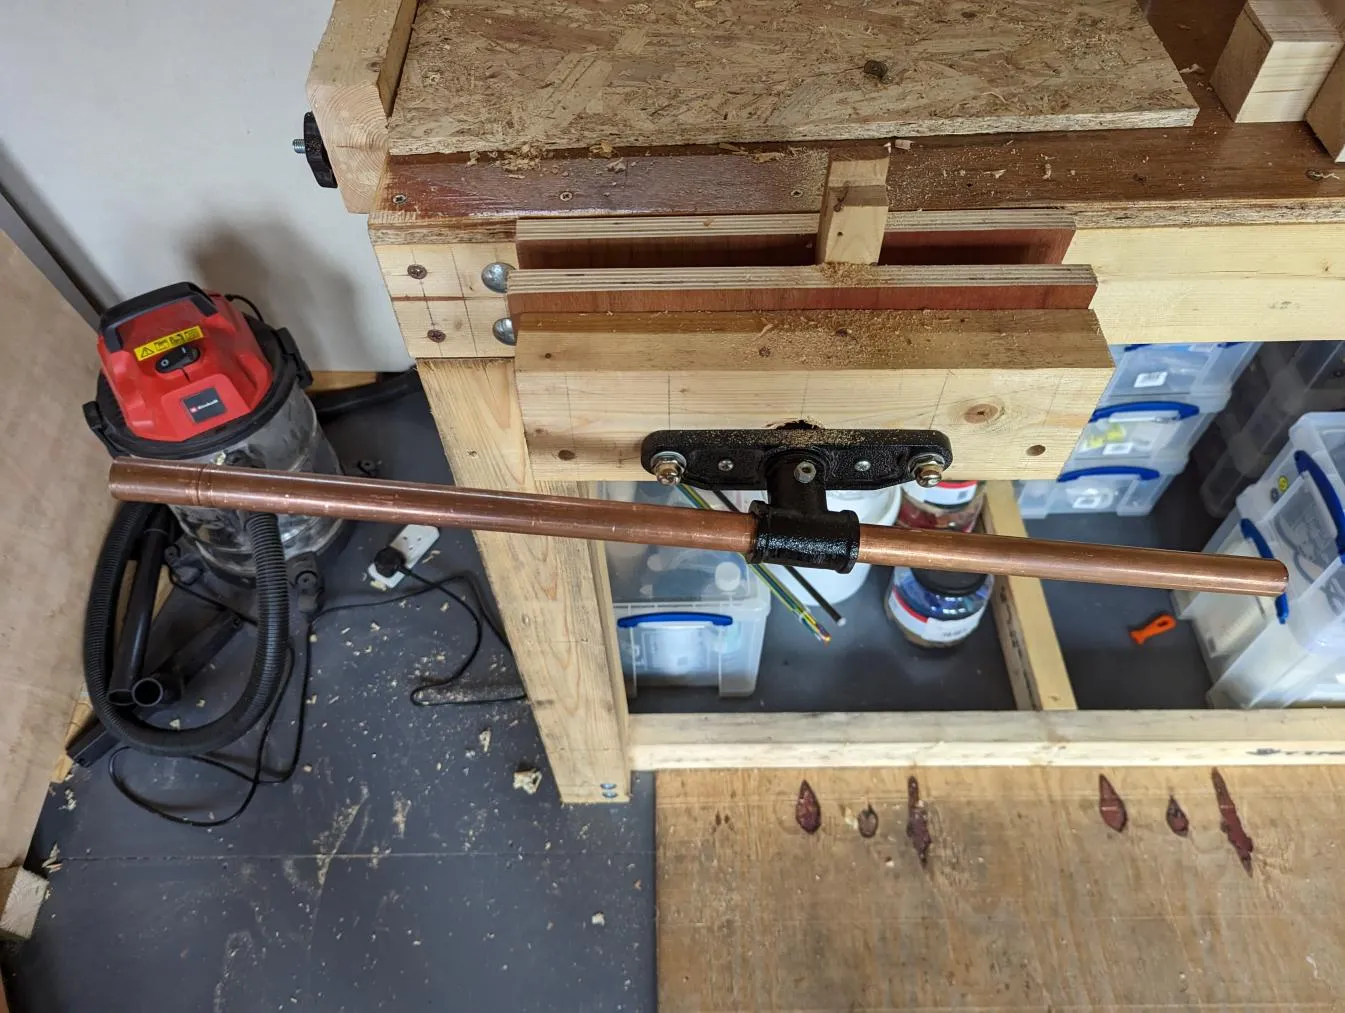
The only problem is the copper tube falls out sometimes: I guess I need to make a couple of knobs at some point! Being able to remove the tube when not in use is quite handy too though..
Leave a comment
Comments are moderated, so yours won't appear immediately. Your email is never published.