Now that I had built a workbench, it was time for some shelves!
This is the cupboard under the stairs; originally it was a big dingy, but I’ve painted it to make it a lot brighter and nicer. Why the dangly cables? That’s from the house patch panel and core network switch of course! :D
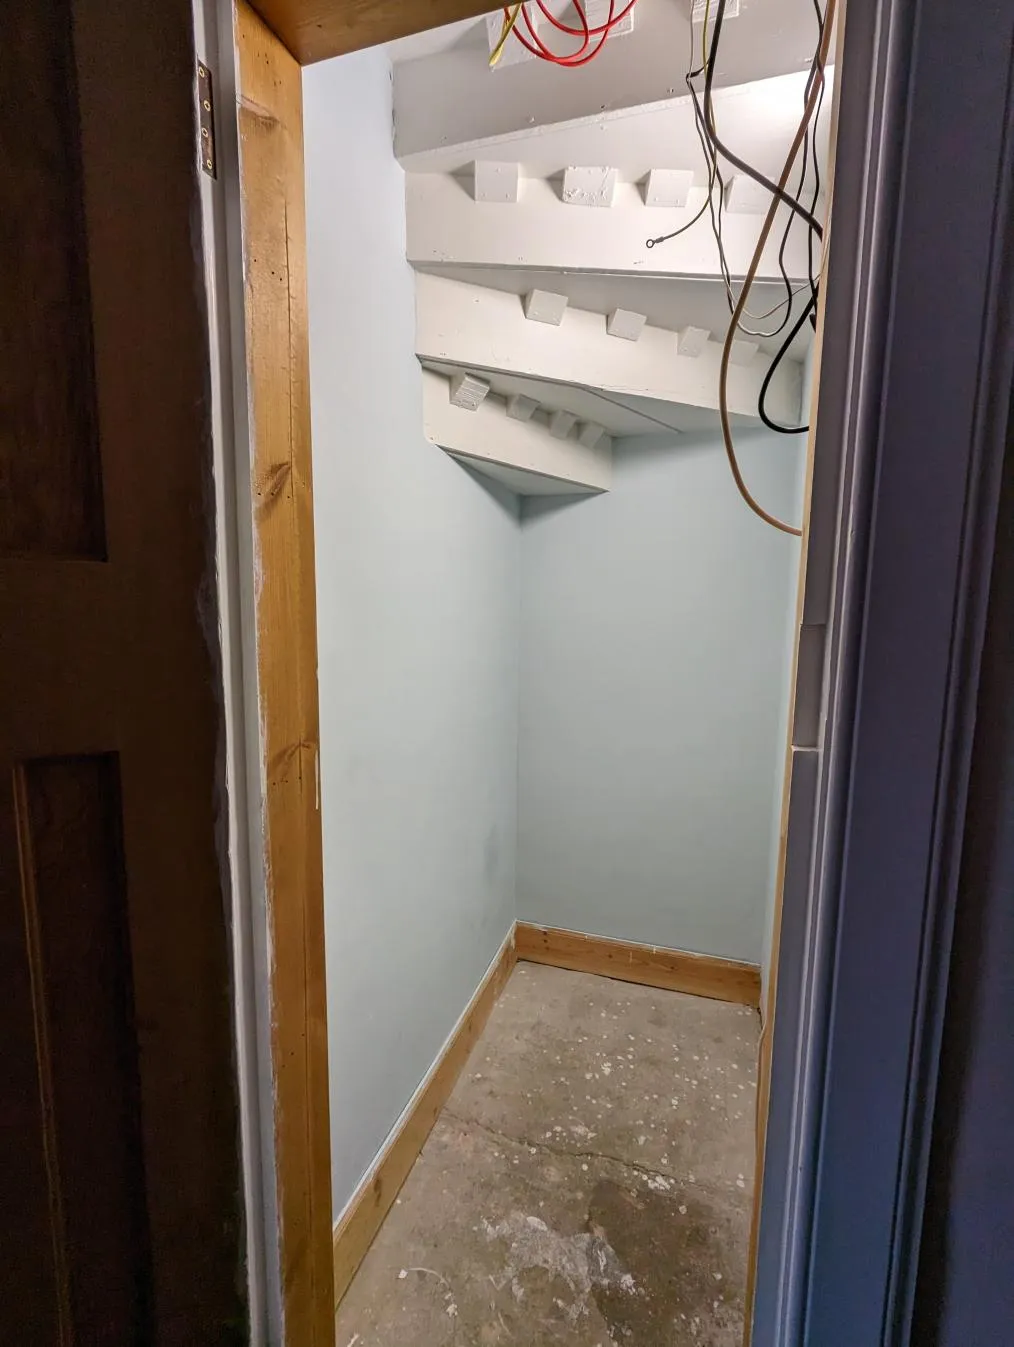
However, the cupboard needs some shelving to be really useful.The previous owners had attached shelves to the (plasterboard) walls, but I removed those prior to painting as they weren’t particularly strong. Time for some design…
Design!
I measured and built a very basic mock up of the room in Fusion 360, just so I knew what space I had to fit into.
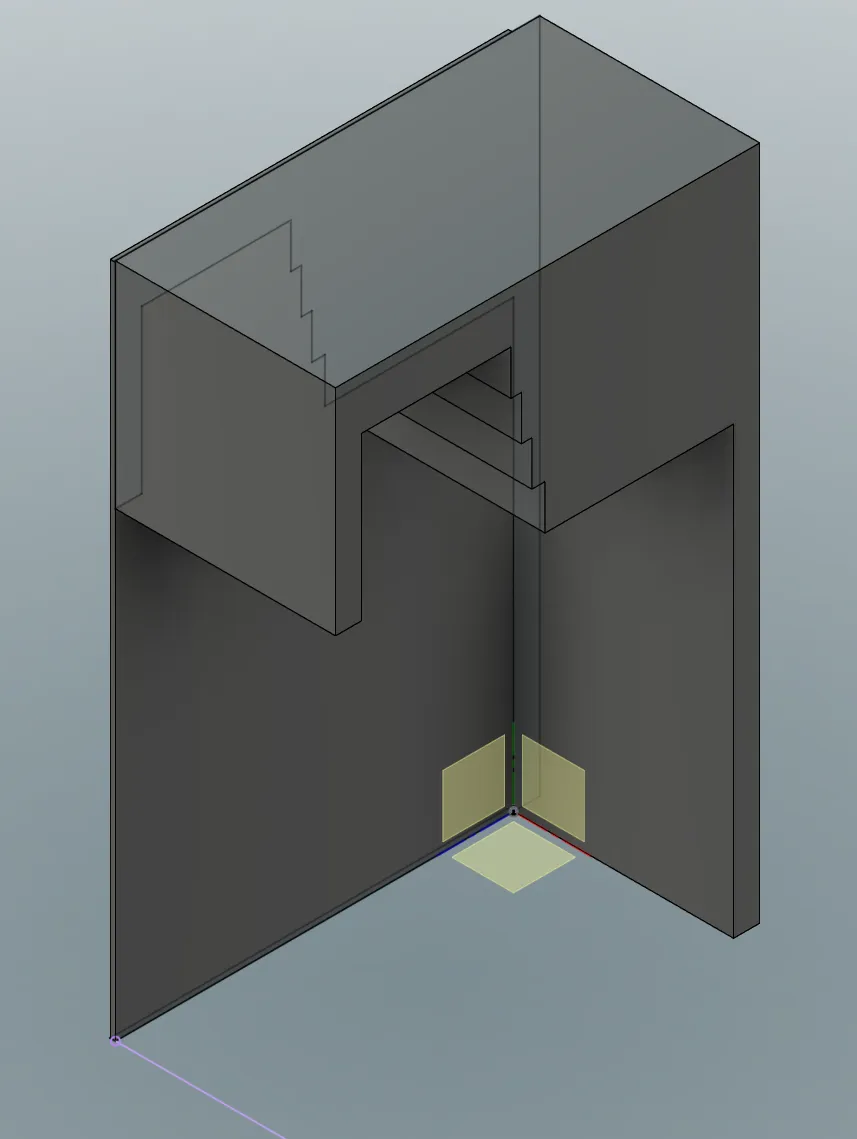
After I had that done, I spent quite some time designing, ending up with this:
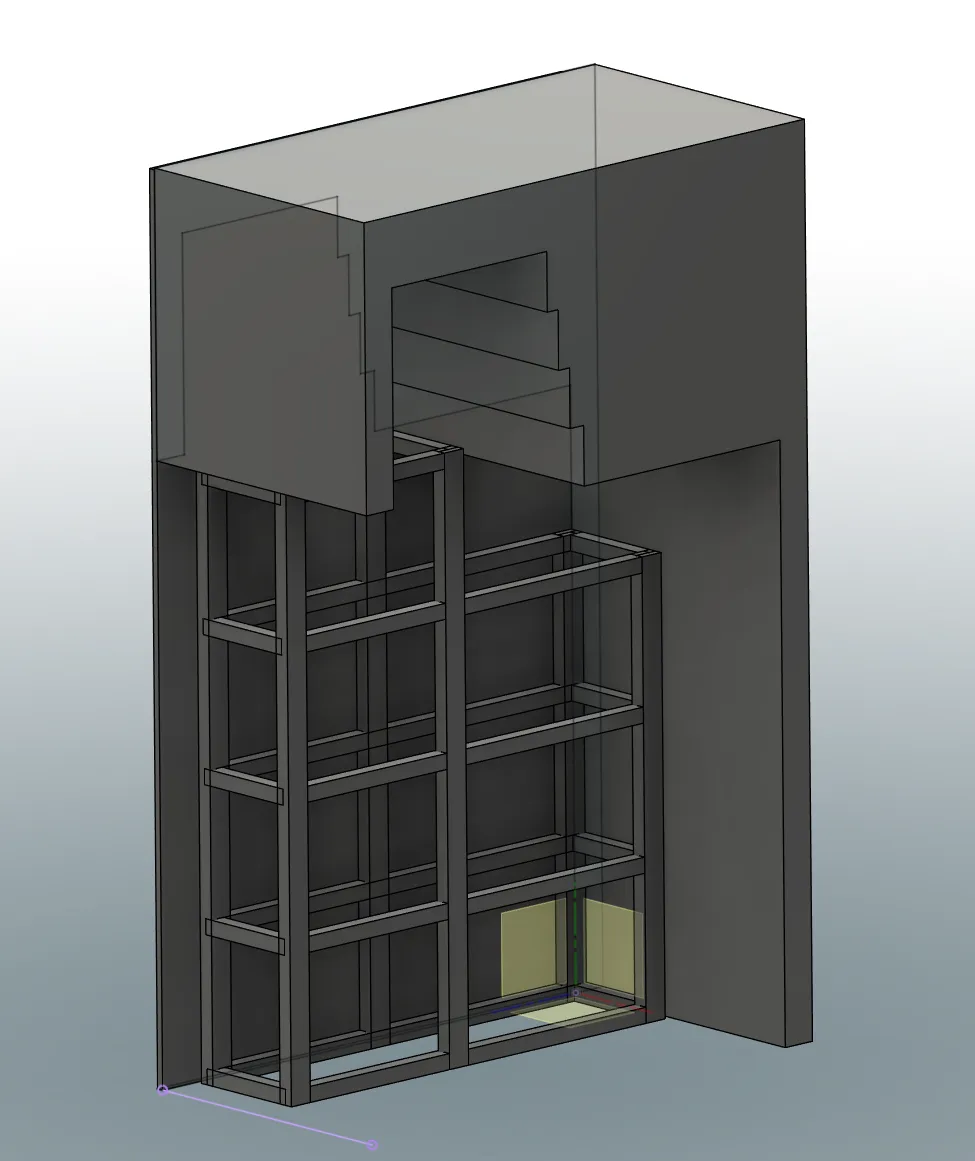
This is a lot more complicated than the workbench:
-
4 + 1/2 wooden platforms.
-
Lots of half lapped joints.
-
I wasn’t going to use the “screw two bits of wood together approach” I had for the workbench: I was gonna have to cut these joints out of lengths of wood.
I realised I was going to need some plans to build it. Luckily, once again, Fusion 360 has a really neat technical diagramming tool that you can link directly to your design. Using that, I built this for reference while cutting/building everything:
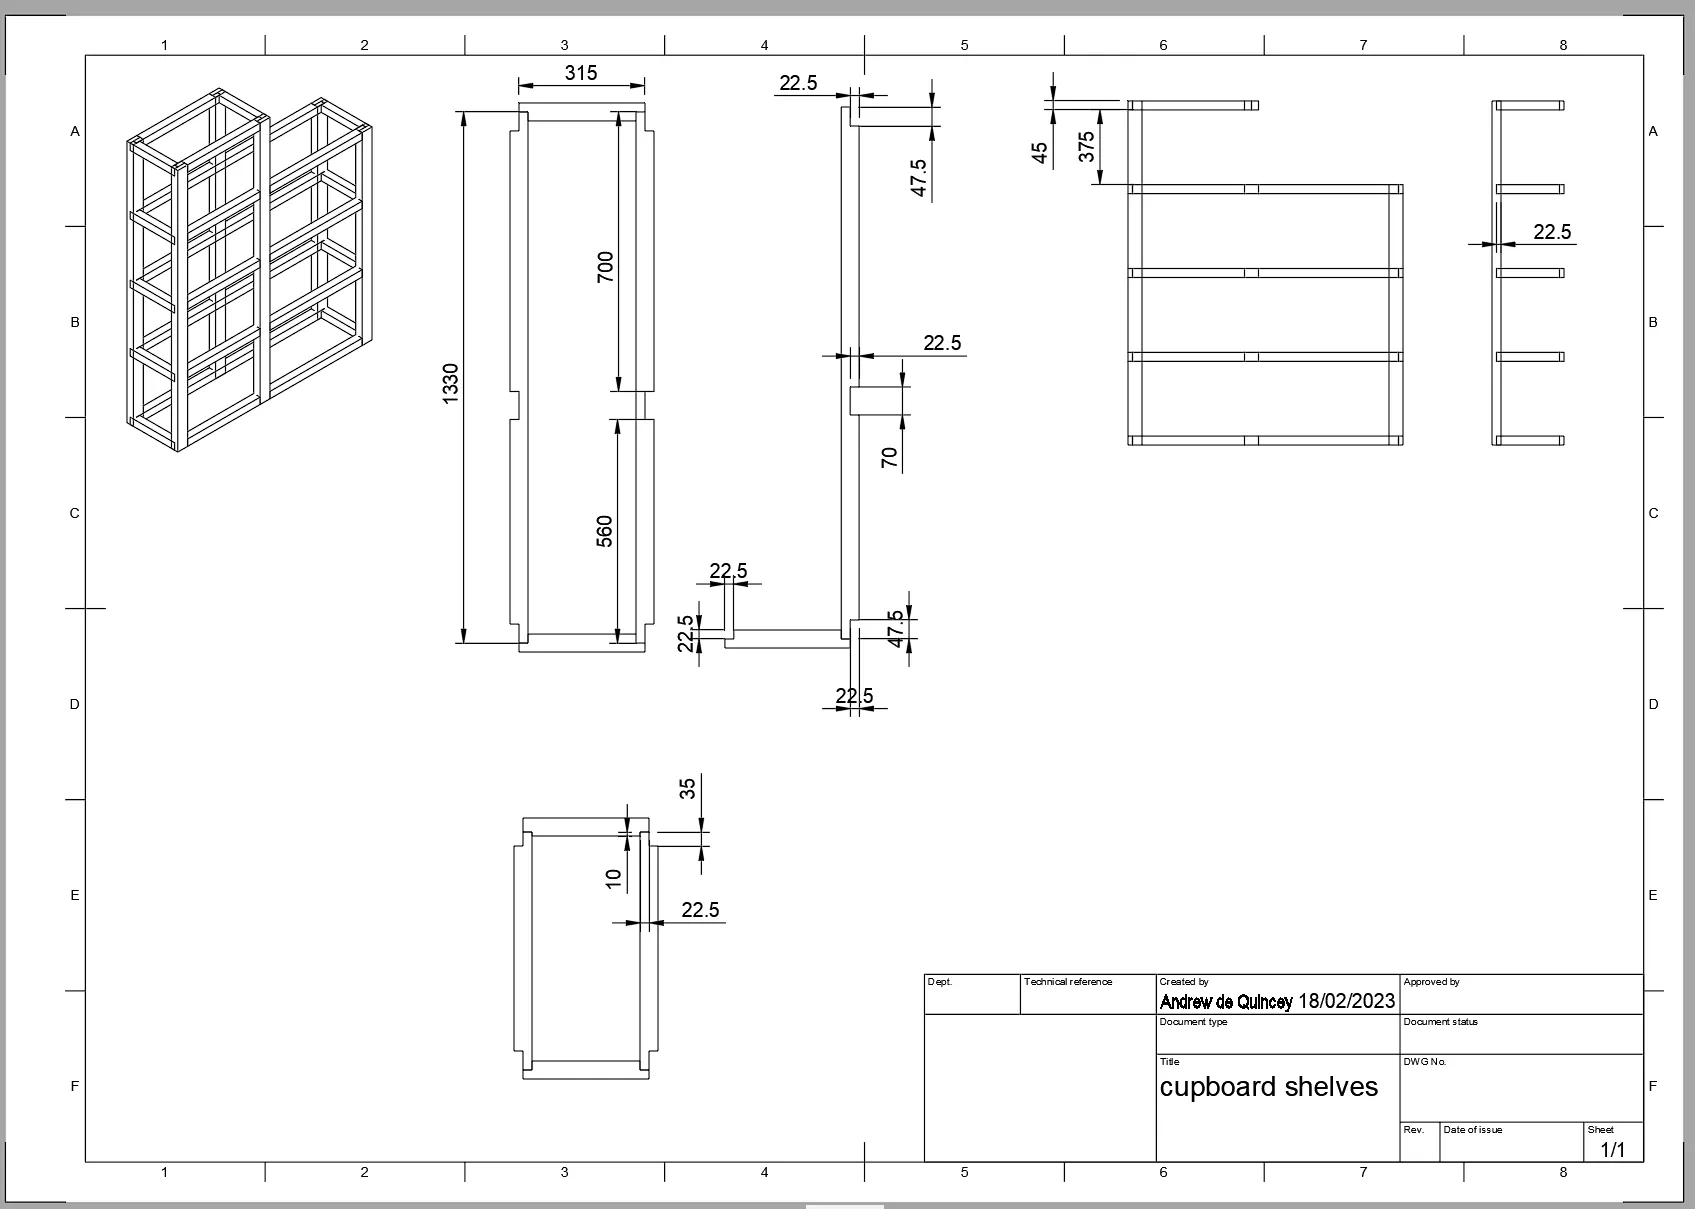
Kinda makes me think of Ikea instructions, though they don’t tend to require a Mitre saw :)
Order Stuff!
The verticals are 45X70mm white wood, while the horizontal platforms are built from 45X45mm white wood. I ordered cheaper timber from Thistle this time, as I felt it didn’t need to be as sturdy. I’ll use OSB again on the platforms for the actual shelves, as they don’t need to be pretty.
Again, it was all delivered in a few days.
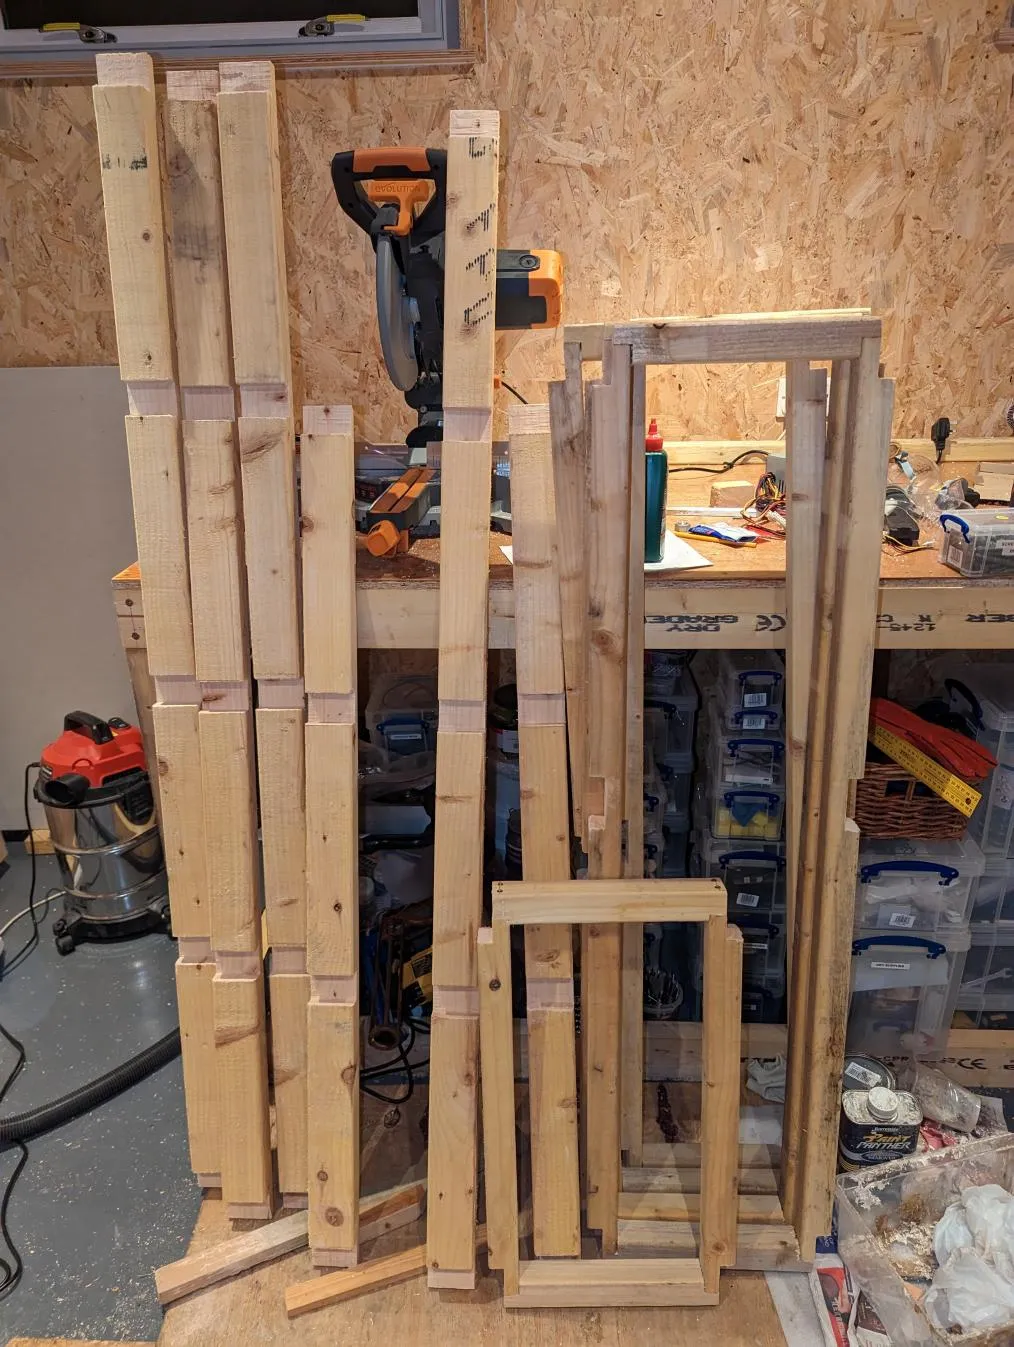
Cut Things!
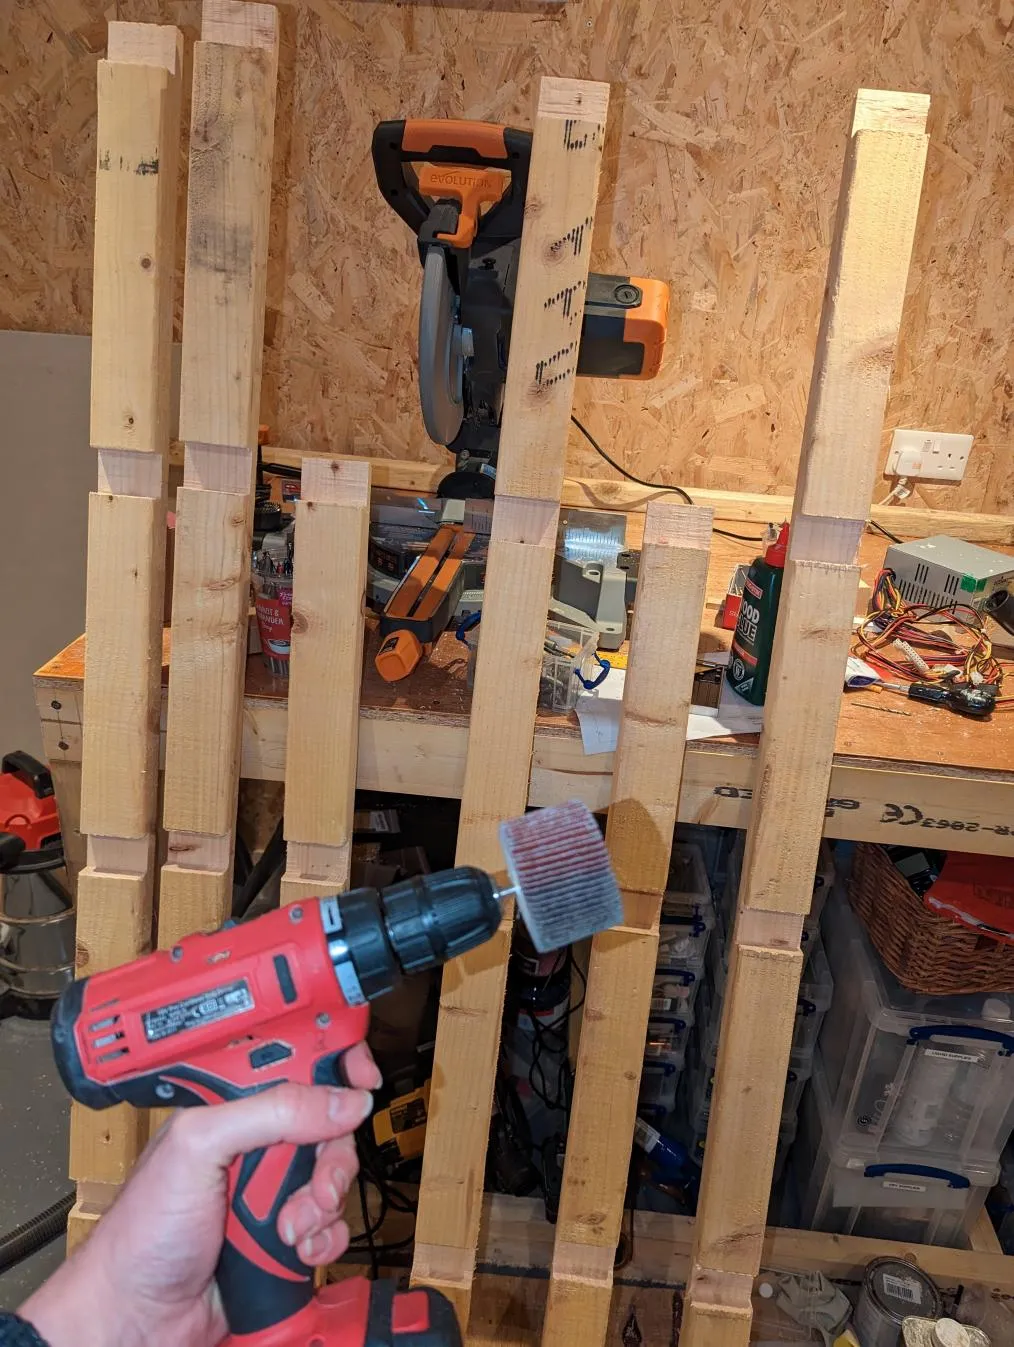
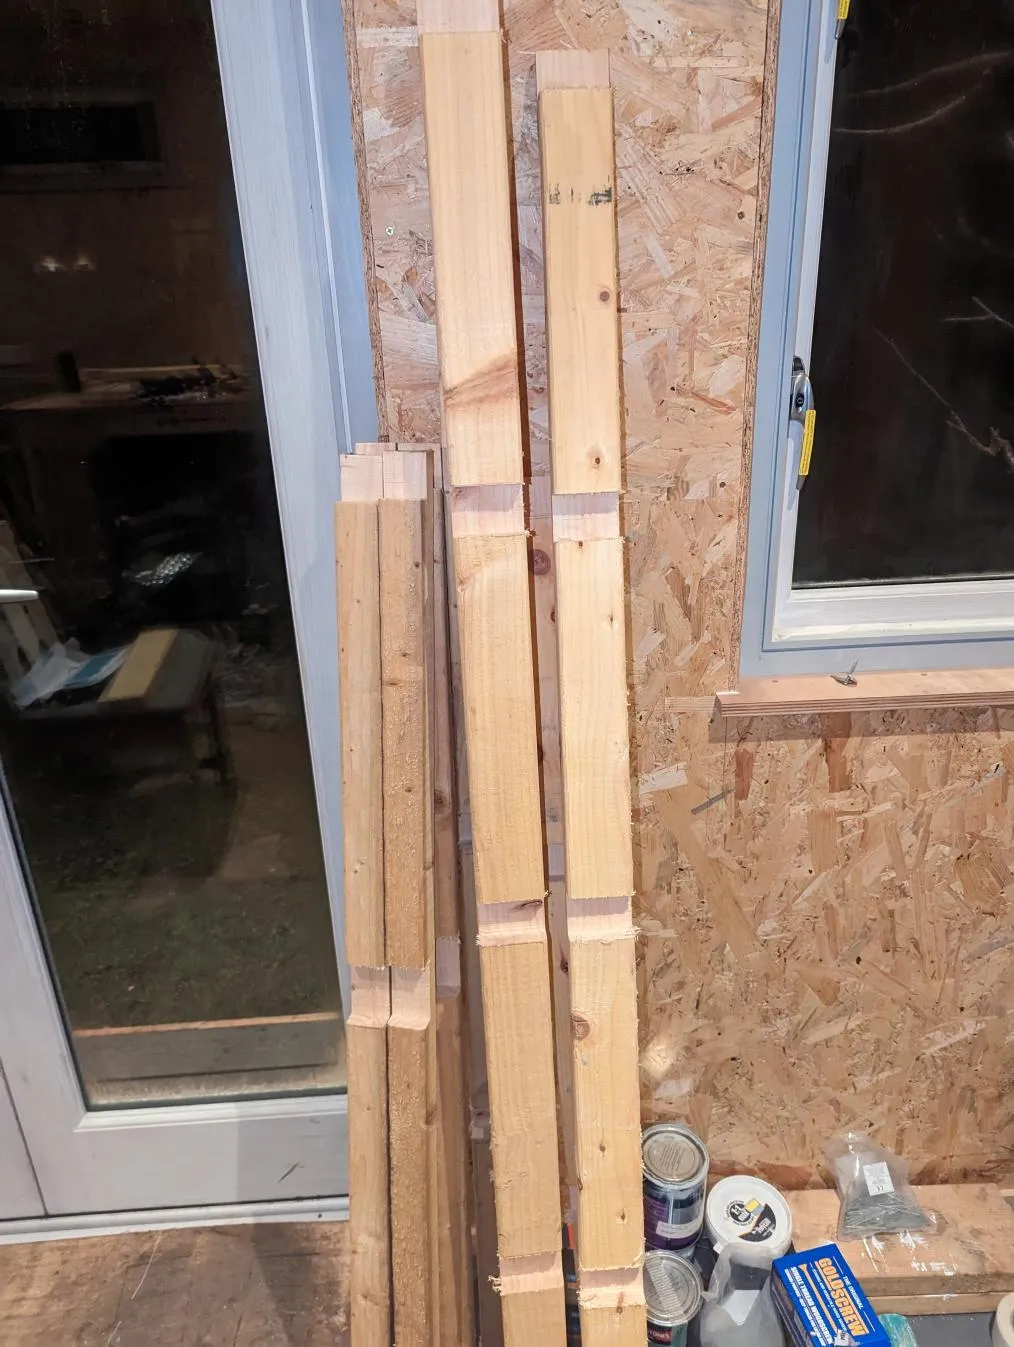

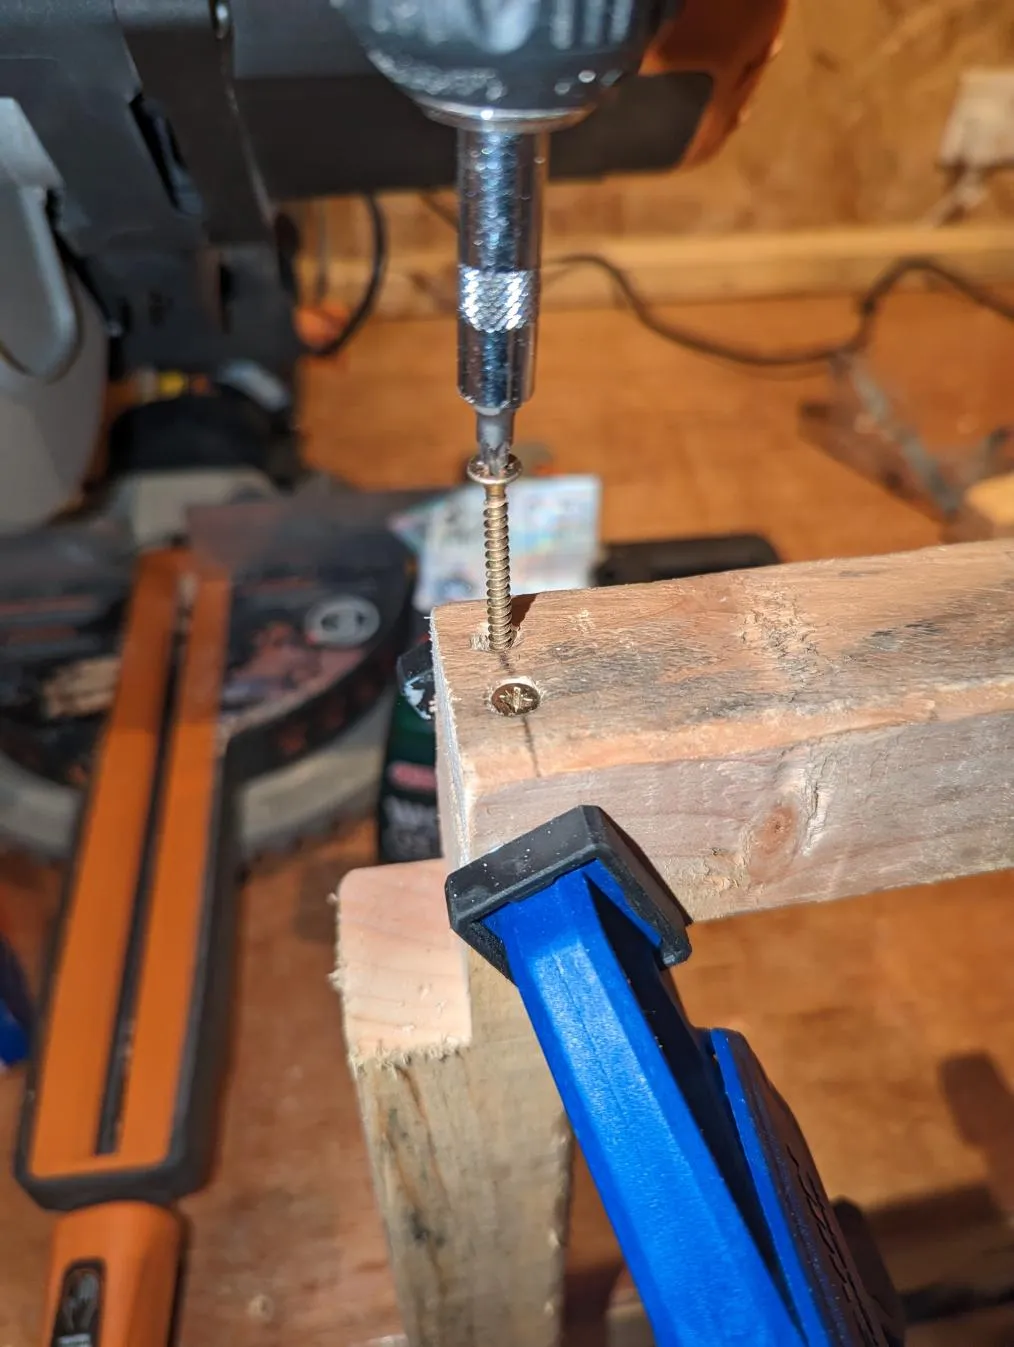
I used the mitre saw to cut all the half-lapped joints, and then sanded things down a bit to remove stray wood fibres. I managed to completely fill the vacuum with sawdust during this!
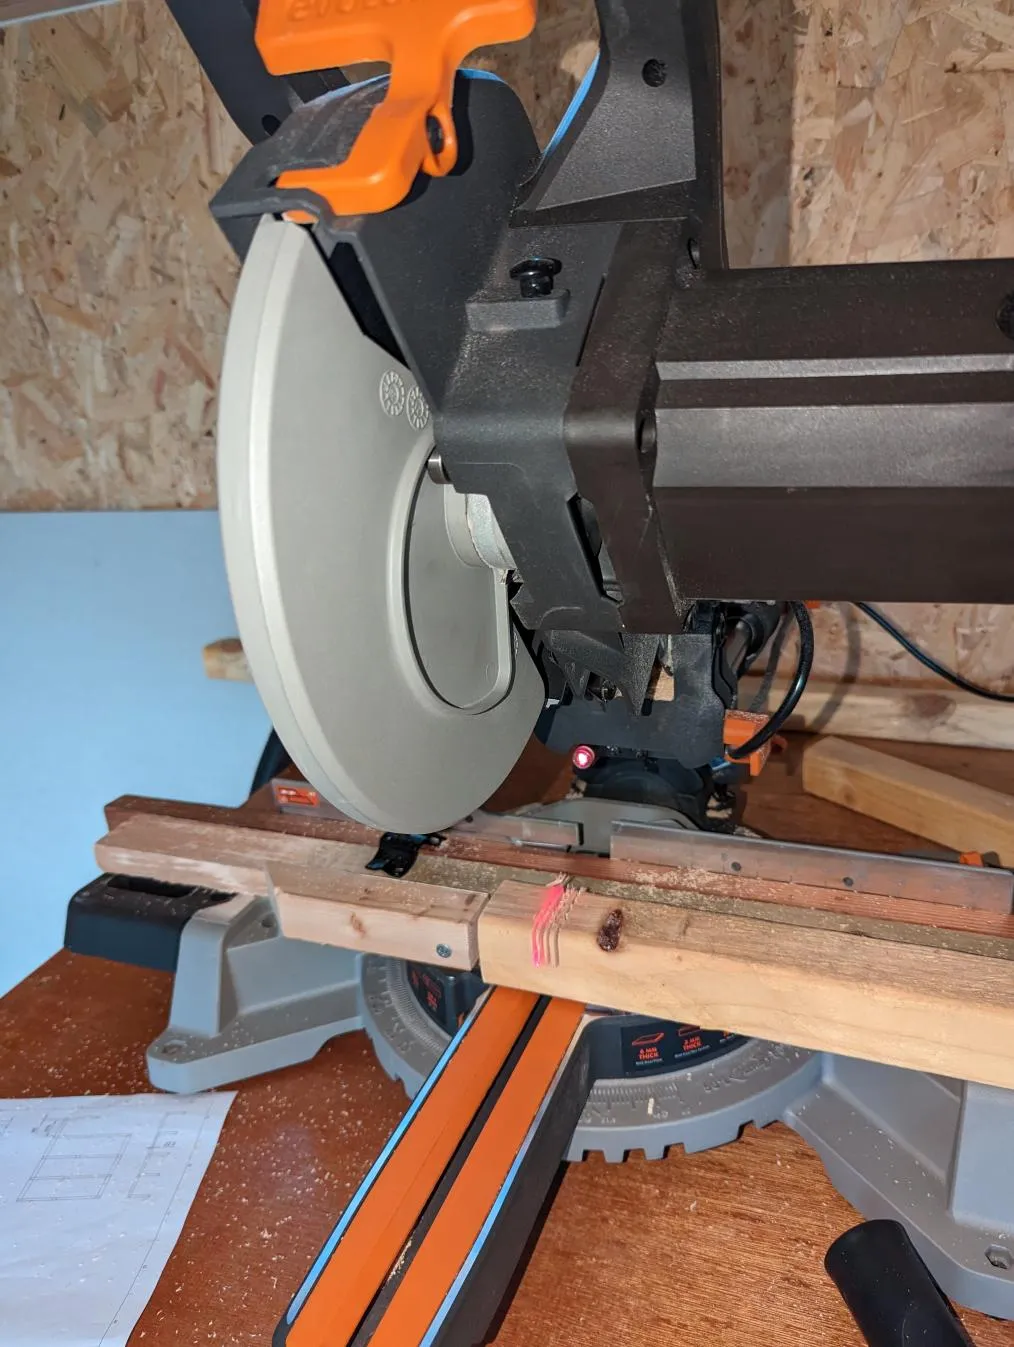
In the picture above you can see cutting the half lapped joints using the depth control on the mitre saw. Interesting thing is you need to bring the wood you are cutting forward a bit when using the depth gauge or it won’t cut fully due to the way the tool works. This is why I have several bits of wood behind the piece I’m actually cutting. Another option would be to raise the wood.
Once I’d carefully measured and cut one piece to size, it was relatively easy to repeat on all the others.
Assemble the platforms!
Next step was to assemble the shelf platforms:

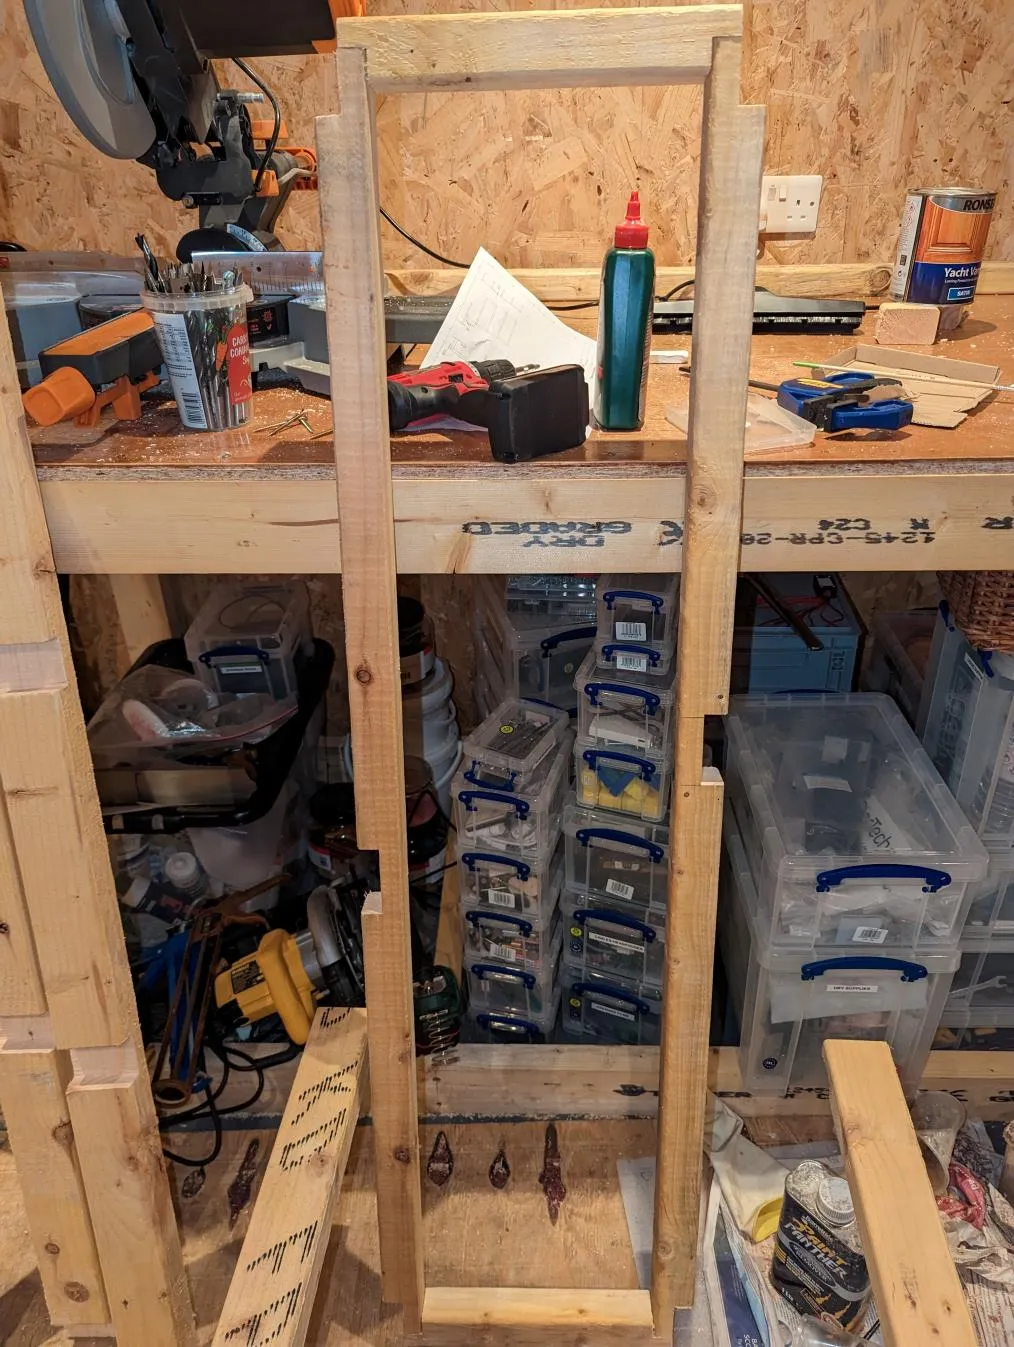
I glued them, clamped them, then screwed them together (making sure to pre-drill and countersink everything). This took a while!
I only had one screwup: I got the long planks for one platform the wrong way round and had to unscrew, cut through the glue, then reassmble: Easy fix, though annoying.
Build the frame
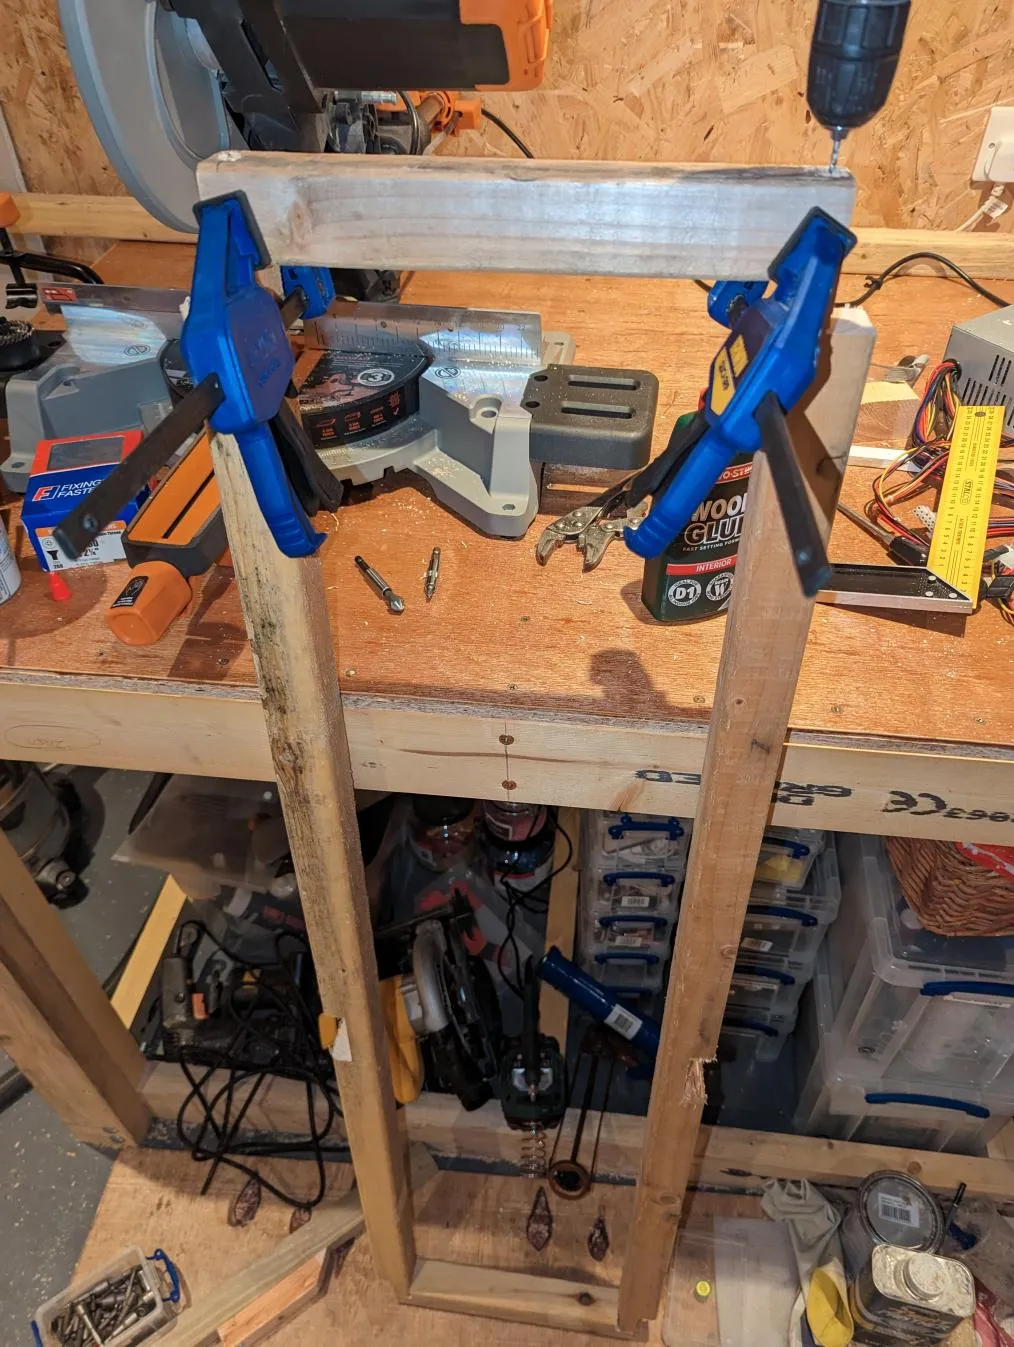
Next step was to attach the platforms to the verticals and build the frame.
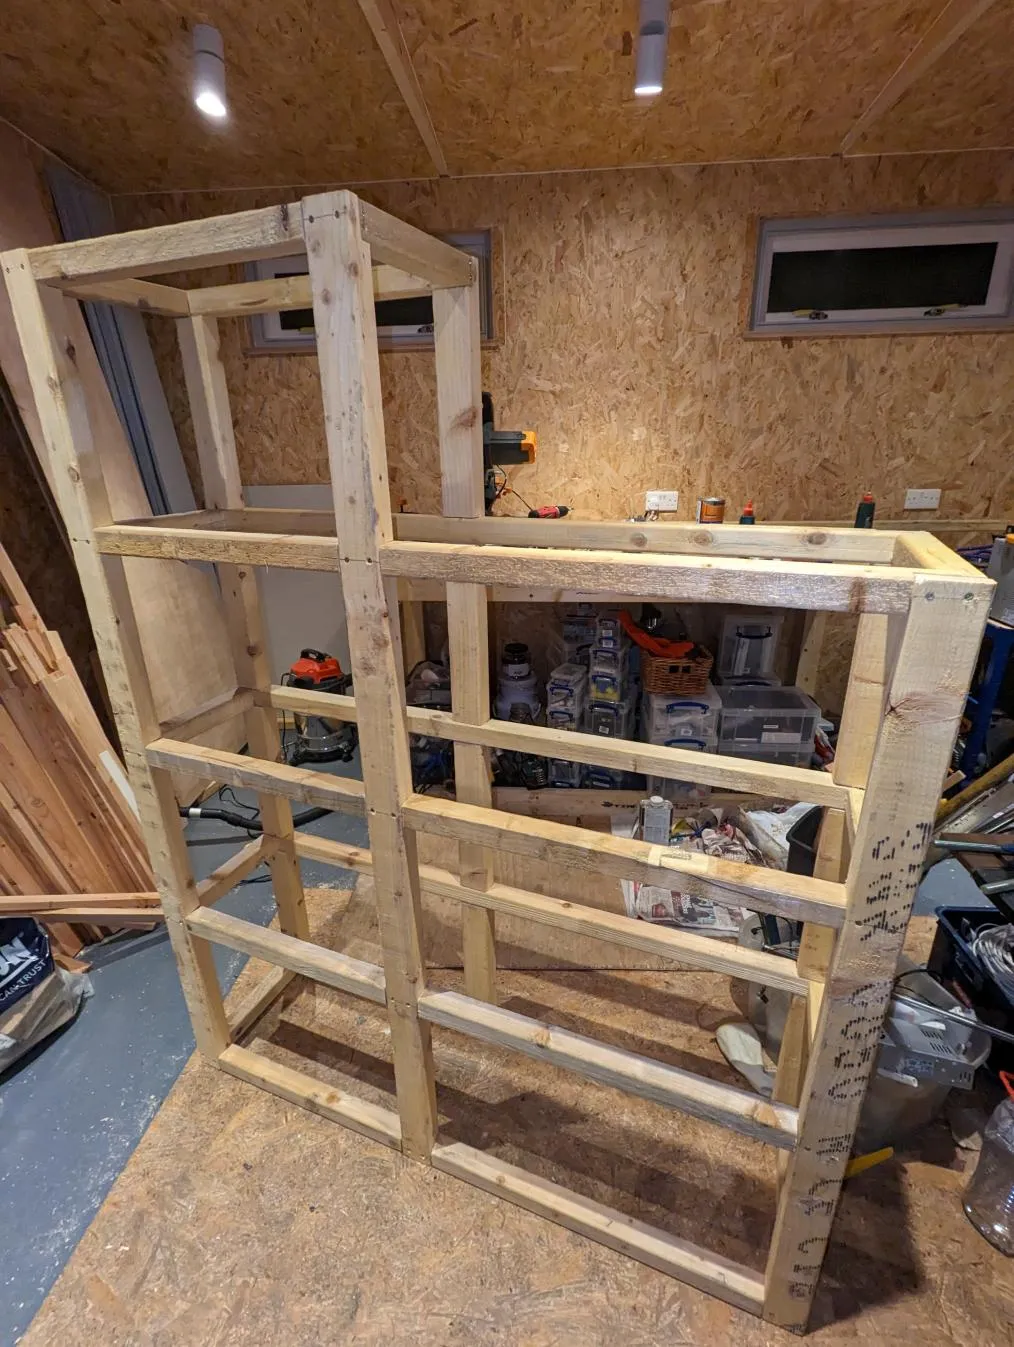
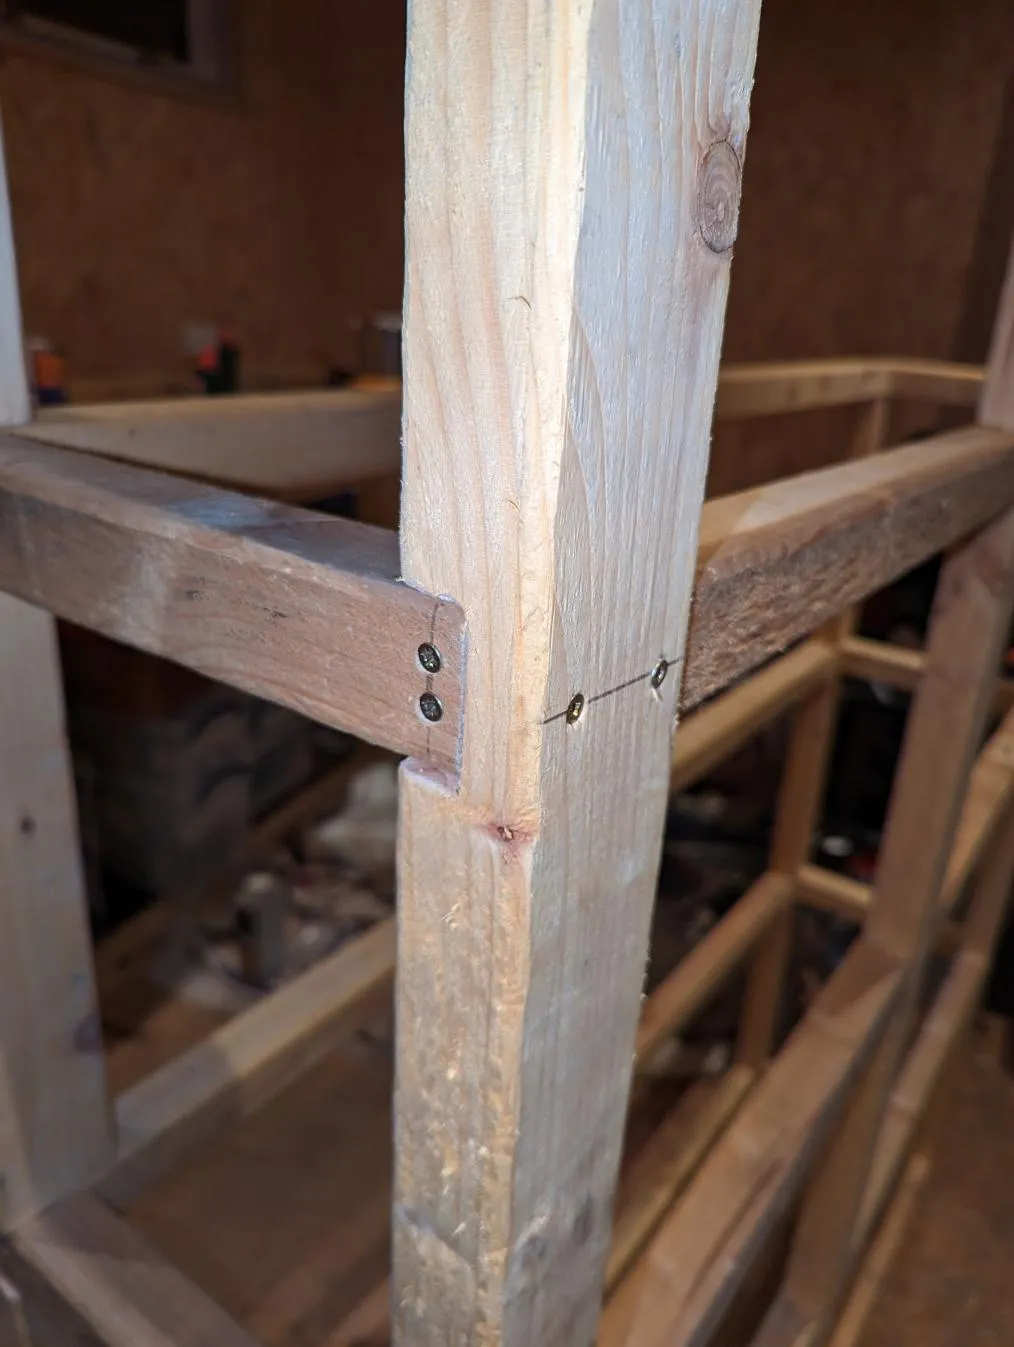
I decided to hold the verticals to the platforms using two screws which passed between the two for the platform: not sure that was a great idea as occasionally it meant I had to move my screw holes as I hit one of the platforms screws when pre-drilling.. it worked, but I’ll probably try something else next time.
Anyway, I eventually had the entire thing assembled. Next, I had to add the shelves
Making the shelves
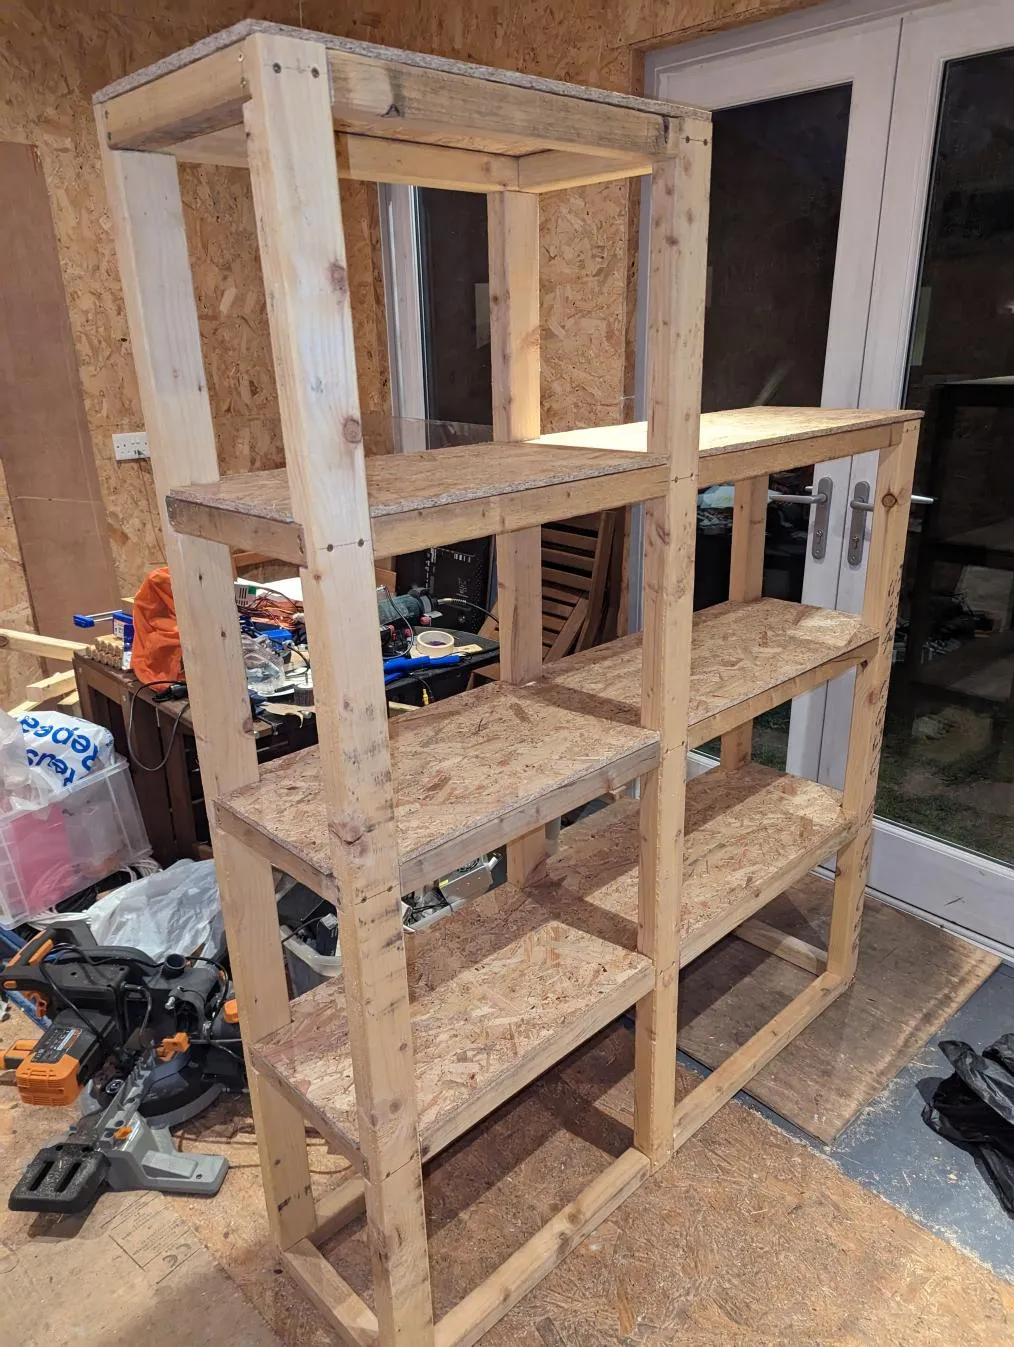
I cut them out of OSB using the circular saw.
The full length shelves were slightly tricky as they need a “bite” taken out for the middle support. However, I used a combination of drilling a hole and using a coping saw by hand to cut them. As a result, I didn’t need to bother screwing the shelves down, except for the very top half-length one.
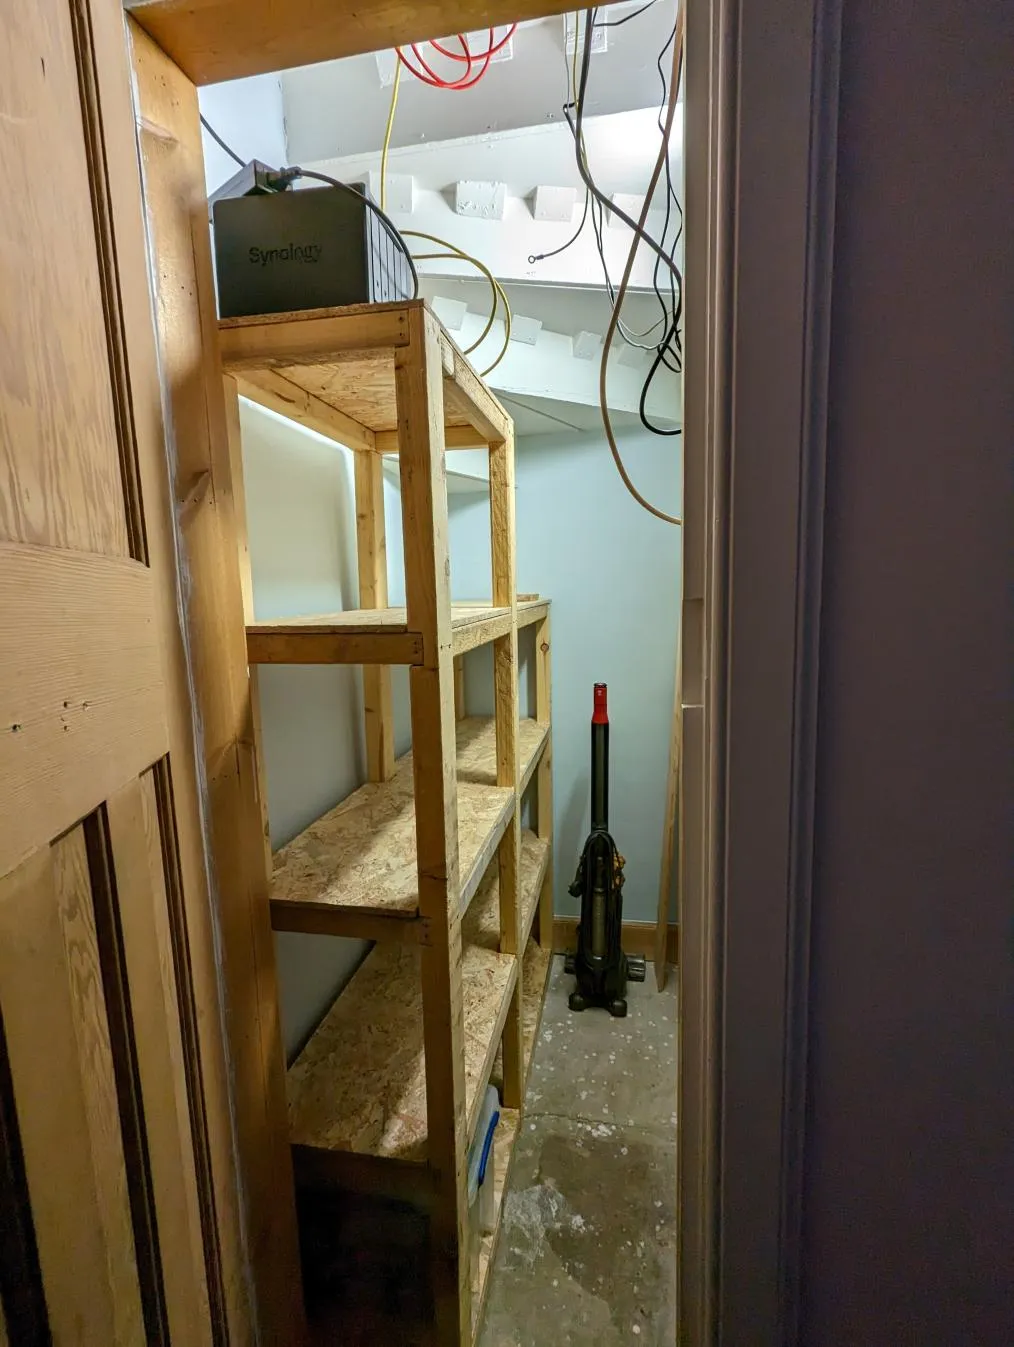
Install it!
We lugged the thing across the garden one afternoon, and installed it into the cupboard: it fits perfectly, and gives us a huge amount of storage space!
2 Comments
adq ·
Thanks! More coming soon...
James S ·
Great blog piece, Andy! I think I must have subscribed to your blog during the lull in activity but have enjoyed the past two. Hope all is going well with the new house!