I’ve been enjoying Electroboom’s Youtube channel, and was really interested in the various Tesla coil videos. I had a look at the OneTesla DIY kits: they look great, but way too expensive for an afternoon’s fun. Plus, shipping to the UK would likely be a faff.
Somehow I had the idea to check on Ebay: and I found there are loads of ~£4 mini tesla coil kits on there! So I ordered one, and a few days later it turned up:
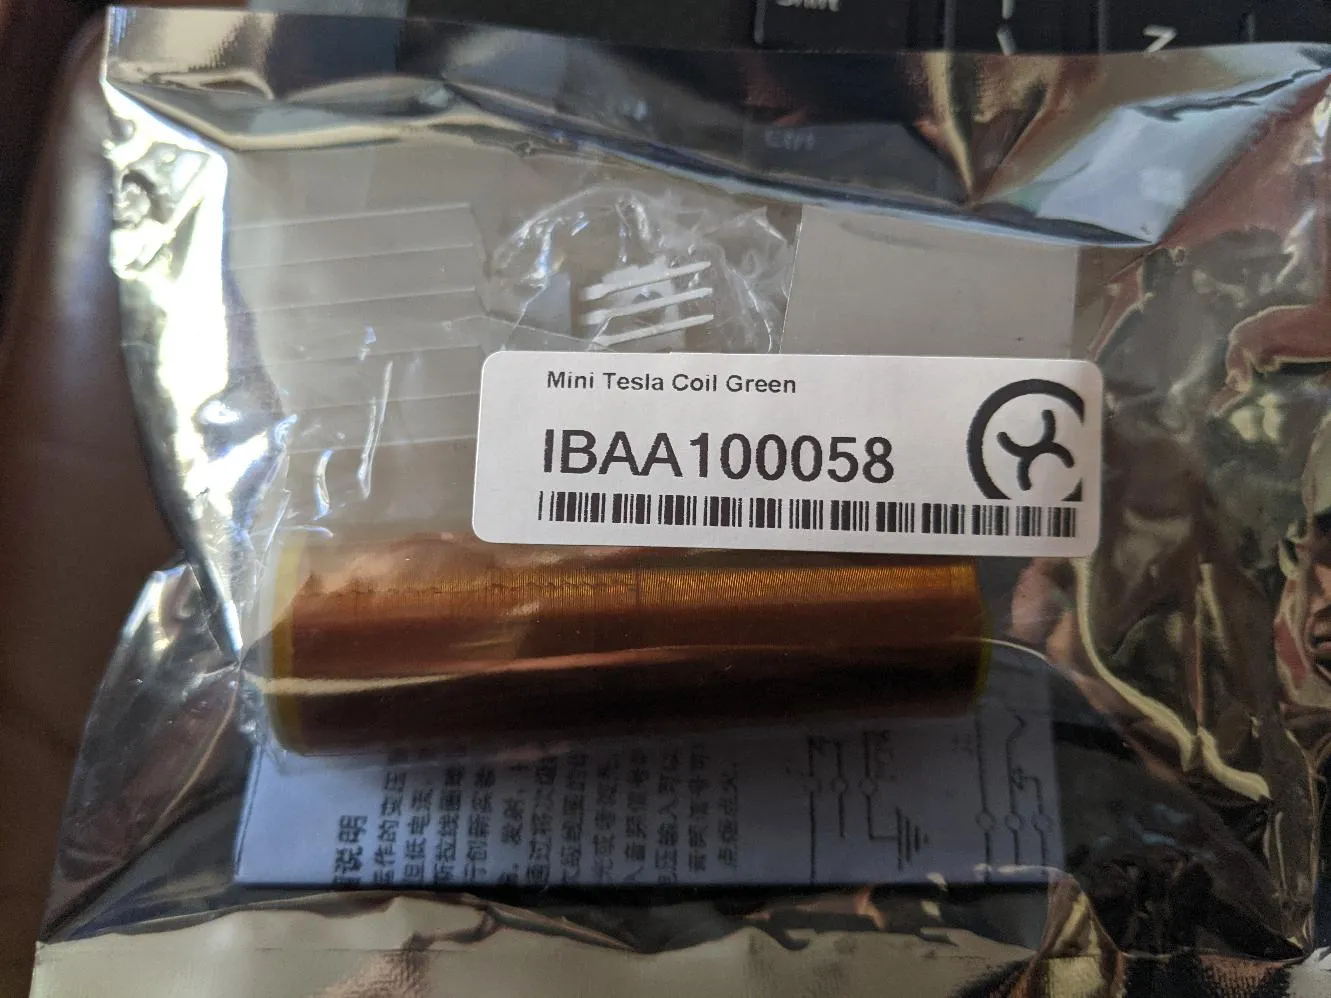
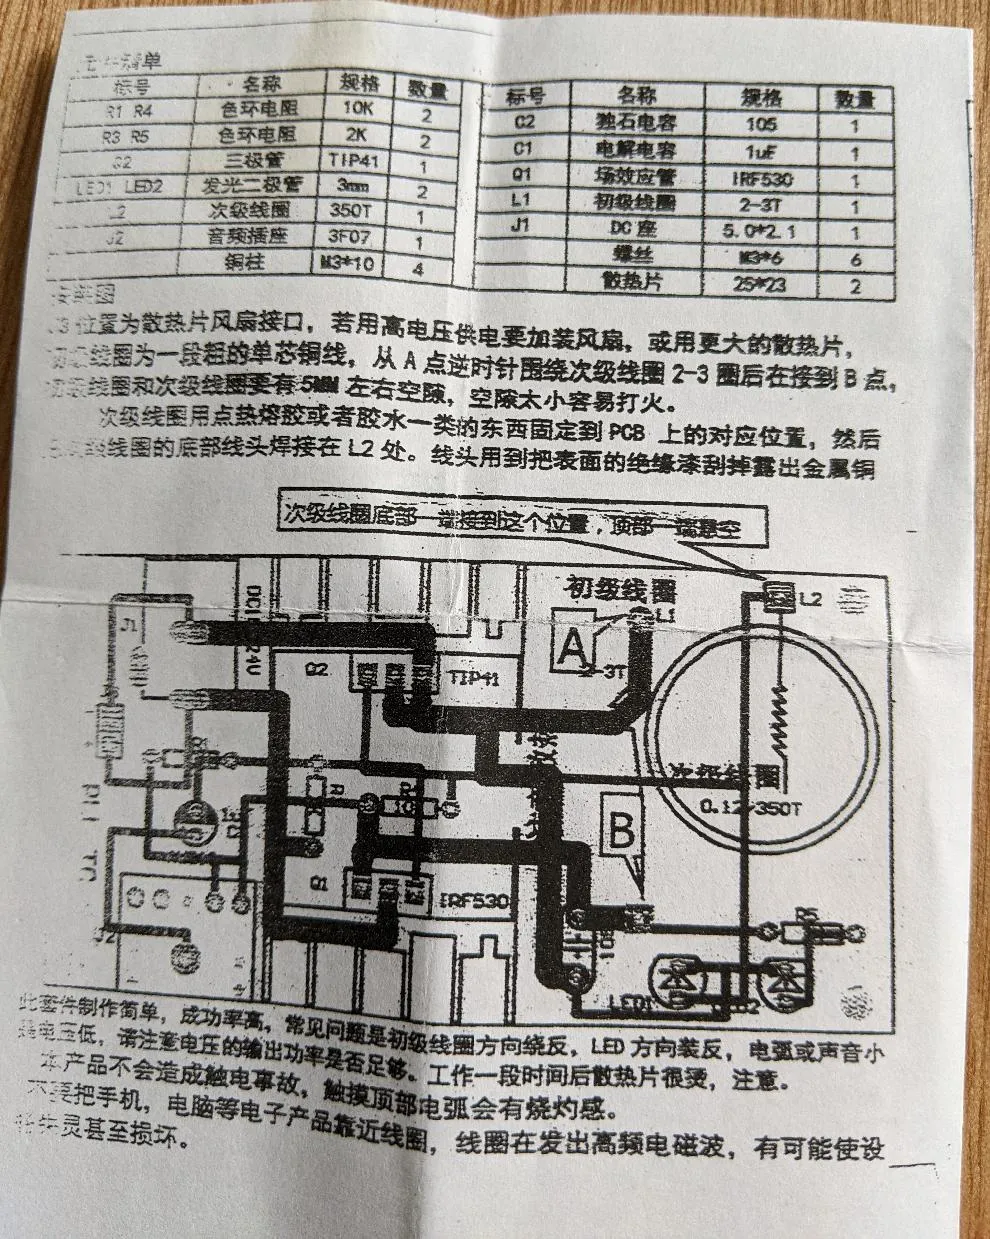
Opening it up revealed a surprisingly small component count, and an instruction leaflet:
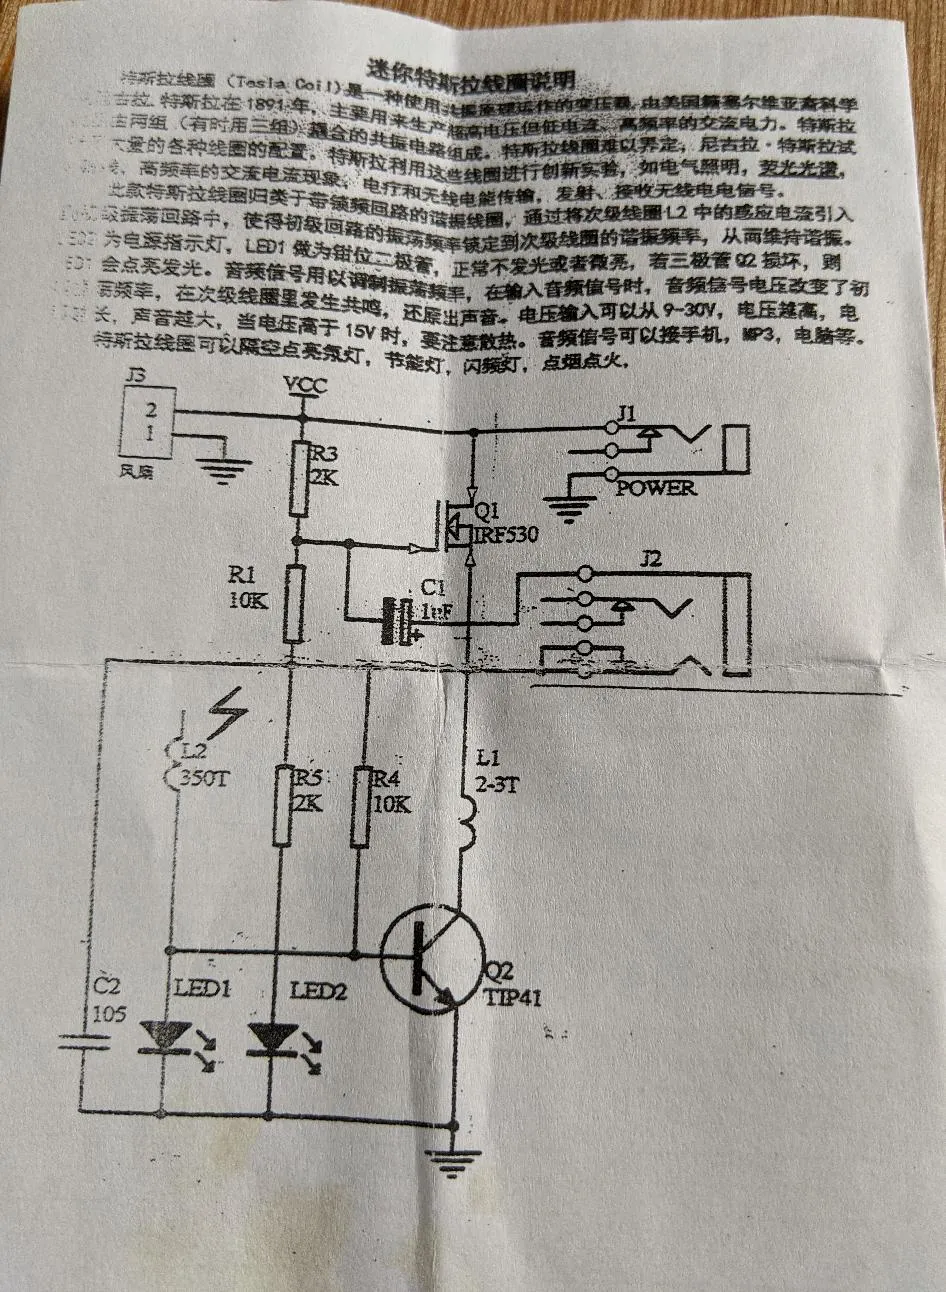
Initially, I made a joke about it being “clear and easy to follow”. But actually, it is really pretty good (though I think they could do with a better photocopier).
You’ve got a schematic, a board layout, and the silk screening on the PCB itself is clear. After running the text through Google Lens (along with some creative interpretation on my part), the first page has a wee bit of history and background of Tesla coils, while the second has a detailed set of instructions, as well as a troubleshooting guide for common errors (make sure you get the LEDs the right way round, the primary coil needs to be **anti-**clockwise etc).
So, a wee bit of simple soldering later, I had this:
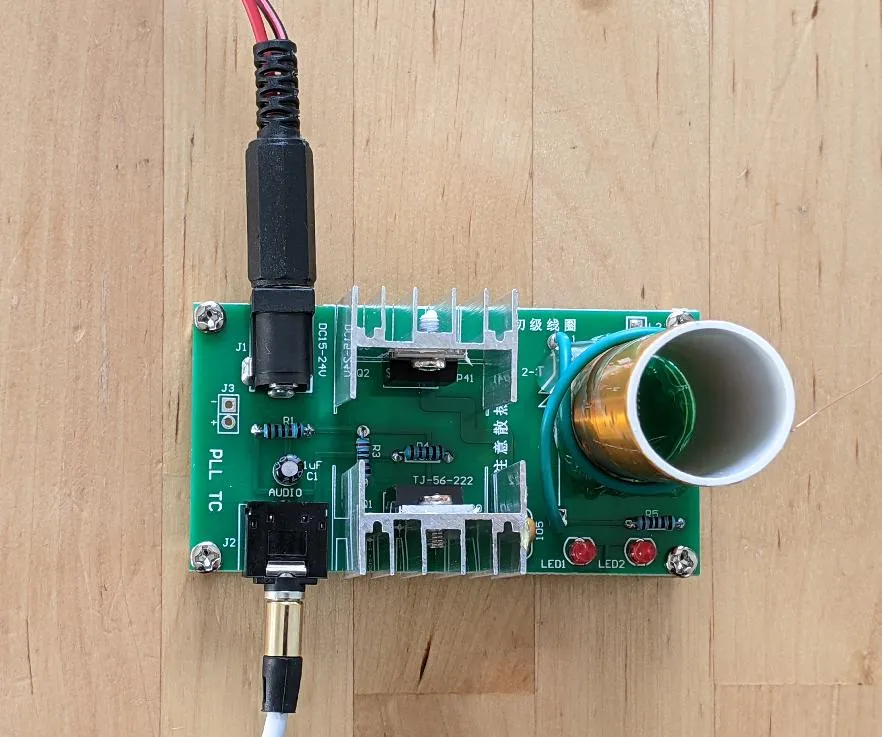
- The only thing I really added was some CPU heat transfer compound to the power transistor heatsinks (from my ever growing tech cupboard).
- At the top is the DC input from my bench power supply - I found about 14V worked well, though I see it says 15-24v on the PCB. The instructions do say if you use a higher voltage, you will need to add a fan (that’s what the unpopulated “J3” is for).
- Below is an analogue audio input to modulate the coronal discharge to make it reproduce audio.
- The primary coil is the green wire you can see coiled (anti-clockwise) round the secondary coil: the instructions said it should be 2-3 turns, but they only supplied enough solid core wire for a single turn. I might try using a longer piece of wire with more turns later, but it works OK with one for now.
- It says to hot glue the secondary coil onto the PCB and solder the bottom wire into “L2”. The other wire should hang free in midair: this is where the coronal discharge happens. According to the instructions, the secondary coil is 350 turns.
After tidying the table (removing all sensitive electronic equipment), taking a deep breath, I hit the power, and:
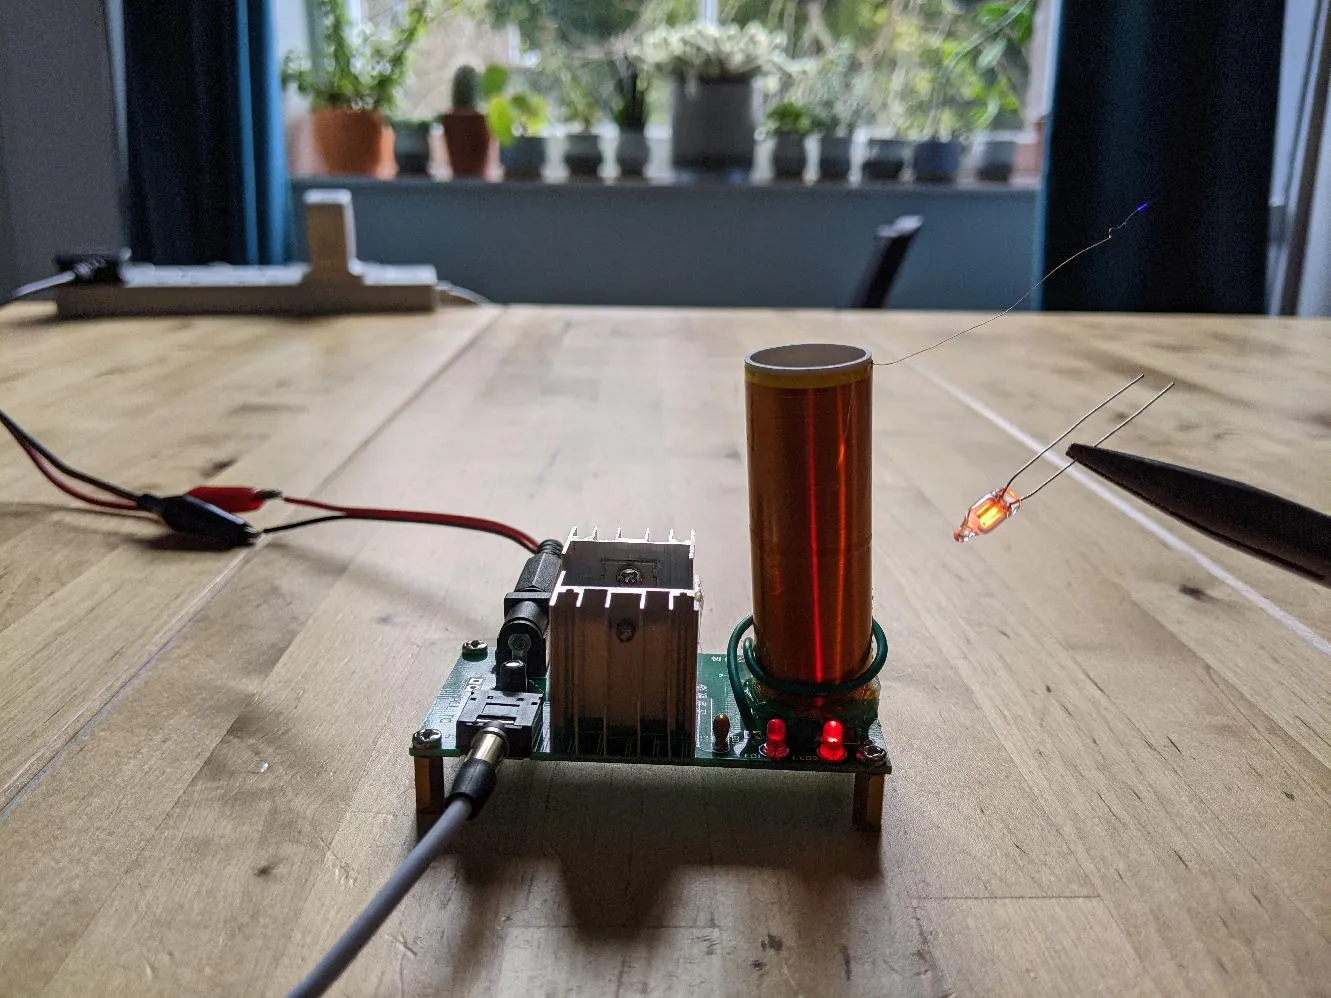
Yay, it works! The kit even came with a tiny wee lightbulb so you can see it lighting it at a (small) distance!
I took a closer look at the corona discharge:
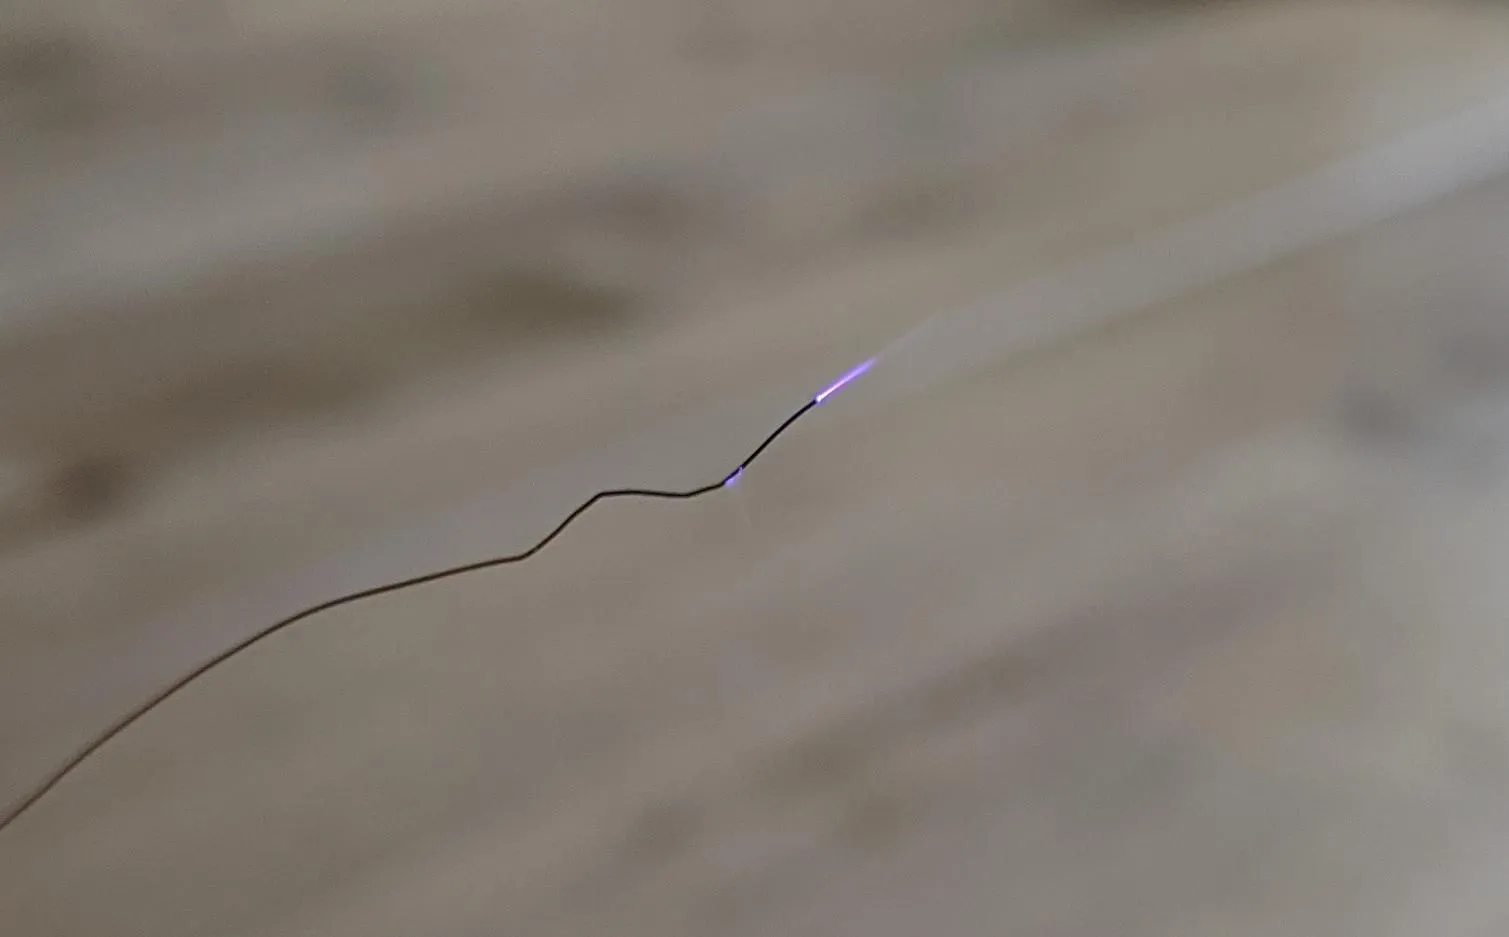
Its tiny, but pretty cool. And purple! It smells strongly of ozone pretty quickly.
Audio reproduction is surprisingly clear. A bit tinny and quiet, but you can clearly make out lyrics (I tested with Queen’s Bohemian Rhapsody :D ).
Leave a comment
Comments are moderated, so yours won't appear immediately. Your email is never published.