The first thing I tried with my new kiln was some glass fusing.
Tools
To cut glass I needed some new tools:
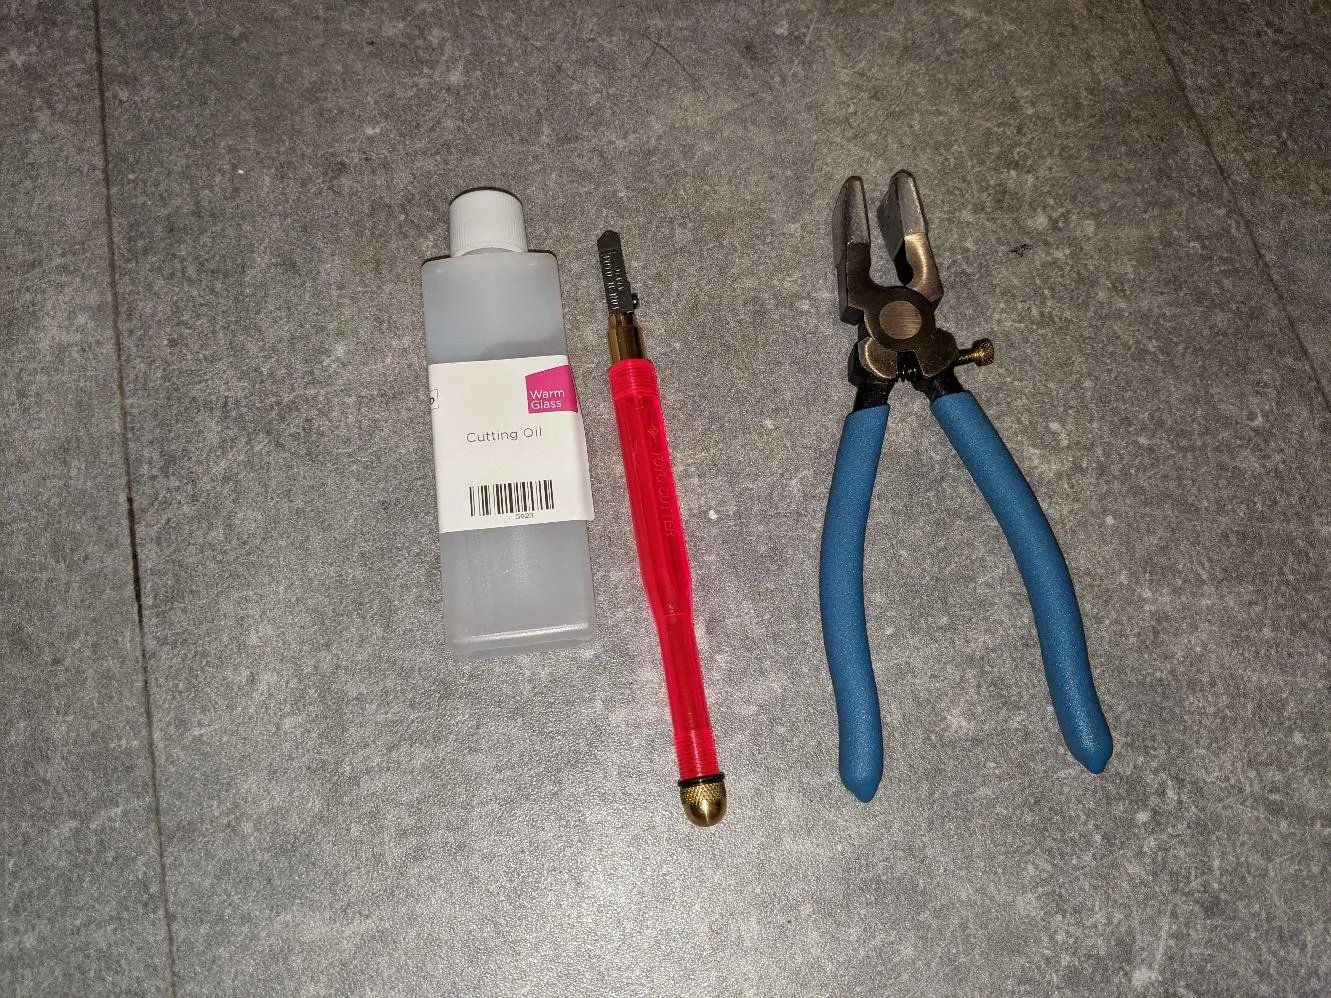
- Toyo Glass cutter and cutting oil (appears to be just a very low viscosity mineral oil).
- Metal running pliers.
Glass
I had bought a “student pack” of glass manufactured by Bullseye Glass Co. Since its all by the same manufacturer, it should work together fine mostly (do check the docs though).
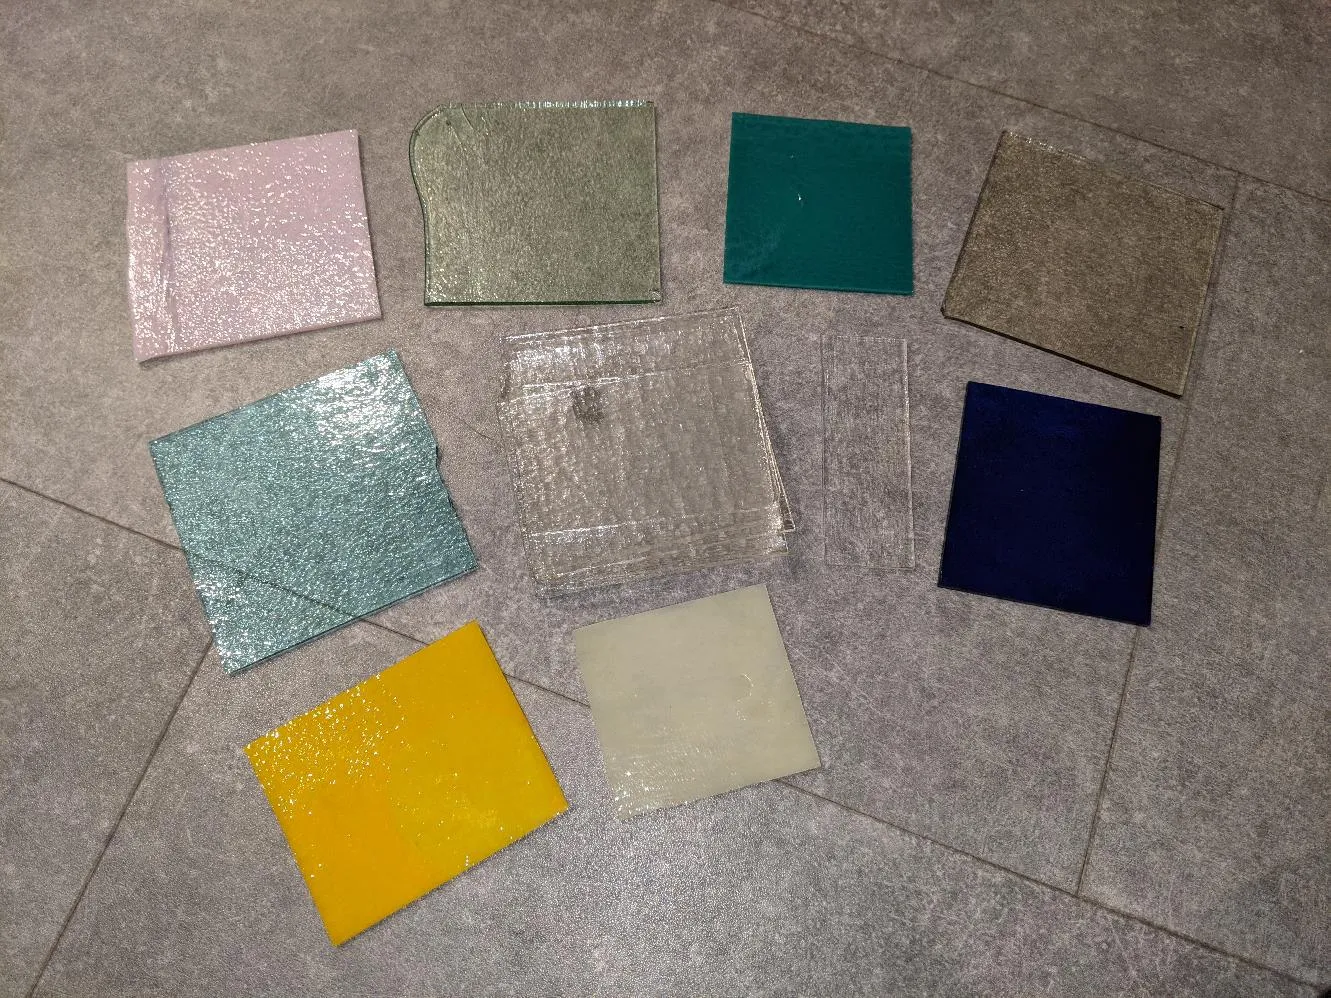
If you want to mix glass from different manufacturers, you need to ensure the Coefficient Of Expansion is similar or you’ll have problems when firing it (I imagine it’ll fracture in annoying ways). Bullseye use a COE of 90 on all their glass.
Preparation
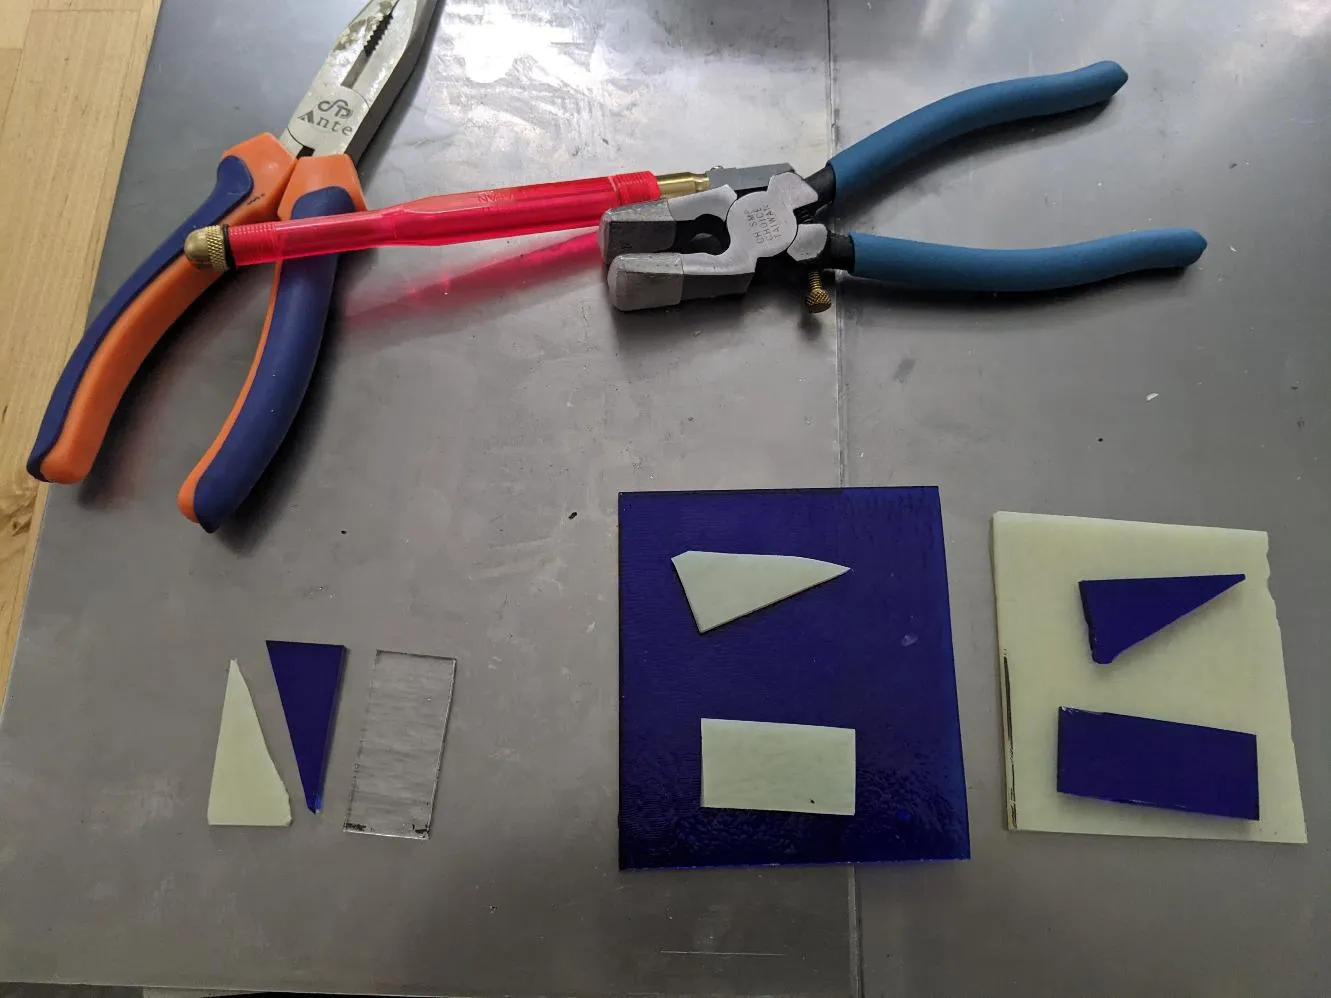
I wanted to make a small Cabuchon with a diagonal design, mainly to see how easy it was to cut glass (I’ve not really done that much before). As it turns out, its reasonably straightforward.
As expected, you score the glass with the cutter along a ruler, then use the running pliers across the scored line to cause it to break along it. I found it slightly tricky as my ruler kept slipping about; I managed a reasonable job in the end though I think:
I assembled the glass piece for firing as follows:
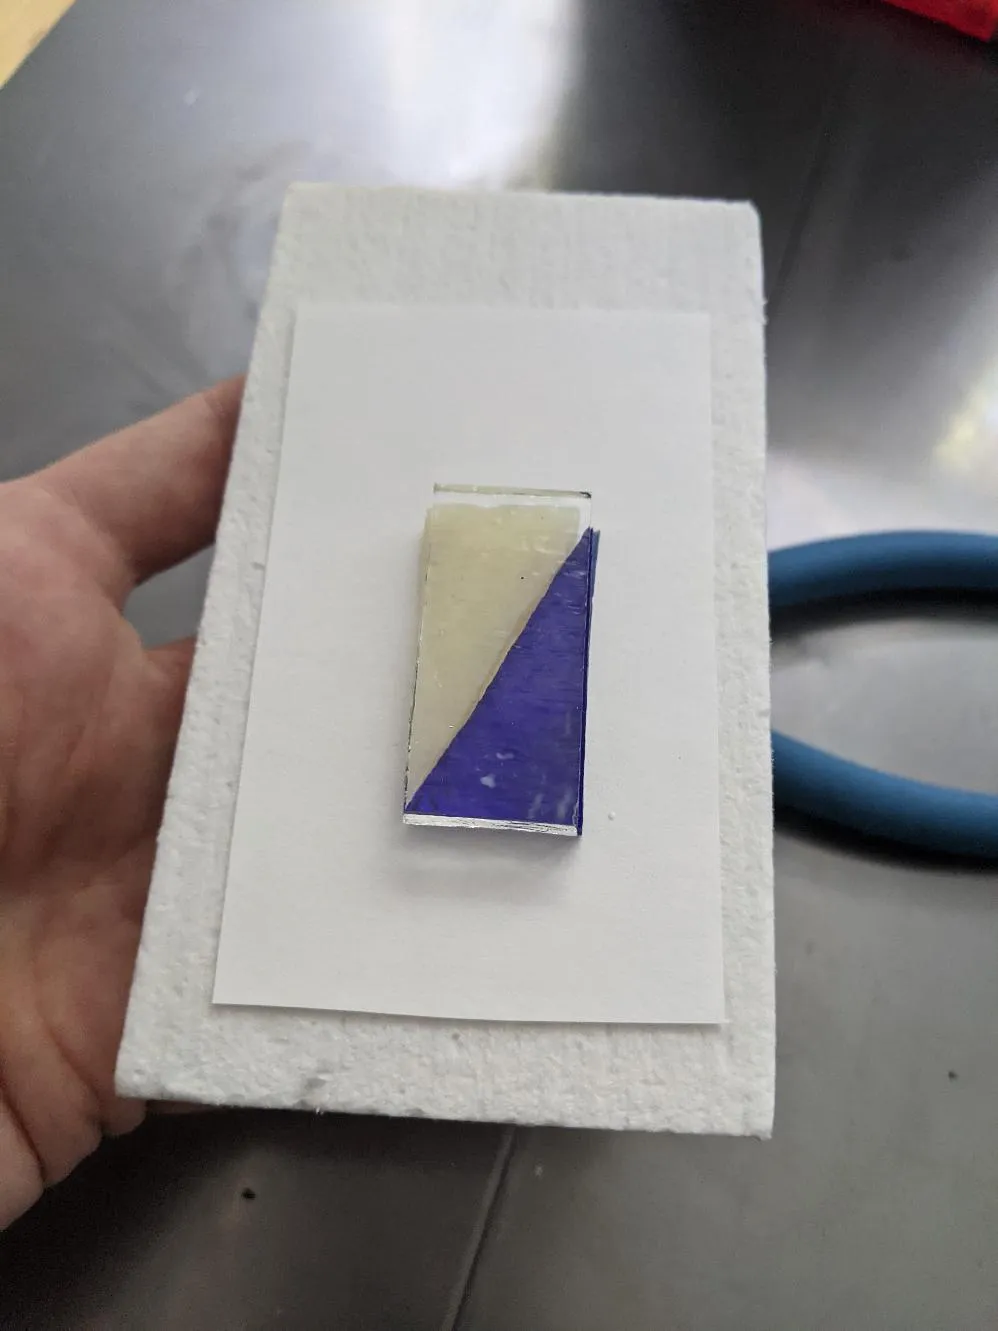
From top to bottom:
- I piece clear “Tekta” glass (Tekta is just Bullseye’s brand name for clear glass I think)
- 2 pieces blue/white glass cut diagonally.
- Sheet of Kiln Paper cut to size.
- Kiln Shelf
The clear glass on top will fuse with the coloured glass below into a nice smooth dome… hopefully!
Apparently the best/easiest results come from a total of 6mm height in your design: this design is made up of two 3mm layers, so should be good. You can make thicker pieces, but it increases the firing time.
I used a teeny bit of PVA glue at the edges to hold the glass together during loading: apparently this is what most people use as it burns off easily and is cheap. Don’t use too much though or it’ll leave black carbon stains behind.
Kiln Paper is how you get a smooth underside to the glass: its a disposable paper-like sheet made of a mineral substance. The alternative is to use “Kiln Wash” on your Kiln Shelf, which sounds like a total faff.
I used a Kiln Shelf because you’re supposed to with the Prometheus Kiln. I’ve not researched exactly why, but I suspect its to do with the fact the heating elements are embedded in the kiln base and walls: using a shelf will mean it is more evenly heated from all sides rather than being dominated by heat from below. It also protects the kiln floor if something leaks from your piece.
Firing Schedule
A firing schedule consists of one or more temperature stages. Each stage has three parameters:
- What temperature you want to reach in this stage?
- How fast you want to reach this temperature? (generally stated in degrees changed per hour)
- When reached, how long that temperature should be maintained for?
Fusing glass has five main stages:
- Heat to bubble squeeze - this stage removes most of the trapped bubbles from the glass (eg trapped between different layers).
- Heat to fusing temperature - this stage causes the glass to fuse together into a whole.
- Cool to annealing temperature. You need to anneal glass (maintain it at a temperature of ~482C for a while) so that any internal stresses will be equalised. Otherwise it will very likely spontaneously shatter when cooled.
- Cooling stage 2. Carefully cool the glass to ~371C. I need to research why this needs extra control as compared to stage 5.
- Cool to room temperature. Not as careful as cooling stage 2, but you still need to avoid sudden changes.
Depending on what you’re doing you may end up with multiple sub-stages (eg cooling stage 2 is sometimes done in two parts). However, I’m not doing anything fancy, so I just did the basic “Full Fuse” from here for now:
- Heat to 677C at 222C/hour and hold that temperature for 30 mins
- Heat to 804C at 333C/hour and hold that temperature for 10 mins
- Cool to 482C as fast as possible and hold that temperature for 60 mins
- Cool to 371C at 83C/hour and don’t hold that temperature.
- Disable any heating and just let it cool to room temperature with the kiln door closed. I left the kiln on, so I could monitor the temperature.
This took a fair few hours. I kept an eye on it throughout the day.
It was a bit stinky ~200C due to this being the first time the kiln and kiln shelf had been used: I opened the window wide, closed the door and left it to it. It went away after an hour or so; apparently it should not return.
Results
In the end, I was left with this:

I reckon its pretty neat for a first attempt! There are a few tiny bubbles present, but nothing horrendous.
I need to make sure to clean the glass properly before firing next time to prevent any embedded carbonised gunk. I only read this after I’d actually started firing: I got away with it this time though.
Next time?
I want to try embedding some metal in a clear glass sandwich: this will cause the glass to have colour where the metal was present (eg copper will cause blue glass). So I ordered a selection of metal powder samples from ebay to try out.
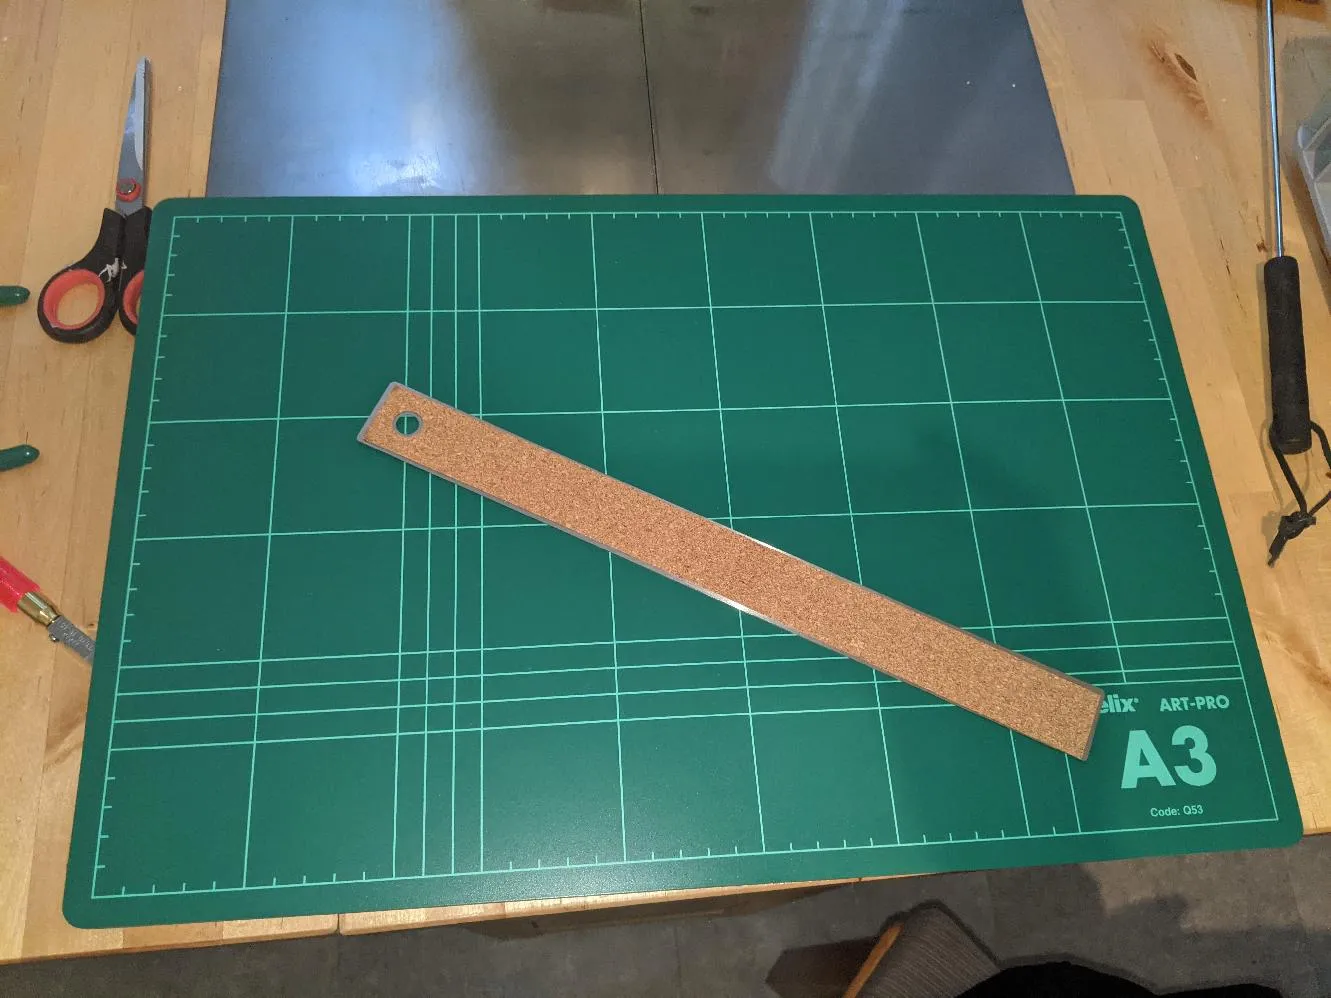
I also acquired a proper cutting board and cork-backed metal ruler so things don’t slip about any more!
1 Comment
Nicola ·
it looks very complicated to set up the heating stages.