
I recently received an Elegoo Saturn 2 resin 3d printer, so I thought I’d document my initial testing:
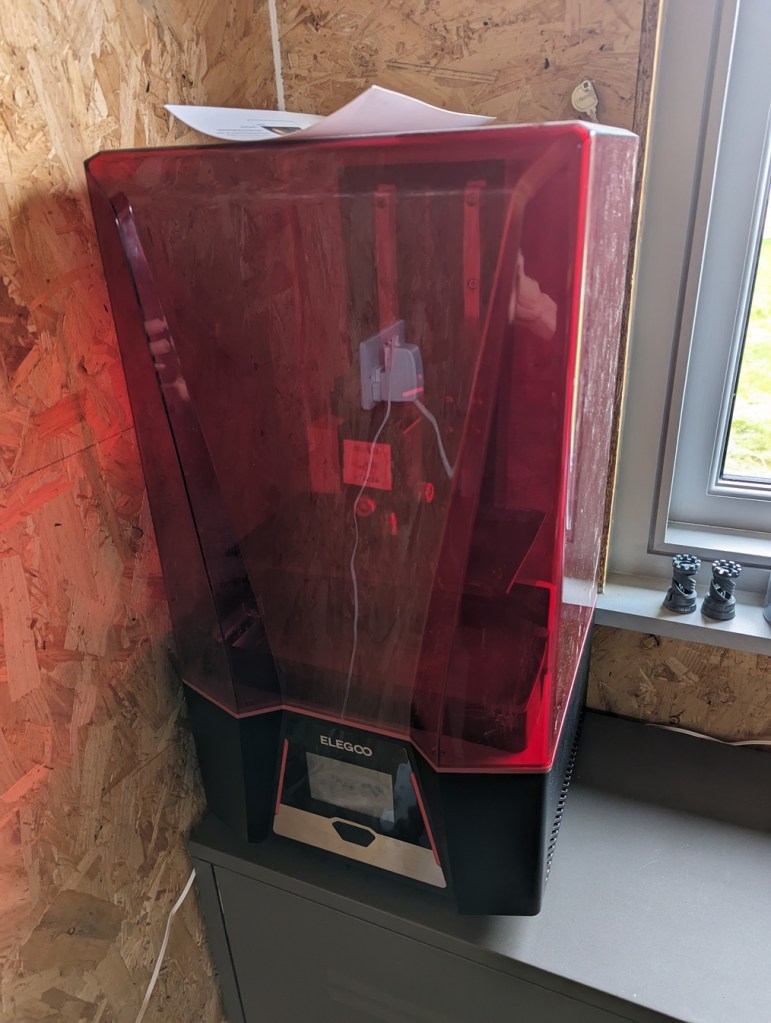
These printers print using a 2d array of UV leds which cure a liquid resin held in a tank where UV is shone. The more/smaller the LEDs, the higher the resolution of the print.
I’d assumed that resin printing surely couldn’t be as fiddly as filament based 3D printing; after all, you’re printing a whole plane at a time, so levelling won’t be such a pain!
As it turns out, it’s just differently fiddly: you have to deal with mildly toxic liquid resin sloshing all around the place now, woo!
Obviously I’ve been doing this in a well ventilated area, with goggles, rubber gloves and a breathing mask. The printer itself has an air filter which helps a bit too.
Resin
I bought a couple of bottles of the newer water washable resin rather than the isopropyl alcohol washable stuff, just to make things a little easier for this first attempt.
Software
This is a closed-source printer unfortunately, so you need to use the Elegoo software to create the printable files from your models.
However, some people have reverse engineered the (needlessly encrypted!) file format so you can explore the processed files with UVtools to try and diagnose issues.
Test Print
I decided to print the test files on the included USB stick to make sure everything was working. This resulted in this disappointment:

It turns out there was another sheet of protective film on the print bed I hadn’t removed. Retrying without that resulted in a successful print.
Wash+Curing
More faff: you need to wash your pieces after printing, to remove any excess resin that might be adhering to them.
Then you cure them under a UV light: I assume the printer solidifies the resin a bit, but it needs a bit more UV time to properly cure.
As I’d ordered the water washable resin, washing it was easy, though I made sure to filter the water afterwards to remove any plastic. (Obviously if you get the isopropyl alcohol washable resin, you need to wash it in that instead, which is ok, but I wanted to avoid having to deal with that the first time as well).
I already had a UV curing box that I’d built for exposing Cyanotype prints, so I just used that again, rotating the pieces a few times. This is Scotland, so just curing under the sun isn’t entirely reliable 😁
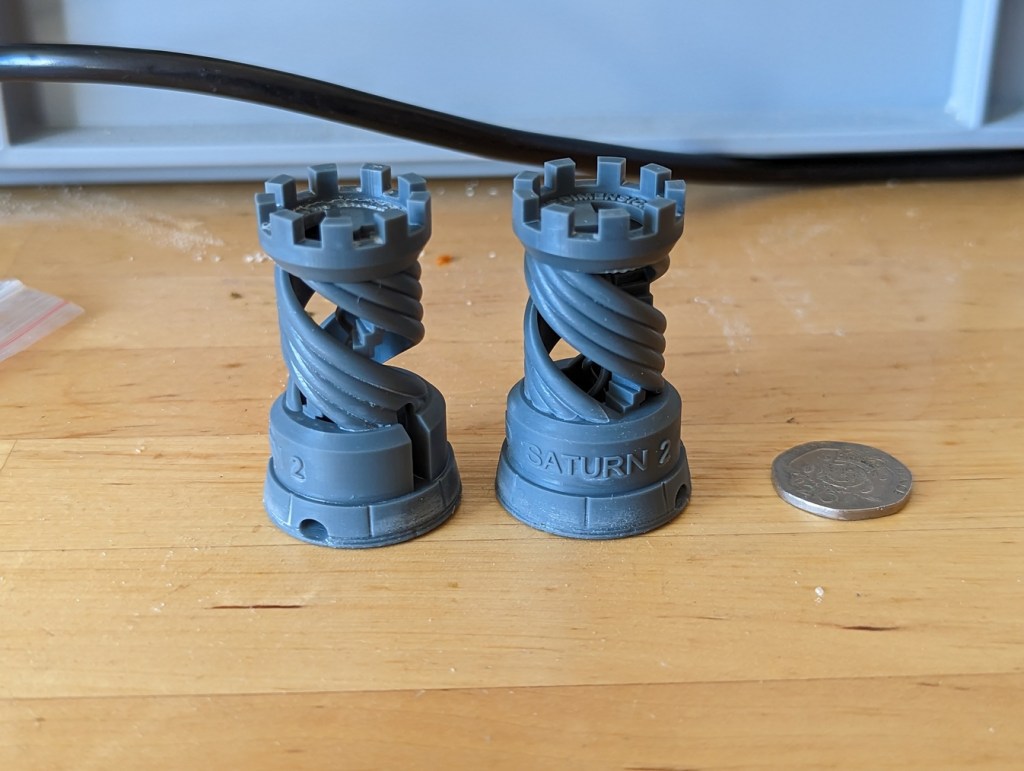
The result was this:
Cleanup
At this point I realised I had a tank of unused resin I needed to filter and put back into the bottle. This was extremely messy as I didn’t have the right equipment to hand: I didn’t even know what equipment I needed at the start.
Things I Hadn’t Realised Before
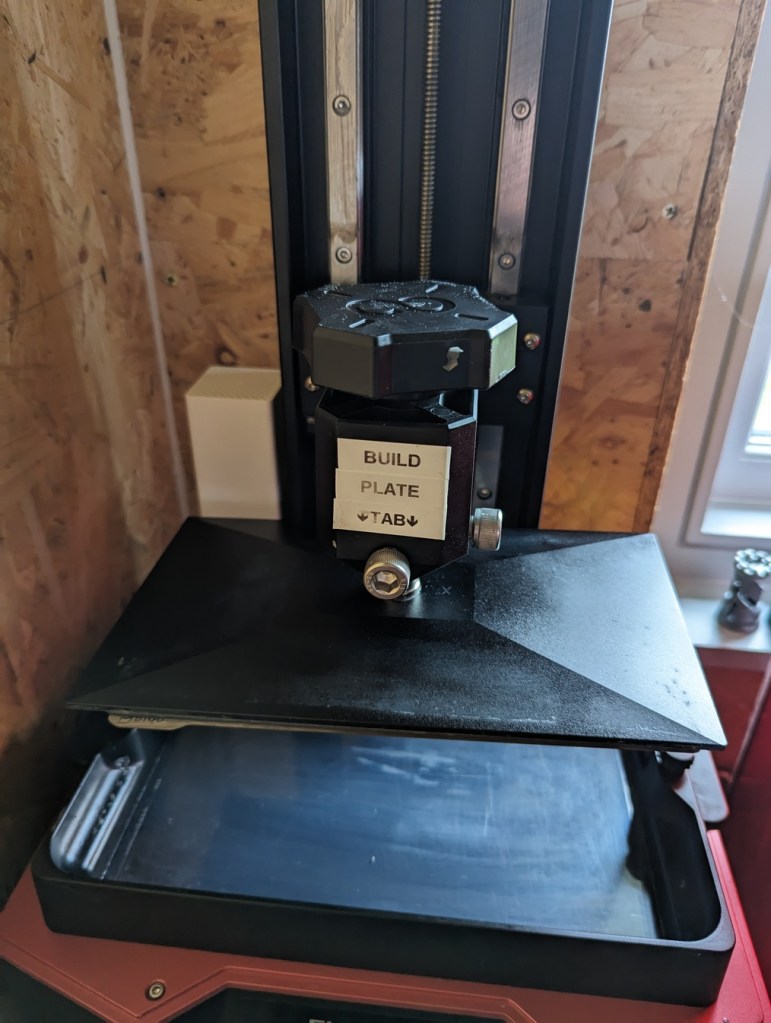
It prints the parts upside down ‘cos it dips the print bed down into the resin!
For every layer, it will print the design, then it will raise and lower the print bed into the resin to ensure resin properly circulates; this makes printing quite a slow process.
Improvements
Here’s what I did to improve the experience:
- Bought a silicone pet mat to work on to catch any resin drips.
- Figure out the order of operations for handing the resin and have everything to hand for each main stage of the process:
- Pouring the resin from the bottle to the printer’s tank.
- Returning unused resin from the tank to the bottle.
- You need to filter the resin when pouring it back into the bottle: some paper “paint filters” will do the trick in a funnel, for example.
- Plastic Funnel.
- A reasonably sized container to contain water (or isopropyl alcohol) for washing.
- A bucket to pour the used washing water into for disposal.
Upgrades
I had great difficulty removing the printed pieces from the print bed, so I ordered a magnetic base plate, similar to what I have on my filament printer. This makes removing pieces much easier!
- There’s a small tab on the build plate to help remove it after printing: you need to ensure it’s the correct way round in the tank or it may scrape the edge of it. On mine, it needs to be facing forwards.
- I have heard that the resin can eat away at the adhesive holding it on, but I’ve not had any problems yet: Something to keep an eye on.
Another useful process thing: when you’re cleaning out the tank for next time, it’s quite hard to get any remaining cured resin off the FEP film. I found I was having to gently scrape it, which decreases its lifetime.
However, the printer has a “clean tank” menu option: this will expose the entire tank to UV for a few seconds, curing a whole “sheet” of resin. You use this without the print head in the tank. Then you can just remove the sheet and it’ll take any stray bits off with it.
IMPORTANT: You need to gently hold a piece of spare solid plastic in the tank against the bottom before you “use clean” tank so you have a “tab” to pull to start extracting the sheet (I didn’t realise this so it was an absolute nightmare to remove the first time). You can buy these, but I found the test chess pieces I’d already printed work perfectly!
Finally, I found this project, which is looking a bit dead, but could be interesting. I’ve hooked a Raspberry Pi Zero up to the printer’s serial ports so I can play with controlling it easily. (That’s a wee buck convertor for 12v->5v in the plastic case there).

Future Impending Faff!
There’s one more piece of faffery: the tank itself:
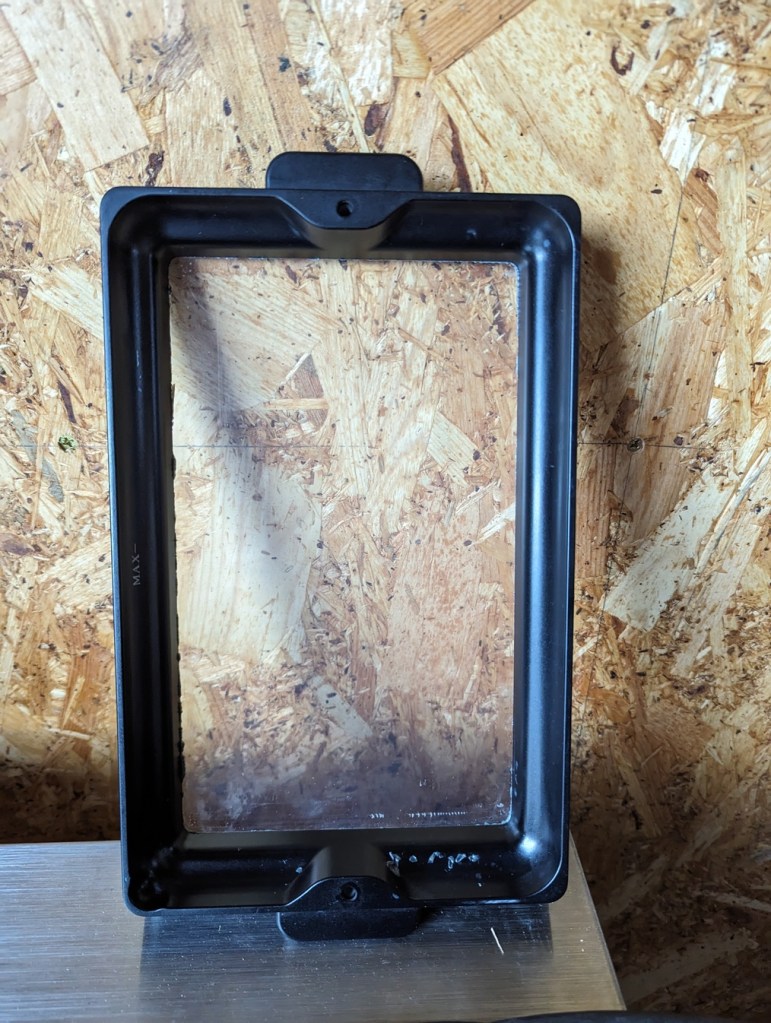
At the bottom of the tank is a thin sheet of “FEP” film; the idea is the UV shines through it, but the film keeps the resin in the tank. And that film will wear out over time, depending on how much you use it, and clean it. The film will need to be replaced eventually, and needs to be carefully inspected to make sure it doesn’t leak resin all over the place or become too opaque to properly transmit the light.
I suspect I’ll have to do this sooner than later as I likely damaged the FEP film more than usual in my initial fumbling.
